We're kicking off a new Designer Challenge on the Elizabeth Craft Designs Blog today. For January it's all about Valentine's Day. With this month's challenge in mind, I set out to create a cute Valentine's Day Card that you could give to that special someone in your life. You'll want to make sure to read below as I have a tutorial for you so that you can re-create my Love You Card at home. Read all the way down to the bottom of the post as I have some information on how to get in on a fabulous giveaway from Elizabeth Craft Designs.
To start, die cut two of the hearts from the True Love Die out of White Soft Finish Cardstock. Blend Candied Apple Distress Ink using a blending tool with foam over the entire surface of each heart. Apply VersaMark Ink to the xoxoxo stamp and stamp onto the hearts, making sure the hearts are covered with xoxoxo's. Ink the edges of the hearts using Black Soot Distress Ink and a blending tool with foam.
From the Words 2 - Thinking of You die set, die cut the Love You out of White Soft Finish Cardstock.
Die cut the Arrow from the Love Struck Die out of White Soft Finish Cardstock.
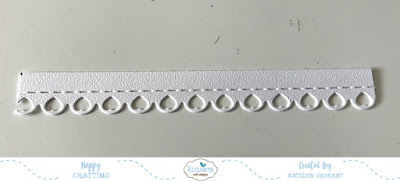
From the Valentine's Edges, die cut the scalloped heart border out of White Soft Finish Cardstock. Cut the border down to 4 3/4".
Die cut the 3 1/4" Dotted Scallop Circle out of White Soft Finish Cardstock. Ink the edges of the scalloped circle using Black Soot Distress Ink and a blending tool with foam.
Die cut the Heart Cutouts three times on three different patterned paper pieces from ModaScrap's Simply Love Patterned Paper Pack. Die cut the outline of the heart out of White Soft Finish Cardstock. Choose which patterned paper you want to use as your heart that you've die cut the small hearts from. Place the heart outline around the heart cutouts to create your patterned paper heart. Ink the edges of the two hearts using Black Soot Distress Ink and a blending tool with foam.
From ModaScrap's Simply Love Patterned Paper Pack, choose two patterned papers. Cut one of the papers down to 4 3/4" x 4 1/4". Cut the other patterned paper to 4 3/8" x 3 7/8". Cut a piece of White Soft Finish Cardstock that measures 4 1/2" x 4". Distress the edges of each paper and ink the edges using Black Soot Distress Ink and a blending tool with foam.
Adhere the White Soft Finish Cardstock to the 4 3/4" patterned paper piece. Adhere the 4 3/8" piece of patterned paper to the White Soft Finish Cardstock. Adhere the scalloped heart border to the bottom of the 4 3/4" patterned paper piece.
Adhere the heart cut out to the white soft finish cardstock heart. From the hearts that you die cut out of the patterned paper, adhere them randomly to the hearts on the heart cut out. You'll want to leave some of the hearts just showing the white soft finish cardstock.
Adhere the dotted scallop circle to the middle of the patterned paper. Foam square the heart to the middle of the dotted scallop circle.
Adhere the arrow, two hearts and the Love You sentiment on the bottom right hand side of the large heart. Take a Zig Marker and create stitch marks around the 4 3/8" piece of patterned paper.
To finish off your card, adhere the card front to a piece of White Soft Finish Cardstock that measures 5" x 9 1/2", score at 4 3/4"
Here are a few close up photos of the Love You Card.
Here's the finished Love You Card.
****************
For today's challenge Elizabeth Craft Designs are giving away a $20 Gift Card to use on our website to 3 winners.
To enter simply leave a comment on the Elizabeth Craft Designs Challenge post and tell us "What Elizabeth Craft Designs dies or stamp sets would you use to create a Valentine’s Card??”
We will select 3 lucky winners in a random drawing
The winners will be announced on Friday, February 1st on the Elizabeth Craft Designs blog.
****************
Elizabeth Craft Designs Products Used:
- Beacon - Kids Choice Glue
- ModaScrap: Simply Love Patterned Paper Pack
Other Products Used:
- Tim Holtz for Ranger Ink: Distress Ink - Black Soot, Candied Apple, Festive Berries, Blending Tool & Foam
- Kuretake: Zig Marker - 03
- Imagine Crafts: VersaMark Ink Pad
- Katelyn


No comments:
Post a Comment