Showing posts with label Becky. Show all posts

Tuesday, May 15, 2018

All That Glitters Designer Challenge

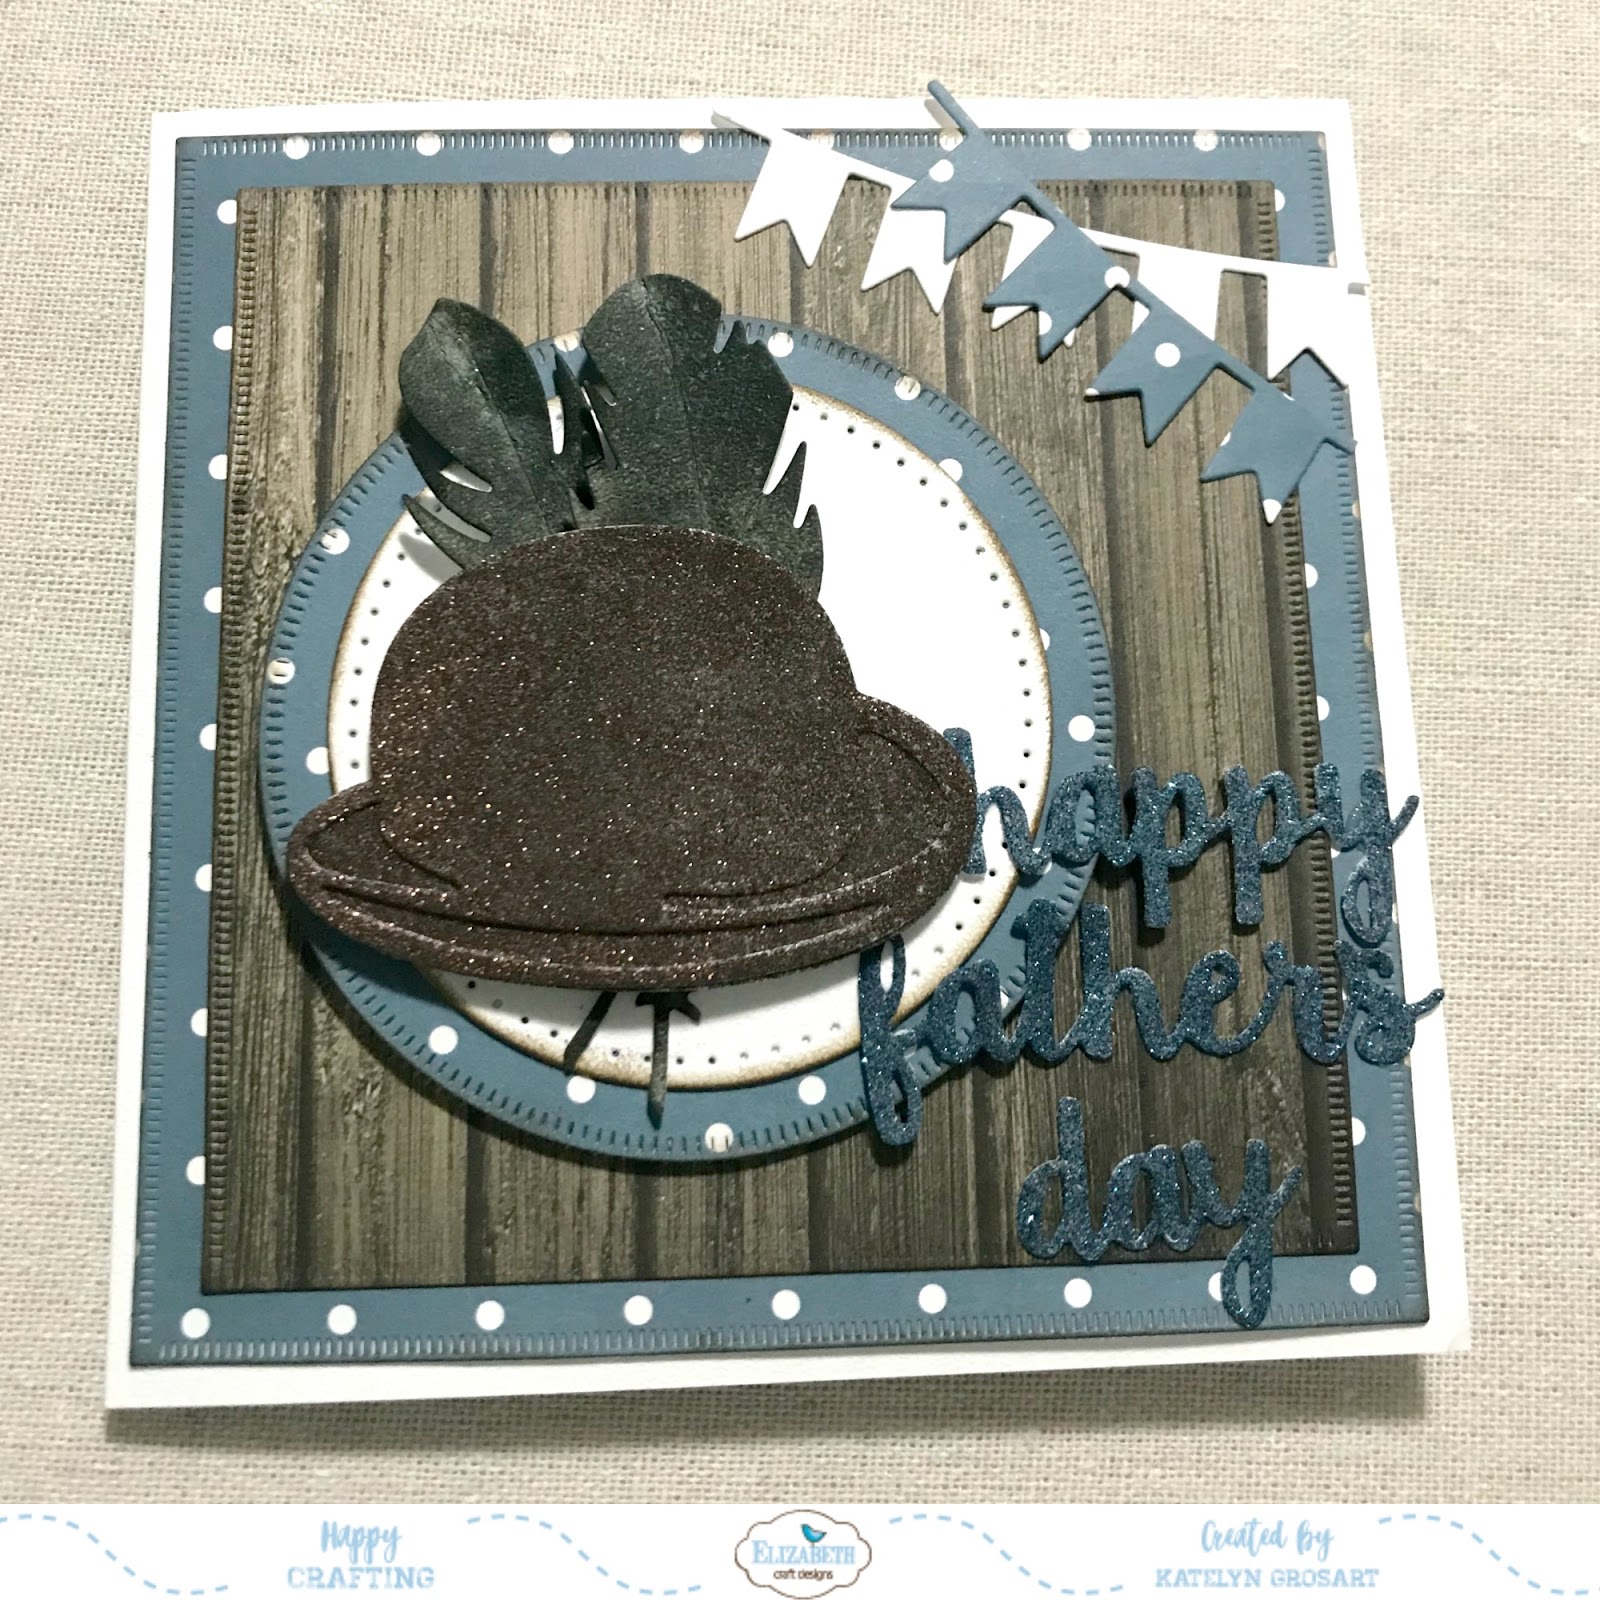
It's time for a new Designer Challenge on the Elizabeth Craft Designs Blog today.  For May's challenge it's all about using Silk Microfine Glitter. The inspiration for my project came from Becky's Vintage Gentleman die and the Silk Microfine Glitter from the Beach Set. With the Vintage Gentleman die in hand, I set out to create this masculine Happy Father's Day Card. Make sure to read below as I have a tutorial for you so that you can re-create my Happy Father's Day Card at home. Make sure to read all the way down to the bottom of the post as there's some information on how to get in on the fabulous giveaway from Elizabeth Craft Designs.


To start, you'll need the Dashing Squares. Die cut the 4 3/4" dashing square out of Navy Blue Polka Dot paper from the Thinking about...Polinesia paper. Die cut the 4 1/4" dashing square out of a piece of wood paper from the Wood Effects paper pack. Ink the edges of the squares using a blending tool with Ground Espresso Distress Ink.


From the Dashing Circles die, die cut the 3 1/4" circle out of Navy Blue Polka Dot paper from the Thinking about...Polinesia paper. From the Stitched Circles die, die cut the 2 3/4" circle out of White Soft Finish Cardstock. Using a blending tool with foam and Ground Espresso Distress Ink, ink the edges of the circles. 


Take the banners from the Celebration Flags die, die cut the banner out of Navy Blue Polka Dot paper from the Thinking about...Polinesia paper. Trim the banner down to four pennants. Die cut the banner a second time out of White Soft Finish Cardstock. Trim the banner down to five pennants.


From the Feathers die, die cut two feathers out of White Soft Finish Cardstock. Using a blending tool with foam, blend Black Soot Distress Oxide Ink over each feather. Spritz the feathers with water. Set the feathers aside to dry.


Cut a piece of White Soft Finish Cardstock that measures 5 1/2" x 8 1/2". Cut a piece of Clear Double Sided Adhesive Sheet that measures 5 1/2" x 8 1/2". Peel off the back off of the adhesive sheet and adhere it to the piece of white Soft Finish Cardstock. From the Words 3 - Happy Holidays, take the "happy", "fathers" and "day" words and place them onto the White Soft Finish Cardstock that has the adhesive on it. Run through your die cutting machine. Peel off the paper from the adhesive sheet on each word. Cover the words with one of the Blue Silk Microfine Glitter from the Beach Set. Once the words are covered with glitter, varnish the glitter with your finger. 


From the same piece of White Soft Finish Cardstock that has adhesive on it and place the hat pieces from the Vintage Gentleman dies on it. Run through your die cutting machine. Peel off the paper from the adhesive sheet on each hat piece. Cover the hat pieces with Chocolate Silk Microfine Glitter. Once the hat pieces are covered with glitter, varnish the glitter with your finger. 


Now it's time to assemble your card.

Adhere the 4 1/4" wood square piece to the 4 3/4" Navy Blue Polka Dot square. Adhere the White Soft Finish Cardstock circle to the Navy Blue Polka Dot circle. Foam square the navy blue polka dot circle 1/2" from the right and 3/4" from the bottom of the Navy Blue Polka Dot square.  


Adhere the feathers to the circle. Foam square the hat overtop of the feathers.


Adhere the "happy", "fathers" and "day" words to the right of the hat. Adhere the two banners in the top right corner of the card front.


Cut a cardbase from White Soft Finish Cardstock that measures 5" x 5", score at 5". Adhere the cardfront to the cardbase. 


Here are a few close up photos of the Happy Fathers Day Card.


And here's the finished Happy Fathers Day Card.

*******************

For today's challenge Elizabeth Craft Designs are giving away a $20 Gift Card to use on our website to 3 winners. 

To enter simply leave a comment on the Elizabeth Craft Designs Facebook Giveaway Blog Post or the Elizabeth Craft Designs Challenge post and tell us Which of the new Silk Microfine Glitter Palettes is your favourite, Earth, Beach or Bloom?

We will select 3 lucky winners in a random drawing 

The winners will be announced on Friday, May.18th on the Elizabeth Craft Designs Blog and our Facebook page.


*****************

Elizabeth Craft Designs Products Used:

- Silk Microfine Glitter: Chocolate & Beach Set

Other Products Used:

- Tim Holtz for Ranger Ink: Distress Ink - Ground Espresso, Distress Oxide Ink - Black Soot & Blending Tool & Foam
- Misc: Spritzer

- Katelyn


Tuesday, April 17, 2018

Scissor Spring Mechanism Designer Challenge

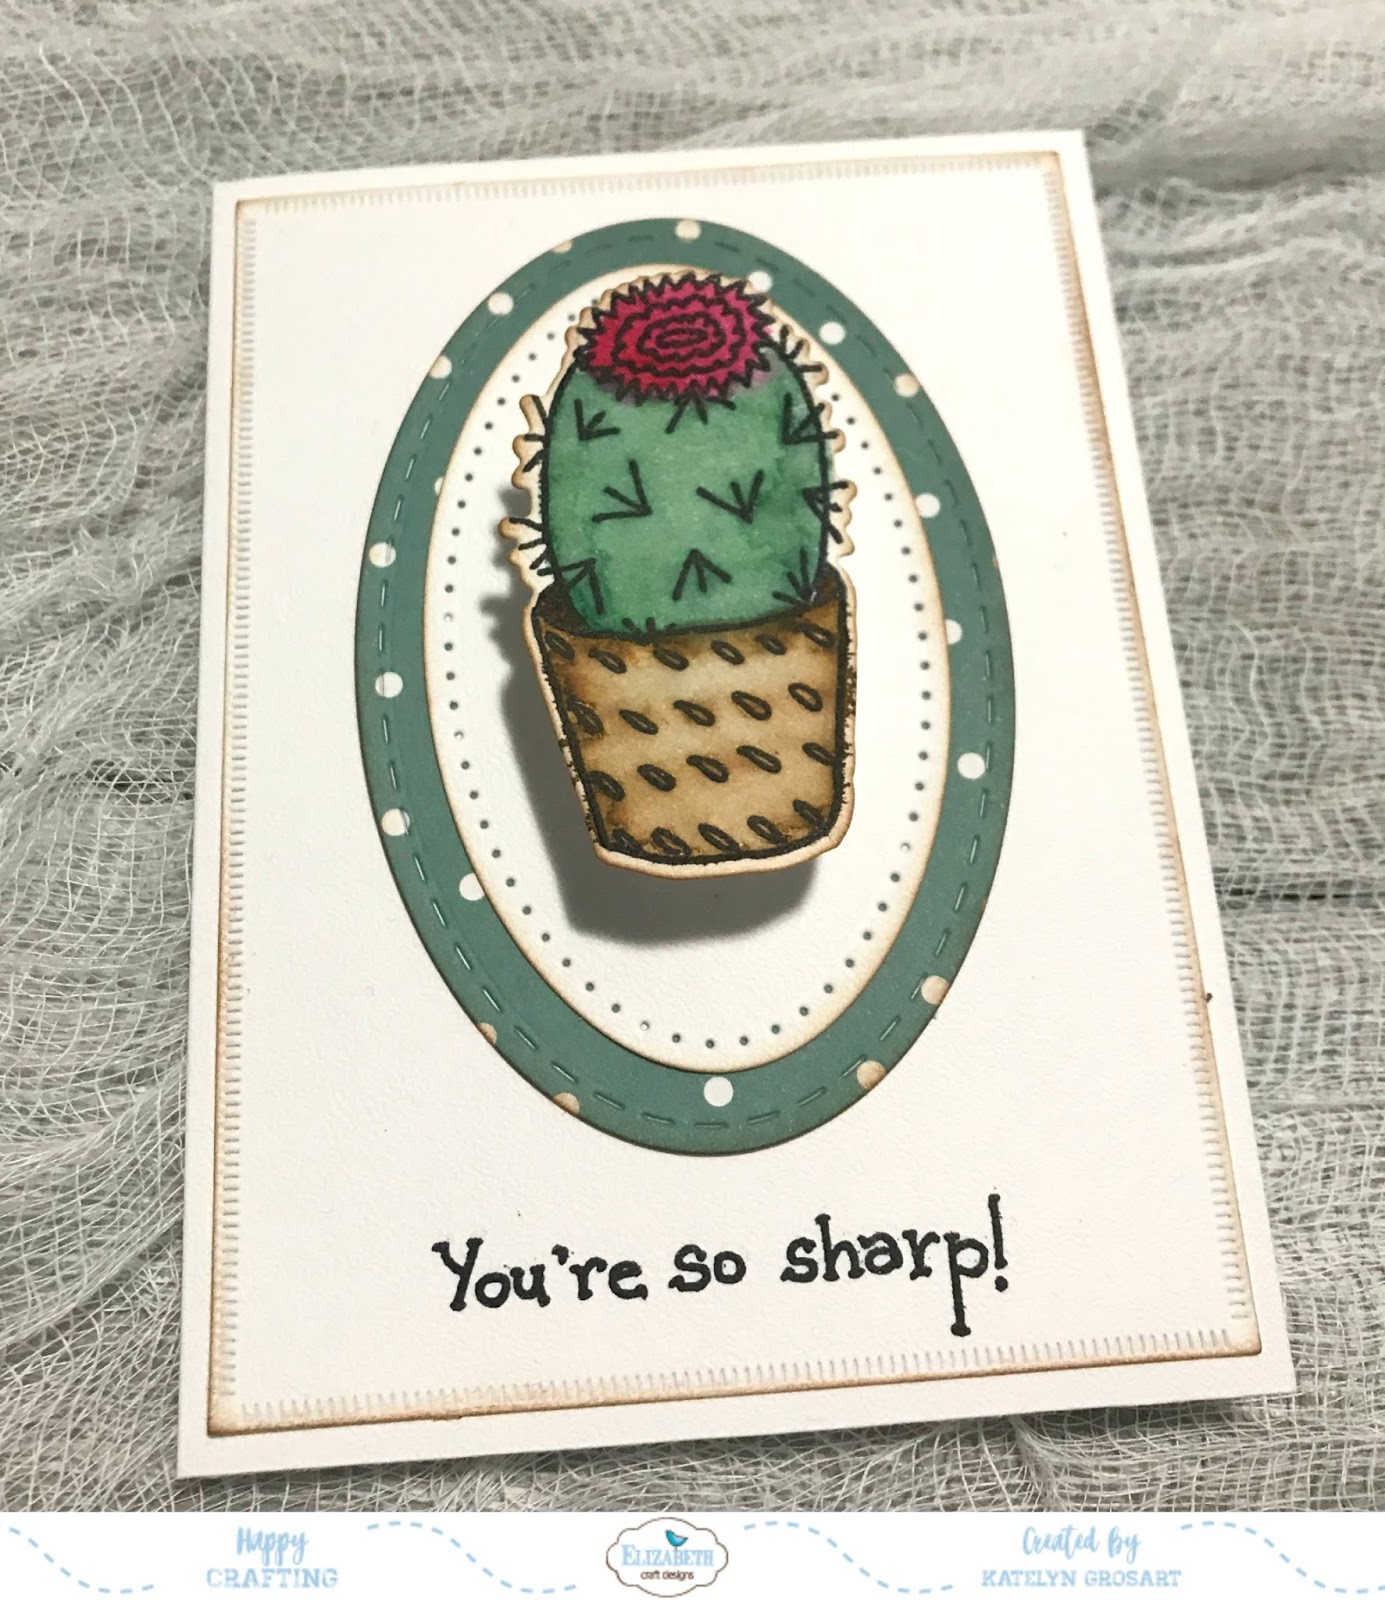
It's time for a new Designer Challenge on the Elizabeth Craft Designs Blog today.  For April's challenge it's all about using the Scissor Spring Mechanisms Die by Becky Seddon. The inspiration for my project was Krista Schneider's Cacti stamp. With the cacti stamp in hand, I set out to create this clean and simple You're so Sharp! Notecard. Make sure to read below as I have a tutorial for you so that you can re-create my You're so Sharp! Notecard at home. Make sure to read all the way down to the bottom of the post as there's some information on how to get in on the fabulous giveaway from Elizabeth Craft Designs.


To start, die cut the small Scissor Spring Mechanism out of White Soft Finish Cardstock. To assemble the scissor spring, slide the two pieces together where the slits are, this will create two diamonds. Cut one of the diamonds off. Fold the top and bottoms so that they face out.


Apply Jet Black Archival Ink to the Cacti stamp and stamp onto a piece of White Soft Finish Cardstock. Place the co-ordinating die overtop of the cacti and run it through your die cutting machine. Watercolour the plant pot using Tombow Markers number 969 and 977. To watercolour the cacti use Tombow Marker number 249. For water colouring the top of the cacti, use Tombow Marker number 847. Ink the edges of the cacti using Vintage Photo Distress Ink and a blending tool with foam.


From the Dashing Rectangles die, die cut the 3 1/2" dashing rectangle out of White Soft Finish Cardstock. Ink the edges of the rectangle using Vintage Photo Distress Ink and a blending tool with foam. Apply Jet Black Archival Ink to the "You're so Sharp!" stamp and stamp at the bottom of the rectangle.


From the Stitched Ovals die, die cut the 2 1/2" stitched oval out of green patterned paper from the Thinking About...Rio De Janeiro Paper Pack. Ink the edges of the stitched oval using Vintage Photo Distress Ink and a blending tool with foam.  


With the Stitched Ovals dies still out, die cut the 2" stitched oval out of White Soft Finish Cardstock. Ink the edges of the stitched oval using Vintage Photo Distress Ink and a blending tool with foam.  


Adhere the 2" White Soft Finish Stitched Oval to the 2 1/2" Patterned Paper Stitched Oval. Adhere the 2 1/2" patterned paper stitched oval to the middle of the cardfront.


Adhere the scissor spring mechanism to the back of the cacti image. Adhere the scissor spring mechanism to the middle of the 2" stitched oval.


To finish your notecard, cut a piece of White Soft Finish Cardstock that measures 5" x 7 1/2", score at 3 3/4". Adhere your cardfront to the cardbase.


Here are a few close up photos of the You're so Sharp! Notecard. 


*******************

For today's challenge Elizabeth Craft Designs are giving away a $20 Gift Card to use on our website to 3 winners. 

To enter simply leave a comment on the Elizabeth Craft Designs Facebook Giveaway Blog Post or the Elizabeth Craft Designs Challenge post and tell us What Elizabeth Craft Designs dies or stamp sets would you use with the Scissor Spring Mechanism die set to create a card, scrapbook layout of home decor item?

We will select 3 lucky winners in a random drawing 

The winners will be announced on Friday, April 20th on the Elizabeth Craft Designs Blog and our Facebook page.


*****************

Elizabeth Craft Designs Products Used:


Other Products Used:

- Tim Holtz for Ranger Ink: Distress Ink - Vintage Photo & Blending Tool & Foam
- Ranger Ink: Jet Black Archival Ink
- Tombow Markers: 969, 977, 249 & 847

- Katelyn

Tuesday, January 30, 2018

You Fill My Heart - Designer Challenge

We're kicking off a new Designer Challenge on the Elizabeth Craft Designs Blog today.  For January it's all about Valentine's Day. With this month's challenge in mind, I set out to create a cute Valentine's Day Card that you could give to that special someone in your life. You'll want to make sure to read below as I have a tutorial for you so that you can re-create my Love You Card at home. Read all the way down to the bottom of the post as I have some information on how to get in on a fabulous giveaway from Elizabeth Craft Designs.


To start, die cut two of the hearts from the True Love Die out of White Soft Finish Cardstock. Blend Candied Apple Distress Ink using a blending tool with foam over the entire surface of each heart. Apply VersaMark Ink to the xoxoxo stamp and stamp onto the hearts, making sure the hearts are covered with xoxoxo's. Ink the edges of the hearts using Black Soot Distress Ink and a blending tool with foam.


From the Words 2 - Thinking of You die set, die cut the Love You out of White Soft Finish Cardstock.


Die cut the Arrow from the Love Struck Die out of White Soft Finish Cardstock.


From the Valentine's Edges, die cut the scalloped heart border out of White Soft Finish Cardstock. Cut the border down to 4 3/4".


Die cut the 3 1/4" Dotted Scallop Circle out of White Soft Finish Cardstock. Ink the edges of the scalloped circle using Black Soot Distress Ink and a blending tool with foam.


Die cut the Heart Cutouts three times on three different patterned paper pieces from ModaScrap's Simply Love Patterned Paper Pack. Die cut the outline of the heart out of White Soft Finish Cardstock. Choose which patterned paper you want to use as your heart that you've die cut the small hearts from. Place the heart outline around the heart cutouts to create your patterned paper heart. Ink the edges of the two hearts using Black Soot Distress Ink and a blending tool with foam.


From ModaScrap's Simply Love Patterned Paper Pack, choose two patterned papers. Cut one of the papers down to 4 3/4" x 4 1/4". Cut the other patterned paper to 4 3/8" x 3 7/8". Cut a piece of White Soft Finish Cardstock that measures 4 1/2" x 4". Distress the edges of each paper and ink the edges using Black Soot Distress Ink and a blending tool with foam.


Adhere the White Soft Finish Cardstock to the 4 3/4" patterned paper piece. Adhere the 4 3/8" piece of patterned paper to the White Soft Finish Cardstock. Adhere the scalloped heart border to the bottom of the 4 3/4" patterned paper piece.


Adhere the heart cut out to the white soft finish cardstock heart. From the hearts that you die cut out of the patterned paper, adhere them randomly to the hearts on the heart cut out. You'll want to leave some of the hearts just showing the white soft finish cardstock.


Adhere the dotted scallop circle to the middle of the patterned paper. Foam square the heart to the middle of the dotted scallop circle.


Adhere the arrow, two hearts and the Love You sentiment on the bottom right hand side of the large heart. Take a Zig Marker and create stitch marks around the 4 3/8" piece of patterned paper.
To finish off your card, adhere the card front to a piece of White Soft Finish Cardstock that measures 5" x 9 1/2", score at 4 3/4"


Here are a few close up photos of the Love You Card. 


Here's the finished Love You Card. 


****************

For today's challenge Elizabeth Craft Designs are giving away a $20 Gift Card to use on our website to 3 winners. 

To enter simply leave a comment on the Elizabeth Craft Designs Challenge post and tell us "What Elizabeth Craft Designs dies or stamp sets would you use to create a Valentine’s Card??”

We will select 3 lucky winners in a random drawing 

The winners will be announced on Friday, February 1st on the Elizabeth Craft Designs blog.


****************


Other Products Used:

- Tim Holtz for Ranger Ink: Distress Ink - Black Soot, Candied Apple, Festive Berries, Blending Tool & Foam
- Kuretake: Zig Marker - 03
- Imagine Crafts: VersaMark Ink Pad

- Katelyn


Monday, January 15, 2018

Becky Seddon Release Day - Let Your Dreams Soar

It's time for another new release day over on the Elizabeth Craft Designs blog, featuring Becky Seddon's new die releases. There will be one more of these release posts featuring inspiration using the new products throughout this month on the Elizabeth Craft Designs blog.

For my project, I featured some of the new Becky Seddon dies and I created this Let Your Dreams Soar Card. 


For the base of the cardfront, I layered three of the Stitched Fishtails together using patterned paper from ModaScrap's Viaggi Vintage Paper Pack.

All three Hot Air Balloons can be found in the Vintage Balloon Race die. I layered patterned paper in behind the balloons that had some cut out pieces. To layer in amongst the hot air balloons, I cut out three birds from the Free as a Bird die and blended Vintage Photo Distress Ink over each bird. The sentiment came from the Soar Collection Clear Stamp set. I stamped the sentiment in Vintage Photo Distress Ink on the backside of one of the scrap patterned paper pieces. You'll need to fussy cut the sentiment out. 


I placed the last bird in amongst the three hot air balloons. In the top portion of the card, I wrapped some twine three times around the top of the card and tied a knot at the top right hand corner. 


To finish off the edges of all the pieces, I used Vintage Photo Distress Ink.

You'll want to make sure to check out the rest of the projects the design team has created using Becky Seddon's dies on the Elizabeth Craft Designs blog.


Elizabeth Craft Designs Supplies Used:


Other Supplies Used:

- Tim Holtz for Ranger Ink: Vintage Photo Distress Ink & Blending Tool with Foam
- Misc: Twine


- Katelyn


Friday, December 22, 2017

Merry Christmas Card

Happy Friday! First off, I want to wish you a very Merry Christmas and hope that you have a wonderful Christmas spending time with friends and family. I'm up on the Elizabeth Craft Designs blog today sharing my Merry Christmas Card. I've created my card using some dies from Becky Seddon, Els van de Burgt Studio and A Way With Words. To compliment the die cut images, I've used ModaScrap's Xmas Vintage Collection Patterned Paper Pack.


You'll want to make sure your way over to Elizabeth Crafts Designs Blog to read all about how I created my Merry Christmas Card, so that you're able to recreate it at home. 


- Katelyn