Showing posts with label Halloween. Show all posts

Thursday, October 19, 2023

Wishing You A Happy Halloween Card

  Happy Thursday!

Halloween is 11 days away and I have been creating some Halloween projects over the last few weeks. So, for today's post I'm sharing this vintage Wishing You A Happy Halloween Card using Graphic 45's Steampunk Spells Deluxe Collector's Edition. 


The first five steps use the Steampunk Spells 8x8 Deluxe Collector's Edition Pack.

From the Totally Wicked Paper, cut a piece from the moon side that measures 4" x 5 1/4". Cut a piece from the Clockworks Paper using the gears side that measures 3 3/4" x 5". From the Witching Hour Paper, cut a piece from the spell paper side that measures 3 1/2" x 4 3/4". Sand the edges of all three papers.


From the Freightful Folly paper, cut a piece from the dot side that measures 2 1/2" x 3 7/8". Sand the edges of the paper.


From the Vintage Voyage paper, fussy cut the spells book, women on bike, wishing you a happy banner, love potion sign, potions image and cut the card with clocks down to 1 1/4" x 2 1/2". Sand the edges of the pieces. 


From the Nevermore Paper, fussy cut the bat, moon balloon and crow out. Sand the edges of the pieces.


From the Steampunk Spells paper, fussy cut two balloons and three stamps out. Sand the edges of the pieces. 


Adhere the gear paper to the moon paper. Adhere the spell paper to the gear paper.


Adhere the clock paper 5/8" from the left and 1/4" from the top of the spell paper. Adhere one of the stamps 7/8" from the left and 1/8" from the top of the spell paper. Roll the top right corner of the stamp down. Adhere the dot paper 1/8" from the left and 5/8" from the top of the spell paper. Adhere a second stamp 7/8" from the right and 1/8" from the bottom of the spell paper. 


Adhere the potions image 1/8" over the left side and 7/8" from the top of the spell paper. Adhere the love potion sign and third stamp to the right side of the spell book as desired. Roll down the top left corner of the stamp. Use foam squares to adhere the spells book 1" from the left and 1/2" from the top of the spell paper.


Adhere the bat to the top right side of the spells book. Use adhesive and foam squares to adhere the two balloons to the left of the spells book as desired.


Use adhesive and foam squares to adhere the woman on the bike to the left of the spells book as desired. In amongst the bottom right portion of the woman, adhere the moon balloon and crow. Use foam squares to adhere the Wishing You A Happy Halloween Banner to the bottom portion of the spells book. 


Add seven black and gold Matte Pearl Gems to the cardfront as desired. 


To finish the card, cut a cardbase out of kraft cardstock that measures 4 1/4" x 11", score at 5 1/2". Adhere the cardfront to the cardbase.


Here are a few closeups of the finished card.


Here is the finished Wishing You A Happy Halloween Card.


Supplies Used:

- Graphic 45: Steampunk Spells 8x8 Deluxe Collector's Edition and Matte Pearl Gems 
- Misc: Kraft Cardstock

I hope that my Wishing You A Happy Halloween Card has inspired you to recreate your own at home!

- Katelyn


Monday, October 31, 2022

Boo! Banner

 I have one more Halloween Post to share with you today!

 Today, I'm excited to share these cute Boo! Banner. My banner features the Hallow-Ba-Boo Paper Pack from FlipAppeal Designs by Jenn Aguilar and I combined it with dies from Elizabeth Craft Designs and Ink from Ranger Ink. 


To start, we will create the B Banner. You'll need the black & green slime paper along with the purple patterned paper. Die cut a 4 1/2" Stitched Fishtail out of the black & green slime paper. Die cut a 4" Stitched Fishtail out of the purple patterned paper. Fussy cut three small bats out of the bat paper. From the ephemera and label paper, fussy cut the large resting witch bottle, pink bottle with skull, cauldron and ghoul. Die cut a B out of white cardstock and ink it using Carved Pumpkin Distress Ink and a blending tool with foam. Distress the edges of both fishtails. 

Adhere the two fishtails together. Use adhesive and foam squares to adhere the bottles, ghoul and cauldron to the left side of the fishtail. Adhere the B to the right of the large bottle. Use foam squares to adhere the three bats amongst the B and images. 


Next, we will create the O Banner. You'll need the green striped paper and the green bubble patterned paper. Die cut a 4 1/2" Stitched Fishtail out of the green striped paper. Die cut a 4" Stitched Fishtail out of the green bubble patterned paper. From the ephemera and pumpkin paper, fussy cut eleven pumpkins out. Die cut a O out of white cardstock and ink it using Carved Pumpkin Distress Ink and a blending tool with foam. Distress the edges of both fishtails. 

Adhere the two fishtails together. Use adhesive and foam squares to adhere the pumpkins as desired in the middle bottom portion of the fishtail. Adhere the O to the top right side of the pumpkins. 


Now, we will create the O! Banner. You'll need the black & green slime paper along with the purple patterned paper. Die cut a 4 1/2" Stitched Fishtail out of the black & green slime paper. Die cut a 4" Stitched Fishtail out of the purple patterned paper. Fussy cut three small bats out of the bat paper. From the ephemera paper, fussy cut three bottles out. You'll need to die cut the O & ! out of white cardstock and ink them using Carved Pumpkin Distress Ink and a blending tool with foam. Distress the edges of both fishtails. 

Adhere the two fishtails together. Use adhesive and foam squares to adhere the bottles to the right side of the fishtails. Adhere the O & ! to the left of the bottles. Use foam squares to adhere the three bats amongst the bottles and O & !.


To finish the banner, punch two holes at the top of each banner. String black twine through the holes of each banner.


Here are a few closeups of the finished banner.


Here is the finished Boo! Banner.


Supplies Used:

- FlipAppeal Designs: Hallow-Ba-Boo Paper Pack
- Tim Holtz for Ranger Ink: Distress Ink - Carved Pumpkin & Blending Tool With Foam
- Elizabeth Craft Designs: Blackboard Alphabet, Stitched Fishtails & White Soft Finish Cardstock
Misc: Black Twine

I hope that my Boo! Banner has inspired you to recreate your own at home!

- Katelyn


Boo! Wall Hanging

  Happy Monday and Happy Halloween!

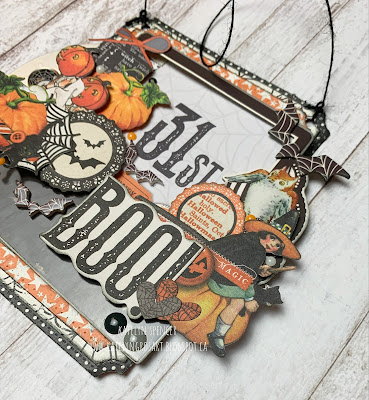
I'm back on Creative Scrapbooker Magazine's Blog today as a monthly blogger sharing with you how to create this Boo! Wall Hanging. My wall hanging features the Simple Vintage October 31st Collection from Simple Stories, Dies from Elizabeth Craft Designs, Ink from Ranger Ink and adhesive from Scrapbook Adhesives by 3L.


You'll want to make sure to stop by the Creative Scrapbooker Blog to learn how to create my Boo! Wall Hanging at home.

Thanks for stopping by!
- Katelyn


Friday, October 21, 2022

Muriatic Acid Tag

    Happy Friday!

 I'm up on Wild Whisper's blog today, where I'm sharing my Muriatic Acid Tag. My tag features the Halloween Night Collection, a variety of stamps by Nicole Wright Designs and the Camp More, Worry Less - Starry Skies Stencil.


For all the details and a tutorial for my Muriatic Acid Tag, you'll want to stop by the Wild Whisper blog. You'll want to make sure to keep checking out Wild Whisper's blog as the design team will be sharing lots of inspiration.

Don't forget to use DTKATELYNG to receive 10% off your order on Wild Whisper's Website.

- Katelyn


Thursday, October 20, 2022

A Haunting We Go

 Happy Thursday!

I'm sharing my A Haunting We Go Mini Album over on Jennifer Edwardson Creative Inc. Blog. My mini album feature the BRAND NEW Haunted House Cut file, SpiderWeb Background Cut File, Simple Vintage Halloween Creative Kit and Vintage Halloween Add On Kit from Jennifer Edwardson Creative Inc. Shop. 


For all of the details, a full tutorial and all the photos of the inside of my A Haunting We Go Mini Album, you'll want to head over to Jennifer Edwardson Creative Inc. blog.

- Katelyn


Friday, October 7, 2022

Halloween Treat Box

      Happy Friday!

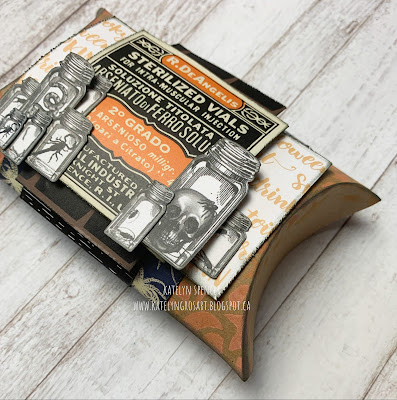
 I'm up on Wild Whisper's blog today, where I'm sharing my Halloween Treat Box. My treat box features the Halloween Night Collection and the Camp More, Worry Less - Starry Skies Stencil.


For all the details and a tutorial for my Halloween Treat Box, you'll want to stop by the Wild Whisper blog. You'll want to make sure to keep checking out Wild Whisper's blog as the design team will be sharing lots of inspiration.

Don't forget to use DTKATELYNG to receive 10% off your order on Wild Whisper's Website.

- Katelyn


Friday, October 11, 2019

Wicked Halloween Card

Happy Friday! 
Halloween is only 20 days away and today's I've created a Wicked Halloween Card for Southern Ridge Trading Company's blog. I hope that my card inspires you to want to recreate your own version at home.


You'll want to stop by Southern Ridge Trading Company's blog so that you can learn how I created my Wicked Halloween Card at home.

- Katelyn


Tuesday, September 24, 2019

Boo Treat Box

Happy Tuesday!
I'm excited to have a be over on Quietfire Design blog today, where I'm sharing my Boo Treat Box. My treat box features a variety of Quietfire stamps as well as A Way With Words Dies.


For a full tutorial and a few more photos of my project, you'll want to head over to Quietfire Design blog for all the details. 

- Katelyn


Sunday, September 15, 2019

Elizabeth Craft Designs September Group Post - Trick or Treat: Halloween Projects

Happy Sunday!

We are switching things up on the Elizabeth Craft Designs blog this year and instead of having a designer challenge, we are having group posts each month. Each month the group post will have a theme and some or all of the design team members will participate. For September's theme it's all about Halloween! 

 For this month's group post, I created this Happy Halloween tag, the perfect halloween tag to add to a gift or a trick or treat bag. To create my tag, I've used dies from Joset Designs. Grab your favourite fall beverage and read below as I have a tutorial for you so that you can re-create my tag at home. You'll also want to make sure to stop by the Elizabeth Craft Designs Blog to check out the rest of the team's projects. 


To start, you'll need some a couple pieces of halloween patterned paper. Die cut the 2 1/2" and 3" Stitched Indented Rectangles out of the patterned papers. Distress the edges of both pieces. Ink the edges of both pieces using Black Soot Distress Ink and a blending tool with foam. 


From the Words 3 - Happy Holidays die, die cut the Happy Halloween sentiment out of White Soft Finish Cardstock.


Die cut the Iron Fence out of Rich Black Soft Finish Cardstock. Rub Art Alchemy Metallique Wax - Brushed Iron over the fence.


Die cut two bats from the Halloween Accessories die out of Rich Black Soft Finish Cardstock.


From the Haunted House set, die cut the house out of Rich Black Soft Finish Cardstock.


Die cut the Spider Web from the Spider Web die out of Rich Black Soft Finish Cardstock. Cut the small spider web out of the center of the big spider web. Using a Clear Glitter pen, colour the small spider web.


Adhere the small spider web to the 3" rectangle. Adhere the 2 1/2" rectangle to the 3" rectangle.


Adhere the fence to the bottom portion of the 2 1/2" rectangle. Foam square the haunted house to the left hand side of the 2 1/2" rectangle.


Use foam squares to adhere the bats in the top right corner of the 2 1/2" rectangle. Adhere the Happy Halloween sentiment to the bottom right side of the rectangles. Punch a small hole at the top of the rectangles. Tie a piece of black twine through the hole.


Here are a few closeups of the tag.


Here's the finished Happy Halloween Tag.


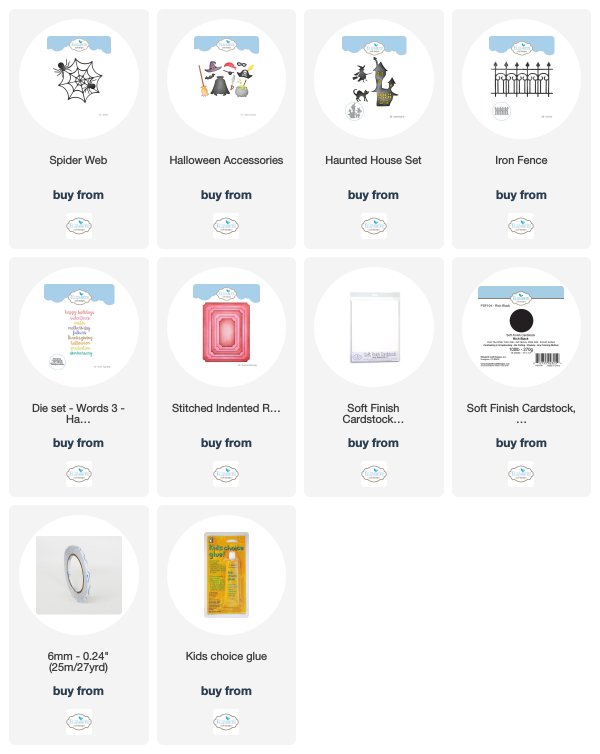
Elizabeth Craft Designs Products Used:


Other Products Used:

- Wild Whisper Designs: Halloween Night Collection Pack
- Prima Marketing: Art Alchemy Metallique Wax - Brushed Iron
- Tim Holtz for Ranger Ink: Distress Ink - Black Soot and Blending Tool with Foam
- Misc: Clear Glitter Pen and Black Twine

- Katelyn