Showing posts with label Planner Essentials. Show all posts

Wednesday, December 29, 2021

Happy New Year!

  Happy Wednesday!

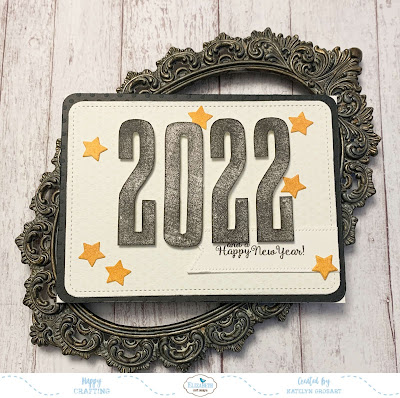
I'm up on the Elizabeth Craft Designs blog today with my last post apart of their design team, it has been an amazing four years and I look forward to seeing what the new design team has up their sleeves. I'm sharing my Happy New Year! Card which features dies and stamps from the Planner Essentials Collection as well as stamps and dies from Joset Designs.


For a full tutorial on my Happy New Year! Card, you'll want to head over to the Elizabeth Craft Designs blog for all the details. 

I hope that you all have a wonderful time celebrating the New Year!

- Katelyn


Thursday, December 16, 2021

December To Remember Pocket

 Happy Thursday!

I'm up on the Elizabeth Craft Designs blog today, where I'm sharing my December To Remember Pocket. My pocket features a variety of dies and stamps from the Planner Essentials Collections.


For a full tutorial on my December To Remember Pocket, you'll want to head over to the Elizabeth Craft Designs blog for all the details. 

- Katelyn


Saturday, December 11, 2021

Peace Gift Tag

  Happy Saturday!

For today's project I'm sharing this Peace Gift Tag perfect to add to a Christmas gift. To create my gift tag, I've used the NEW dies and stamps from the Beautiful Blooms Collection as well as dies from the Planner Essentials Collection and stamps from the Art Journal Collection. You'll want to read below as I have a full tutorial on how to recreate my gift tag at home.


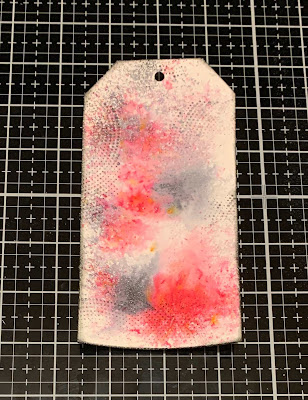
To start, die cut a large tag from the Planner Essentials 26 - Planner Pocket 4 - Tag & Toppers out of a piece of White Soft Finish Cardstock. Sprinkle Magenta Nuance in Red and Grey on the tag. Spritz the powder with water and allow to dry.


Once the tag has dried, you'll need the circle stamp from the Frosty Patterns Stamp Set. Apply Jet Black Archival Ink to the stamp and stamp randomly on the tag. Reapply ink to the stamp as needed and stamp another four times. Distress the edges of the tag. Ink the edges of the tag using Black Soot Distress Ink using a blending tool with foam.


The next three steps use the Peace Stamp Set and coordinating Peace Die set.

Apply Jet Black Archival Ink to the poinsettia stamp and stamp onto a piece of White Soft Finish Cardstock. Reapply ink to the stamp and stamp on the same piece of White Soft Finish Cardstock. Colour the poinsettias in using a waterbrush and the Watercolour Palette. Die cut the poinsettias out using the coordinating die. Ink the edges of the poinsettias using Black Soot Distress Ink and a blending tool with foam.


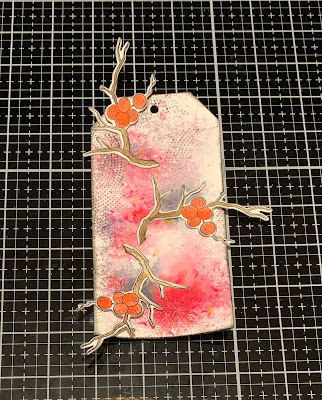
Apply Jet Black Archival Ink to the branch stamp and stamp onto a piece of White Soft Finish Cardstock. Reapply ink to the stamp and stamp on the same piece of White Soft Finish Cardstock. Repeat the previous step one more time. Colour the branches in using a waterbrush and the Watercolour Palette. Die cut the branches out using the coordinating die. Ink the edges of the branches using Black Soot Distress Ink and a blending tool with foam.


Apply Jet Black Archival Ink to the peace stamp and stamp onto a piece of White Soft Finish Cardstock. Die cut the peace word out using the coordinating die. 


Apply the three branches as desired on the tag.


Use foam squares to adhere the two poinsettias on the tag as desired so that they cover the ends of the branches.


Adhere the Peace word to the bottom right side of the tag as desired.


To finish the tag, tie a piece of white ribbon through the hole at the top of the tag. 


Here are a few closeup photos of the finished gift tag.


Here is the finished Peace Gift Tag.


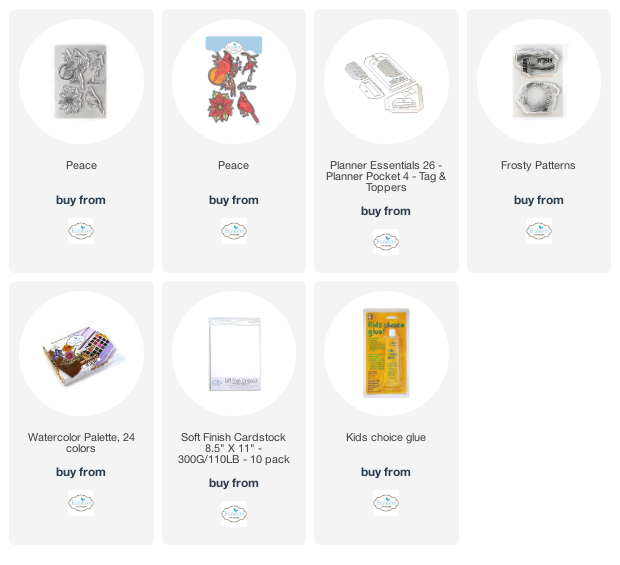
Elizabeth Craft Designs Supplies Used:


Other Supplies Used:

- Tim Holtz for Ranger Ink: Distress Ink - Black Soot and Blending Tool with Foam
- Ranger Ink: Jet Black Archival Ink
- Magenta Nuance: Red and Grey
- Misc: White Ribbon

I hope that my gift tag has inspired you to recreate your own version of my Peace Gift Tag.

- Katelyn


Sunday, December 5, 2021

Merry Christmas Card

 Happy Sunday!

I'm up on the Elizabeth Craft Designs blog today, where I'm sharing my Merry Christmas Card. My card features dies from the Paper Flowers Collection and Joset Designs as well as stamps from the Planner Essentials Collection.


For a full tutorial on my Merry Christmas Card, you'll want to head over to the Elizabeth Craft Designs blog for all the details. 

- Katelyn


Tuesday, November 30, 2021

Christmas Memories Tag

   Happy Tuesday! 

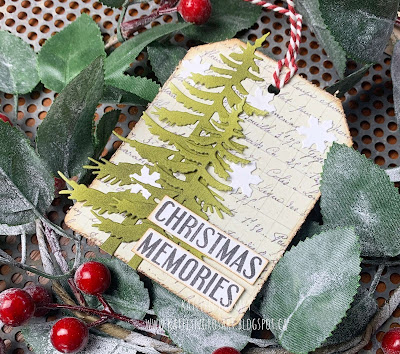
Today's post, is all about this Christmas Memories Tag perfect for adding to a present or inserting into your planner. My tag uses a variety of stamps and dies from the Planner Essentials. You'll want to grab a cup of your favourite beverage and learn how to recreate my Christmas Memories Tag at home. 


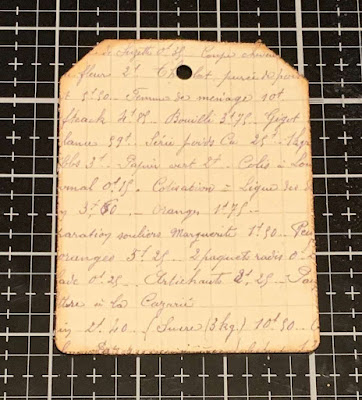
To start, choose a piece of patterned paper out of the Reminiscence the Book 2. From the Planner Essentials - 2 die, die cut the large tag out of the patterned paper piece. Distress the edges of the tag. Ink the edges of the tag using Walnut Stain Distress Ink and a blending tool with foam.


The next two steps use the Mason Jar / Snowflake Globe Special.

Die cut the two trees out of a piece of White Soft Finish Cardstock. Using a blending tool with foam, blend Forest Moss Distress Ink over the entire surface of each tree.


Die cut the snowflakes out of a piece of White Soft Finish Cardstock. You'll need a total of five snowflakes.


From the Winter Words Stamp Set, you'll need the Christmas Memories words. Apply Jet Black Archival Ink to the words and stamp onto a piece of White Soft Finish Cardstock. Cut the two words into two strips. Ink the edges of the words using Walnut Stain Distress Ink and a blending tool with foam.


Adhere the trees to the left hand side of the tag as desired.


Adhere the five snowflakes as desired on the tag. Use foam squares to adhere the Christmas Memories Words to the bottom right side of the tag as desired.


To finish the tag, tie a piece of red and white twine through the hole at the top of the tag.


Here are a few closeup photos of the finished Christmas Memories Tag.


Here is the finished Christmas Memories Tag.


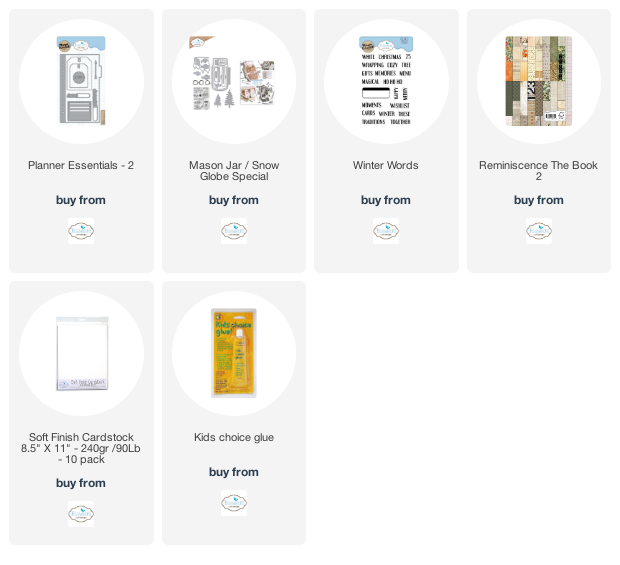
Elizabeth Craft Designs Supplies Used:


Other Supplies Used:

- Tim Holtz for Ranger Ink: Distress Ink - Walnut Stain & Forest Moss and Blending Tool with Foam
- Ranger Ink: Jet Black Archival Ink
- Misc: Red and White Twine

Thanks so much for joining me today and I hope that I have inspired you to recreate your own version of my Christmas Memories Tag.

- Katelyn


Thursday, November 25, 2021

Ho Ho Ho Gift Tag

 Happy Thursday!

I've been busy lately creating holiday gift tags perfect for adding to gifts this year, so today's post, is all about this Ho Ho Ho Gift Tag.  To create my gift tag, I've used dies from the Paper Flower Collection and the Planner Essentials Collection. You'll want to read below as I have a full tutorial on how to recreate my gift tag at home.  


To start, choose a piece of Christmasy patterned paper out of the Reminiscence the Book. Die cut the large tag from the Planner Essentials - 2 die out of the patterned paper. Distress the edges of the tag. Ink the edges of the tag using Walnut Stain Distress Ink and a blending tool with foam.


Out of the Reminiscence the Book you'll need the Ho Ho Ho rectangle from the patterned paper. Distress the edges of the rectangle. Ink the edges of the rectangle using Walnut Stain Distress Ink and a blending tool with foam.


From the Leaves & Branches die, you'll need to choose one of the branches. Die cut the branch out twice from a piece of White Soft Finish Cardstock. 


The next two steps use the Florals 12 die.

Die cut the large holly leaf three times and the small holly leaf twice out of a piece of White Soft Finish Cardstock. Using a blending tool with foam, blend Mowed Lawn Distress Ink over the entire surface of all the leaves. Shape the leaves as desired.


Die cut the extra large poinsettia once, the large poinsettia three times, the medium poinsettia three times, the small poinsettia three times and the centre three times out of White Soft Finish Cardstock. Using a blending tool with foam, blend Fired Brick Distress Ink over the entire surface of all the poinsettias and centres. Shape the poinsettias as desired.


Foam square the Ho Ho Ho rectangle to the left hand side of the tag as desired.


Adhere the first poinsettia together which needs a extra large, large, medium, small poinsettia and a centre. Adhere the remaining two poinsettias together which need a large, medium, small poinsettia and a centre. Re-shape the poinsettias as needed.


On the bottom portion of the tag, adhere a branch as well as a large and small holly leaves as desired. In the top portion of the tag, adhere the remaining branch and holly leaves as desired.


Use foam squares to adhere the three poinsettia flowers around the Ho Ho Ho rectangle as well as the leaves and branches as desired.


To finish the tag, tie a piece of twine through the hole at the top of the tag.


Here are a few closeup photos of the finished gift tag.


Here is the finished Ho Ho Ho Gift Tag.


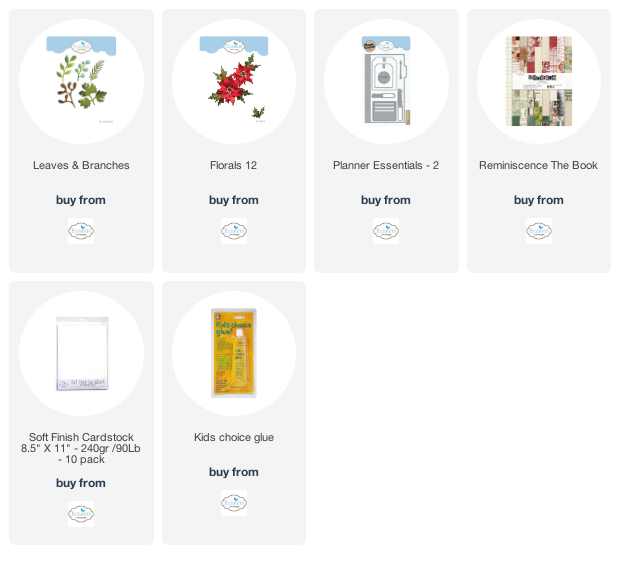
Elizabeth Craft Designs Supplies Used:

 
Other Supplies Used:

- Tim Holtz for Ranger Ink: Distress Ink - Walnut Stain, Mowed Lawn & Fired Brick and Blending Tool with Foam
- Misc: Twine

I hope that my gift tag has inspired you to recreate your own version at home.
- Katelyn