Showing posts with label Ranger. Show all posts

Saturday, January 9, 2016

We are on our way

It's the start of CHA today and I can't think of a better way to start off CHA by sharing a brand new release from Emerald Creek Craft Supplies featuring two new stamp sets by Nicole Wright Designs. Nicole has created a beautiful Fallen Blossom stamp set and a stunning Upstream Stamp set. I can't wait to create more projects using these stamp sets.  The stamp sets are available to order on the Emerald Creek Craft Supplies website.  For my project, I created a Pop Up Box Card featuring the two new beautiful stamp sets. 

Supplies Used: Emerald Creek Craft Supplies featuring Nicole Wright Designs - Cherry Blossom & Koi stamp set. Ranger/Tim Holtz Distress Ink - Black Soot & Antique Linen. Ranger/Tim Holtz Distress Markers - Carved Pumpkin, Dried Marigold, Spiced Marmalade, Black Soot, Worn Lipstick & Spun Sugar. Tim Holtz Kraft Core - #13 & #19. Bazzill Cardstock - Black. 1 3/8" Circle Punch.

To begin making my card, I coloured two sets of the cherry blossom image with Worn Lipstick and Spun Sugar Distress Markers. Once all the images were coloured, fussy cut them out and inked the edges using Black Soot Distress Ink on a blending tool.


After the Cherry blossoms images were fussy cut out and inked, I moved on to colouring the Koi. For the Koi you will need two sets of the Koi images. To colour them I used Carved Pumpkin, Dried Marigold, Spiced Marmalade and Black Soot Distress Markers.  Once the I was happy with the colouring, I fussy cut all the Koi out and inked the edges using Black Soot Distress Ink on a blending tool.


For the saying, it is found on the Cherry Blossom set. I stamped it and then inked over top of it with Antique Linen Distress Ink on a blending tool. Once I was happy with the colour, I trimmed out the saying into two strips. Love this saying that Nicole Wright Designs incorporated into the set. 


To create the Pop Up Box card, I followed a tutorial the I found on the Split Coast Stampers website, here is the link so you can create it at home: http://www.splitcoaststampers.com/resources/tutorials/popupboxcard/. Below is what the Pop Up Box Card will look like before assembly. 


Before attaching the box together, I cut out panels using Graphic 45's Bird Song Paper and Tim Kraft Core paper #19. Once these were cut I inked them using Black Soot Distress Ink on a blending tool. 


After the panels were cut, I adhered them to the small panel pieces to the small panels and the loong panel pieces to the long inside panel. Once the panels were adhered, place adhesive on the tab and attach the tab to the outside of the long panel. Once the box is adhered together, cover the outside tab using a piece of Tim Holtz Kraft Core #19. 


Before decorating the inside, you will want to attach the inside centre piece. This will allow for attaching the Koi and Cherry Blossoms to the inside of the card.


After the inside support pieces are in place, now it is time to decorate. I used a variety of the Koi images, cherry blossoms and the saying and placed them throughout the inside of the pop up box.   An extra piece I added was 1 3/8" circle lily pad out of the Tim Holtz Kraft Core #13. To top  off the lily pad add a cherry blossom petal to the top of it. Once I was happy with placement of all of the images, I adhered some pieces with adhesive and other pieces with foam squares, to give it some extra dimension. 


Supplies Used: Emerald Creek Craft Supplies featuring Nicole Wright Designs - Cherry Blossom & Koi stamp set. Ranger/Tim Holtz Distress Ink - Black Soot & Antique Linen. Ranger/Tim Holtz Distress Markers - Carved Pumpkin, Dried Marigold, Spiced Marmalade, Black Soot, Worn Lipstick & Spun Sugar. Tim Holtz Kraft Core - #13 & #19. Bazzill Cardstock - Black. 1 3/8" Circle Punch.

Here is my Pop Up Box card with all the aspects together. 


This card was a ton of fun to make and with the beautiful stamped images from Nicole Wright Designs, it created the perfect combination!  

Make sure that you go and check out the rest of the Emerald Creek Dares Design Team as they have all created different pieces using the same stamp sets:


Don't forget to enter your project into our Emerald Creek Dares Challenge for your chance to win a $25.00 gift certificate for the Emerald Creek Store!


Thanks for stopping by and checking out my Pop Up Box Card. Make sure that you continue to check back over CHA week as there will be other projects featuring Emerald Creek Craft Supplies products.

Until Next Time!
-Katelyn


Thursday, December 17, 2015

Season's Greeting - Emerald Creek Dares Challenge

It's time for a new challenge over on the Emerald Creek Dares blog and this time it features wishing you all a very happy holidays. I want to take the time to thank you all for taking the time to stop by and viewing my blog on a regular basis, I truly appreciate it. I hope you enjoy viewing how I created my card.


To begin making my card, I cut two pieces of cream cardstock to 3 3/4" x 3 3/4". Once those were cut, I inked up the Holly stamp from Tim Holtz Christmas Blueprints 4 with black archival ink and stamped it on one of the cream cardstock pieces. Re-ink the Holly stamp and stamp onto the second piece of cream cardstock.


Decide which holly image you like the best and set that one aside. Take the second Holly stamped image and colour the holly with Festive Berries and Peeled Paint Distress Markers. Once the holly is coloured, fussy cut around the holly image and the holly word. Take you blending tool and ink the edges of the holly and holly word with Ground Espresso Distress Ink.


To create the banner at the bottom of the card, cut a piece 1" x 5 1/2". With the Barn Door Distress Ink, ink up the Season's Greeting Stamp from Emerald Creek and stamp onto the middle of the paper. Once the greeting is stamped, create the banner ends by cutting a triangle at either end 1/4" in. Once the banner ends have been created, score at 3/4" on the left and right hand side. To make the banner stand up, fold the banner tail up at the score mark and then fold the straight banner part down onto the banner ends. 


To finish off the banner, the piece of red cardstock and the first piece of cream cardstock with the holly image, ink all of the edges with Embossing Ink. Once the edges are inked where you want them to be, sprinkle over top with Soft Fallen Snow  Embossing Powder from Emerald Creek and then emboss with a heat tool. Warning, each piece will come out differently. Once embossed, ink the edges using Ground Espresso Distress Ink. Below is how my pieces turned out.


Now that you have seen how I created these different elements for my card, here is the finished card with all of the pieces put together.

Supplies Used: Emerald Creek - Season's Greeting Stamp & Soft Fallen Snow Embossing Powder. Ranger/Tim Holtz - Festive Berries & Peeled Paint Distress Markers, Ground Espresso & Barn Door Distress Ink, Black Archival Ink, Embossing Ink. Stampers Anonymous Stamp - Christmas Blueprints 4. Maja Designs - 6x6 "Home for the Holidays". Bazzill Cardstock - Cream, Red, and Brown. Hug n Snug - Brown ribbon.

Make sure that you go and check out the rest of the Emerald Creek Dares Design Team:


Don't forget to enter your project into our Emerald Creek Dares Challenge for your chance to win a $25.00 gift certificate for the Emerald Creek Store!


Thanks for stopping by and checking out my project!

Until Next Time!
-Katelyn


Monday, December 14, 2015

"Merry Christmas Card on the Southern Ridge Trading Company Blog

It's my turn back on the Southern Ridge Trading Company blog with a vintage "Merry Christmas" card. There is still time to participate in our Monthly Challenge. To see all the details and how you can enter, head here

Supplies Used: SRTC - Merry Christmas Greetings Pack, Leafy Frame and Assorted Flowers. Emerald Creek - Onyx Frost Embossing Powder. Tsukineko/Imagine Crafts - VersaMark. Maja Designs - 6x6 "Home for the Holidays". Bazzill Cardstock - Brown Cardstock. Ranger - Ground Espresso Distress Ink and Blending Tool.

The chipboard pieces that I used on my card are the Merry Christmas Greetings Pack and Leafy Frame. To start, I separated the Merry Christmas word with scissors so that I could place the "Merry" at the top of the card and "Christmas" at the bottom of the card. For the words and the leafy frame, I went overtop of them with Ground Espresso Distress Ink. Once I was happy with the coverage of the ink, I covered the words and leafy frame lightly with VersaMark. Once the VersaMark is on the chipboard pieces, I sprinkled over Onyx Frost embossing powder from Emerald Creek and embossed it with a heat tool. Below are pictures of how the chipboard pieces look once embossed. To finish off my leafy frame, I added the old fashioned santa picture to the frame and then added an assortment of flowers to the top right and bottom left hand corners of the frame.


Here is my card with all of the elements put together


Thanks for stopping by and taking a look at my vintage Merry Christmas card. Stay tuned for some another fantastic Christmas card this week.

Until Next Time!
-Katelyn

Thursday, November 26, 2015

Winter Wishes - Emerald Creek Dares Challenge

It's my first official post as a Design Team member with Emerald Creek  and if working with this amazing team and company couldn't get any better, I found out that the next Emerald Creek Dares Challenge is all about Christmas.  With knowing the challenge is all about Christmas, I knew it was going to be right up my alley.  Christmas is one of my most favourite times of the year as you are able to spend time with family and friends and create new traditions. So sit back with a cup of coffee and enjoy learning how I created.

To get my embossed snowflakes, I ran two snowflakes out of black cardstock, using the paper snowflakes die set and then ran them through my Big Shot. Once they were run through, I took my Tim Holtz Distress Embossing ink and covered the entire surface of both snowflakes.


Once the snowflakes were covered with embossing ink, I used the Soft Fallen Snow Embossing Powder and sprinkled it over top of each of the snowflakes. Make sure that the entire surface of both  snowflake die-cuts are covered in embossing powder. 


Once the snowflakes are covered in embossing powder, emboss both snowflakes with a heat tool.  Once the snowflakes are embossed, adhere the two snowflakes together in the middle using a glue dot. Once the paper snowflakes are adhered together, add a glue dot to the Victorian Snowflake and adhere to the middle of the top paper snowflake. Set the snowflakes aside once they are together. 


To add the Soft Fallen Snow Embossing Powder  to the edges of the white and black cardstock, ink around your edges using the Tim Holtz Distress Embossing Powder.  


Once the edges are marked with the Tim Holtz Distress Embossing Ink, sprinkle Soft Fallen Snow Embossing Powder around the edges. Tap off the extra. If there is more embossing powder on one side of the paper then the other, that is what gives the edges a unique look. Repeat this for both black cardstock pieces.
Once the embossing powder has been tapped off, emboss the edges with a heat tool. Repeat this for both black cardstock pieces. 


To finish off the card I needed a sentiment, so I inked up the Warmest Wishes stamp with the Tim Holtz Distress Embossing Ink. Once inked, stamp the Warmest Wishes stamp onto the vellum piece. 


Sprinkle the Onyx Frost Embossing Powder  over top of the Winter Wishes stamped image. Tap off the excess and then emboss with a heat tool. 


To finish the sentiment off, on the right side of the vellum piece I turned it into a banner to give the saying a bit more detail as well as adding a Mini Victorian Snowflake charm to the left hand side of the saying.  Once I was done with the sentiment, I attached all of my layers together on the cardbase. To give the snowflake die cuts some dimension, I foam squared them. The best way the adhere the vellum banner is to use glue dots. 

Here is my Warmest Wishes Card finished

Supplies Used: Emerald Creek - Soft Fallen Snow Embossing Powder, Onyx Embossing Powder, Victorian Snowflake Charms & Mini Victorian Snowflake Charms, Bazzill Cardstock - White, Black & Vellum, American Crafts - Silver Glitter Paper, Ranger/Tim Holtz - Distress Embossing Ink, Sizzix/Tim Holtz Die - Paper Snowflakes.


Make sure that you go and check out the rest of the Emerald Creek Dares Design Team:


Don't forget to enter your project into our Emerald Creek Dares Challenge for your chance to win a $25.00 gift certificate for the Emerald Creek Store!


Thanks for stopping by and checking out my project!

Until Next Time!
-Katelyn


Sunday, November 22, 2015

"Peace" Christmas Card on the Southern Ridge Trading Company Blog

It's my turn back on the Southern Ridge Trading Company blog today with a vintage "Peace" Christmas card.  Just a reminder that there are still 8 days to participate in our Monthly Challenge. Head here to see all of the details on how to enter and add your project. 


Supplies Used: SRTC - Small Primitive Stars, Words of Christmas #2, 10mm Cream Flowers & 10mm Brown Flowers. Emerald Creek - Soft Fallen Snow & Iridescent Shimmer Embossing Powder. Glue Dots. Ranger/Tim Holtz - Ground Espresso Distress Ink. Maja Designs - Home for the Holidays 6x6 pad & Home for the Holidays 12x12 Die-cut paper. Bazzill Cardstock - Brown. Tsukineko/Imagine Crafts - Silver Delicata & VersaMark.


On the small primitive stars and Words of Christmas #2 featuring the "Peace" word, I covered the entire surface of all three pieces using Silver Delicata. Before the Silver Delicata dried on all three pieces, I sprinkled Iridescent Shimmer embossing powder from Emerald Creek over top and embossed them. I love how each piece turned out a bit differently but all three pieces have even more sparkle on now.


To finish my card I covered the edges of each of my patterned papers with VersaMark and sprinkled Soft Fallen Snow embossing powder from Emerald Creek around the edges. Once embossed, it gives the edges some more detail. I also added the matching flowers around the two corners to pull my card together.


Thanks for stopping by and taking a look at my card.  To see other projects from the Southern Ridge Trading Company Design Team, head over to the blog. Stay tuned for some more Christmas themed projects on my blog this week.

Until Next Time!
-Katelyn

Saturday, November 14, 2015

Noel Christmas Tag on the Southern Ridge Trading Company Blog

Happy Saturday! I'am back on the Southern Ridge Trading Company Blog with a fun Christmas tag. Our challenge this month is all about Christmas so make sure that you participate as it is an easy one and you have a chance to win $20.00 in product of your choosing. To find out all of the details on the Challenge and how to participate, head HERE.  Without making you wait any longer, here is my fun Christmas tag:

Supplies Used: SRTC - Snowflakes 713 & Words of Christmas 2, Ranger - Bridal Tinsel Embossing Powder, Tim Holtz Distress Stain - Brushed Pewter, Tim Holtz Distress Ink - Walnut Stain, Dylusions Paint - Postbox Red, Emerald Creek - Large Snowflake and Small Snowflake charms, KaiserCraft Holly Jolly Collection - Joyous & Hearty, KaiserCraft Home for Christmas Collection - Laurel, Graphic 45 Staples - Large Black Tag, White Cardstock,  Tsukineko/Imagine Crafts - VersaMark, Wink of Stella Pen - Silver, Sakura Gel Pen - Clear, May Arts Ribbon - White Seam Binding Ribbon & Kraft Twine.

For the snowflakes I used Snowflakes 713, which are chipboard and covered them first with a layer of VersaMark and then sprinkled the Bridal Tinsel Embossing Powder overtop of them. I then used my heat tool to set the embossing powder. Once they were embossed, I added a layer of Tim Holtz Distress Stain in Brushed Pewter. To make sure the snowflakes were dry from the stain, I ran the heat tool over top of them.  Below is a photo of how they turned out.


The "Noel" word can be found on the Christmas Words 2 set.  I painted the "Noel" word using Dylusions Paint in Postbox Red. What is cool with this word, is you don't have to cover the word in Gesso before painting it because it is made out of wood. I went overtop of the word with my heat tool to make sure that the paint was dry. Below is how the noel word turned out.


Here is my card with all of the elements together. I added some fun snowflake charms from Emerald Creek. I felt my Christmas Trees were bare, so I added some sparkle to them using my Wink of Stella pen as well as my Sakura Clear Gel Pen.


Thanks for taking the time to stop by and check out my blogpost. Make sure you stop by the Southern Ridge Trading Company blog to see the other amazing projects from the rest of the design team at: http://southernchipboard.blogspot.ca/. You can also follow me on Instagram at: a_creative_journey_1.

Until Next Time!
-Katelyn 

Friday, November 6, 2015

Sympathy Card

I'am so excited that I can finally tell you that I will be guest designing for Emerald Creek for three months. I absolutely love their charms and stamps, what I find that is even cooler is that they're a Canadian company.  You have to go and check out their website and see all of the awesome things they carry. While you're there, head over to their blog and participate in their Tricks Treat Challenge. Here is where you can find all of the details on how to participate: http://blog.emeraldcreek.ca/2015/10/tricks-treats-for-this-dare.html.  There are only 4 days left to participate and you have a chance to win a $25.00 gift certificate to use in the store. 

Sympathy cards aren't something that you see a lot of online as many people don't enjoy making them. When I saw the poppy stamp and "You are in our Thoughts" stamp  from Emerald Creek,  I knew they would make the perfect sympathy card.  So for my first project with them, I decided to do a sympathy card: 
Supplies Used: Emerald Creek - Poppy stamp & In our thoughts stamp, Tsukineko - Black Staz On, Tim Holtz Distress Ink - Gathered Twigs, Tim Holtz Distress Markers: Black Soot, Barn Door, Peeled Paint, Mowed Lawn, Sizzix/Tim Holtz Thinlits - Tiny Tattered Floral, Graphic 45 "Home Sweet Home" - Garden Fresh & Bazzill Cardstock - White & Cream.

The poppy stamp and "You're in our Thoughts" stamp I used are available on the Emerald Creek Website. For the poppy stamp I used Black Staz On to stamp with and then coloured in the poppy image using Tim Holtz Distress Markers in: Black Soot, Barn Door, Peeled Paint, and Mowed Lawn. I also stamped the "You are in our Thoughts" stamp with Black Staz On to create the banner.  To create my rolled flowers, I used the Tim Holtz Thinlits die - Tiny Tattered Floral. Here is an up close view at how great the stamps are.


I love how all of the elements turned out on the card and I love how beautiful the stamped images are. Here's my card one last time:

Thanks for taking the time to stop by and check out my card. I hope you take the time to head over to the Emerald Creek Blog and check out all of the other amazing designers as well as participate in their Tricks and Treat challenge. 

Until Next Time!
-Katelyn


Sunday, November 1, 2015

Skull Card for the Trick and Treat Challenge at Emerald Creek Dares

Happy November! I know that Halloween was yesterday but I couldn't resist making one more card as Emerald Creek is having a Tricks and Treat challenge over on their blog. There are still 9 days to participate in this fun challenge. To participate and add your submission, head over here to read all of the details. For the challenge, I submitted a fun skull card featuring all things Tim Holtz. Follow below to read how I created this fun card.

Here is my card I created:

Supplies Used: May Arts Ribbon - Cream Seam Binding Ribbon. Emerald Creek - Brass Skull charms. Tim Holtz Distress Ink - Black Soot, Twisted Citron, Carved Pumpkin, Wilted Violet. Tim Holtz Distress Markers - Wilted Violet, Carved Pumpkin, Scattered Straw, Antique Linen. Tim Holtz Distress Stain - Wilted Violet, Carved Pumpkin. Tsukineko - Versamark, Clear Embossing Powder, Black Staz On . Memory Box - Delicate Web. Tim Holtz Stamp - Undertaker. Tim Holtz Stencil - Shattering. Bazzill - Black Cardstock. Pebbles "Boo" - Hocus Pocus. 

To create the background behind my skull, I first blended Twisted Citron, Carved Pumpkin and Wilted Violet on white cardstock with a blending tool. I then took my shattered stencil and laid it over top of the custom background and stamped Versamark over top. Once the versamark and stencil  had covered the entire card, I sprinkled clear embossing powder over top of the versamark, tapped off the excess and used a heat tool to set the clear embossing powder. Once the embossing powder had cooled down a little bit, I blended black soot distress ink overtop where it stayed in between the shattered embossed parts. To finish the card I added the fun skull image and labels from the Tim Holtz Undertaker stamp set. I stained my cream ribbon using Wilted Violet and Carved Pumpkin Distress stains. Once the ribbon was dry, I wanted to add some extra detail to my ribbon, the perfect embellishments was a  fabulous brass skull charm from Emerald Creek. Here is my card again with all of the elements I just talked about:


Thanks for stopping by and checking out my card. Make sure you head over to Emerald Creek's Blog and see all of the fabulous creations from their design team members.

Until Next Time!
-Katelyn


Saturday, October 31, 2015

Haunted House Mini Album on the Southern Ridge Trading Company Blog

Happy Halloween! I'am back on the Southern Ridge Trading Company blog with a fun haunted house mini album. There is still 10 hours to participate in our Monthly Challenge and here is where you can find all of the details. 


This is just one of the mini albums available in the SRTC store, which features a fun Haunted House front.  I mixed White Linen and Black Marble Dylusions Paint together to make the paint colour for my haunted house. Once the front was dry, I repeated the same steps and painted the back. I wanted to add some texture to my haunted house so I ran it through a brick embossing folder to give it the impression of a brick facade. My haunted house was still missing something so I added the birch tree die cut. The birch tree die cut was a bit plain so I dressed it up using my Wink of Stella clear shimmering pen.

Supplies Used: SRTC - Mini Album, Dylusions Paint - White Linen & Black Marble, Brick Embossing Folder, Wink of Stella Clear Shimmering Pen and Tim Holtz Die - Birch Trees.

To finish off the side of the front of my Haunted House mini album, I die cut the word "haunted" for the side beside my brass skull charm. I have to give Emerald Creek a shout out for the fabulous brass skull, where you can find here other charms and stamps. 

Supplies Used: Tim Holtz Die - Halloween Words Script & Emerald Creek - Brass Skulls.


For Page 1, I just covered the chipboard page with patterned paper from Reminisce called "Goosebumps - Scary Night". Once I adhered the paper, I added Glossy Accents to the pumpkins and the eyes of the bats.

Supplies Used: Glossy Accents, Black Soot Distress Ink & Reminisce - Goosebumps: Scary Night

For Page 2 and 3, I used chipboard pieces out of the Happy Halloween pack, which you can find here. I covered the ghost in White Linen Dylusions paint and I covered the bat in Black Marble Dylusions paint.  To get the effect I did on my spider webs, I blended Black Soot Distress Ink over top of both cob webs and then embossed them with Iridescent embossing powder. To add some detail to the black photo mats, I used the Tim Holtz Cobwebs embossing folder.

Page 2 Supplies Used: SRTC - Happy Halloween, Tim Holtz Distress Ink - Black Soot, Dylusions Paint - White Linen, Iridescent embossing powder, Reminisce Halloween - Scary Jack, Bazzill Cardstock - Orange & Black & Tim Holtz Embossing Folder - Cobwebs.

Up close picture of the details on page 2

Page 3 Supplies Used: SRTC - Happy Halloween, Tim Holtz Distress Ink - Black Soot, Dylusions Paint - Black Marble, Iridescent embossing powder, Reminisce Halloween - Scary Jack, Bazzill Cardstock - Orange & Black & Tim Holtz Embossing Folder - Cobwebs.


Up close picture of the details on page 3

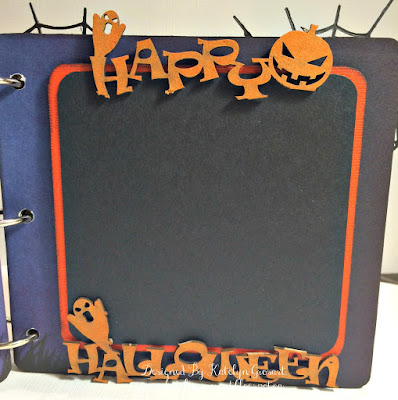
On Page 4 I adhered the Reminisce paper called "Goosebumps -  Scary Night" to the chipboard page. Once adhered I added Glossy Accents to the pumpkin faces. For page 5 I cut apart the Happy Halloween word found, here, for the top and bottom of my photo mat. Once the Happy Halloween word was cut apart I blended Tim Holtz Carved Pumpkin Distress Ink over top of both chipboard pieces.

Page 4 Supplies Used: Tim Holtz Distress Ink - Black Soot, Ranger - Glossy Accents & Reminisce Goosebumps paper - Scary Night.

Page 5 Supplies Used: SRTC - Happy Halloween, Tim Holtz Distress Ink - Black Soot & Carved Pumpkin, Bazzill Cardstock - Orange & Black, Reminisce Goosebumps paper - Scary Night.

Up close picture of the details on page 5

Up close picture of the details on page 5


For page 6 I painted the bat from the happy halloween pack in Black Marble Dylusions paint. I then cut out a cob web from the delicate web die from Memory Box. To add some interest to my cob web I added some sparkle with my Wink of Stella Clear Shimmering pen. For Page 7 I painted the ghost from the happy halloween chipboard piece in White Linen Dylusions paint. I repeated the same step with the cob web that I did on page 6. To add some detail to the black photo mats on both pages, I used the Tim Holtz Cobwebs embossing folder.


Page 6 Supplies Used: SRTC - Happy Halloween, Tim Holtz Distress Ink - Black Soot, Bazzill Cardstock - Orange & Black, Reminisce Halloween paper - Creepy, Wink of Stella - Clear Shimmer, Dylusions Paint - Black Marble, Tim Holtz Embossing Folder - Cobwebs & Memory Box Die - Delicate Web.


Up close details on page 6

Page 7 Supplies Used: SRTC - Happy Halloween Pack, Tim Holtz Distress Ink - Black Soot, Bazzill Cardstock - Orange & Black, Reminisce Halloween paper - Creepy, Wink of Stella - Clear Shimmer, Dylusions Paint - White Linen, Tim Holtz Embossing Folder - Cobwebs & Memory Box Die - Delicate Web.

Up close detail on page 7


On page 8 I blended Black Soot Distress ink over top of the witch from the happy halloween pack. The witch needed some extra detail so I gave her some shimmer using the Wink of Stella Clear Shimmering pen. For page 9 I  adhered the Remininsce paper called "Goosebumps - Happy Halloween", once it was adhered, I added Glossy Accents to the windows of the haunted house. Once again I blended Black Soot Distress ink over top of the witch from the happy halloween pack and added some shimmer with the Wink of Stella Clear Shimmering pen.  

Page 8 Supplies Used: SRTC - Happy Halloween Pack, Tim Holtz Distress Ink - Black Soot, Bazzill Cardstock - Orange & Black, Reminisce Goosebumps paper - Happy Halloween & Wink of Stella - Clear Shimmer.

Page 9 Supplies Used: SRTC - Happy Halloween Pack, Tim Holtz Distress Ink - Black Soot, Bazzill Cardstock - Orange & Black, Reminisce Goosebumps paper - Happy Halloween & Wink of Stella - Clear Shimmer.


Up Close details on page 9


For page 10 I adhered the Reminisce paper called "Halloween -  Scary Jack" to the chipboard page.

Page 10 supplies used: Reminisce  Halloween - Scary Jack & Tim Holtz Distress Ink - Black Soot.

Here is the front of the haunted house mini album:


Thanks for stopping by and taking a look at my project. Have a safe and Happy Halloween and I hope that you will participate in our monthly challenge on the Southern Ridge Trading Company Blog.

Until Next Time!

-Katelyn