Monday, January 30, 2023

So Very Thankful Tag

    Happy Monday!

 I'm back on Creative Scrapbooker Magazine's Blog today as a monthly blogger sharing with you how to create this So Very Thankful Tag. My tag features the The Simple Life Collection from Simple Stories and adhesive from Scrapbook Adhesives by 3L.


You'll want to make sure to stop by the Creative Scrapbooker Blog to learn how to recreate my So Very Thankful Tag at home.

Thanks for stopping by!
- Katelyn


Wednesday, January 25, 2023

Floral Happy Birthday Card

  Happy Wednesday!

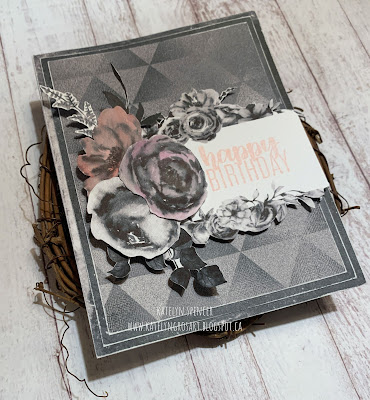
 Today, I'm sharing this beautiful Floral Happy Birthday Card perfect for a friend or loved one. My card features the Midnight Majesty Collection from Simply Stated Design.


To start, you'll need to choose three patterned papers out of the Midnight Majesty Paper Pack. Cut the first patterned paper to 4 1/4" x 5 1/2". Cut the second piece of patterned paper to 4" x 5 1/4". Cut the third piece of patterned paper to 3 3/4" x 5". Sand the edges of all three patterned papers.


From the Midnight Majesty Single Ephemera, you'll need three flowers and three branches. Colour two of the flowers using a waterbrush and Distress Watercolors in Picked Raspberry and Kitsch Flamingo. Fussy cut around the flowers and branches.


Out of the Midnight Majesty Ephemera, you'll need the label with floral on the top and bottom. I used a Happy Birthday sentiment out of Jennifer Edwardson's Simple Sentiments Clear Stamps. Apply Passion Fruit PinkFresh Studio Ink to the sentiment and stamp on the right hand side of the label as desired. Fussy cut around the floral part on the label.


Adhere the 4" patterned paper piece to the 4 1/4" patterned paper piece. Adhere the 3 3/4" patterned paper piece to the 4" patterned paper piece.


Foam square the floral label 1" from the left and 1" from the bottom of the 3 3/4" patterned paper piece. Adhere two of the branches to the top left corner of the floral label.


Adhere the other branch to the bottom left corner of the floral label. Use adhesive and foam squares to adhere the floral as desired to the left side of the floral label making sure you cover up the branches.


To finish the card, cut a cardbase out of white cardstock that measures 4 1/4" x 11", score at 5 1/2". Adhere the cardfront to the cardbase.


Here are some closeups of the finished card.


Here is the finished Floral Happy Birthday Card.


Supplies Used:

- Simply Stated Design: Midnight Majesty 12x12 Paper Pack, Midnight Majesty Ephemera and Midnight Majesty Single Ephemera
- Jennifer Edwardson Creative Inc.: Simple Sentiments Clear Stamps
- PinkFresh Studio: Passion Fruit Ink
- Tim Holtz for Ranger Ink: Distress Watercolor Set 1 & 2
Misc: White Cardstock and Sander

I hope that my Floral Happy Birthday Card have inspired you to recreate your own at home!

- Katelyn


Thursday, January 19, 2023

Happy Birthday Cards

  Happy Thursday!

I'm sharing my Happy Birthday Cards over on Jennifer Edwardson Creative Inc. Blog. My cards feature the Daisy Background Cut File, Geometric Circles Background Cut File, Simple Sentiments Clear Stamps & Cut File, Celebrate Mega Kit and a variety of inks from PinkFresh Studio Ink from Jennifer Edwardson Creative Inc. Shop. 


For all of the details of my Happy Birthday Cards, you'll want to head over to Jennifer Edwardson Creative Inc. 
blog.


- Katelyn


Thursday, January 12, 2023

Winter Floral Tag

  Happy Thursday!

 Today, I'm excited to share this beautiful Winter Floral Tag perfect for adding to a gift or writing a note on the back to send to a friend or loved one. My tag features the Winter Days Collection from Simply Stated Design.


Choose a piece of patterned paper out of the Winter Days Paper Pack. Die cut a 2 3/4" x 4 3/4" tag out of the patterned paper. Sand the edges of the tag.


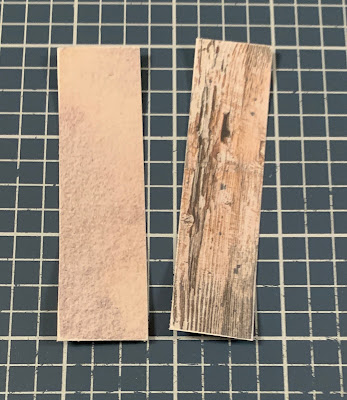
Out of the patterned paper pack, choose two more patterned papers. Cut one piece of patterned paper to 3/4" x 2 7/8". Cut the other piece of patterned paper to 3/4" x 3". Sand the edges of both papers.


Choose one of the tags out of the Winter Days Tags Ephemera. Cut the top of the tag off. Sand the edges of the tag.


Out of the Winter Days Essentials Ephemera, you'll need a circle label, two banners and a pennant. Sand the edges of all of the elements.


Choose one of the florals out of the Winter Days Bouquet Ephemera. Fussy cut around the floral image.


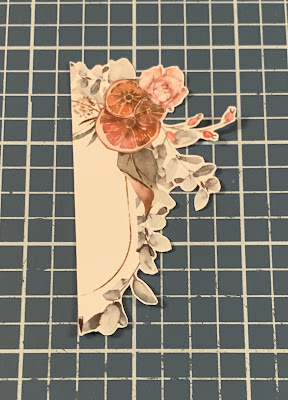
Choose one of the frames out of the Winter Days Frames Ephemera. Cut the frame in half. Fussy cut around the image.


Adhere the pennant 3/8" from the top and 1/4" from the right of the cut down tag. Adhere the half frame to the top right side of the tag.


Adhere the two banners to the bottom right side of the cut down tag as desired.


Staple the two patterned paper pieces 1/4" from the left of the cut down tag as desired. Foam square the tag piece 1/4" from the left and 3/8" from the bottom of the die cut tag. 


Adhere the circle label 3/8" from the bottom and 1 5/8" from the left of the cut down tag. Foam square the floral element to the left hand side of the circle label.


To finish the tag, tie a piece of twine through the hole at the top of the tag.


Here are some closeups of the finished tag.


Here is the finished Winter Floral Tag.


Supplies Used:

- Simply Stated Design: Winter Days 12x12 Paper Pack, Winter Days Bouquet Ephemera, Winter Days Frames Ephemera, Winter Days Essentials Ephemera and Winter Days Tags Ephemera 
- Elizabeth Craft Designs: Nested Tags
Misc: Mini Stapler and Sander

I hope that my Winter Floral Tag have inspired you to recreate your own at home!

- Katelyn


Friday, January 6, 2023

Peace & Joy Mini Album

 Happy Friday!

I'm sharing my Peace & Joy Mini Album over on Jennifer Edwardson Creative Inc. Blog. My mini album feature the BRAND NEW Mandala Background Cut File, Hearth & Holiday Creative Kit and Add On Kit from Jennifer Edwardson Creative Inc. Shop. 


For all of the details, and all the photos of the inside of my Peace & Joy Mini Album, you'll want to head over to Jennifer Edwardson Creative Inc. blog.


- Katelyn