Monday, March 30, 2020

Create, Explore, Dream Tag

Happy Monday! 
I'm excited to be back on Creative Scrapbooker Magazine's Blog as a monthly blogger sharing my Create, Explore, Dream Tag. My project features dies and stamps from Elizabeth Craft Designs, a variety of products from Ranger Ink, embossing powder from Emerald Creek Craft Supplies, cardstock from Creative Scrapbooker Magazine and adhesive from Scrapbook Adhesives by 3L.


You'll want to make sure to stop by the Creative Scrapbooker Blog to learn how I created my Create, Explore, Dream Tag.

Thanks for stopping by!
- Katelyn

Thursday, March 26, 2020

Dream Art Journal Page

Happy Thursday!

 For today's project I get to share with you a project that uses some of the new dies, stencils and stamps from Charlene & Ilse's new Art Journal Specials Collection from Elizabeth Craft Designs. So for today's project, I created a Dream Art Journal Page. You'll want to read below as I have a full tutorial on how to recreate my Dream Art Journal Page at home.


Start by die cutting the ticket page from the Planner Essentials - 11 die out of White Soft Finish Cardstock. Using a brayer, start by brayering on PaperArtsy - Fresco Chalk Acrylic paint - Jade on the page. Continue to layer the PaperArtsy - Fresco Chalk Acrylic paint - Glacier Ice, Blue Lagoon and Coral on the page using a brayer. 


Place the X & 's portion of the stencil from Make Your Mark stencil, on the page as desired. Using a palette knife, put Texture Paste Opaque Matte through the stencil. Move the stencil around and place texture paste through the stencil. You'll want to have five stenciled areas on the page. 

Once the texture paste has dried, choose one of the leaves from the Spring Fling Stamp Set. Apply Jet Black Archival Ink to the leaf and stamp onto the page as desired. Reapply ink to the stamp and stamp seven more times as desired. Reapply ink to the stamp as needed. Distress the edges of the page. Ink the edges of the page using Black Soot Distress Ink and a blending tool with foam.


Choose one of the reinforcements from the Reinforcement Variety Pack. Die cut the reinforcements out of black cardstock. You'll need a total of four.


Apply Jet Black Archival Ink to one of the girls from the Floral Girls Stamp Set and stamp onto a piece of watercolour cardstock. Use a waterbrush and Scribble Sticks 1&2 to colour the girl in. Once the girl has dried, fussy cut her out. Ink the edges of the girl using Black Soot Distress Ink and a blending tool with foam.


Using the Morning Letters, spell out the word dream and apply Jet Black Archival Ink to the word. Stamp the word onto a piece of White Soft Finish Cardstock. Fussy cut the word out. Ink the edges of the word using Black Soot Distress Ink and a blending tool with foam.


Die cut the floral leaf branch from the Blooming Branches die out of book page.


From the Blooming Branches die, die cut the heart branch once out of black cardstock and a second time out of kraft cardstock.


From the Budding Florals die, die cut the bulb out of black cardstock.


Die cut one 1 1/2" Diagonal Stitched Fishtail out of White Soft Finish Cardstock. Die cut one 1" Diagonal Stitched Fishtail out of book page. From the top of the white fishtail, tear off enough so that the fishtail ends up being 4" long. From the top of the book page fishtail, tear off enough so that the fishtail ends up being 3 3/4" long. Distress the edges of the fishtails. Ink the edges of the fishtails using Black Soot Distress Ink and a blending tool with foam.


Die cut the Bubbles die out of black cardstock. Cut the bubbles down to fit the page as desired.


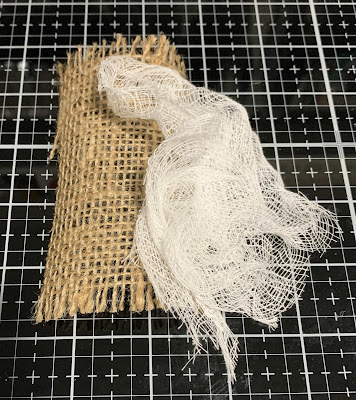
Die cut a 2 1/2" x 4 1/4" piece of burlap. Cut a piece of cheesecloth that's big enough to look good bunched up.


Adhere the reinforcement circles over top of each circle on the page. Adhere the burlap piece 1" from the top and all the way to the right hand side of the page. Adhere the bubble piece 3/8" from the top of the page and all the way to the right hand side of the page. 


Foam square the white fishtail 1 1/4" from the top and 1/4" from the right of the page. Adhere the book page fishtail 1 1/8" from the top and 1 3/8" from the left of the page. Adhere the bunched cheese cloth overtop of the fishtails as desired.


Adhere the black bulb to the middle of the cheese cloth. Adhere the two heart leaves and floral leaf branch as desired over top of the black bulb.


Use foam squares to adhere the girl partially overtop of the heart leaves and floral leaf bunch. Use adhesive and foam squares to adhere the dream sentiment to the bottom left hand side of the girl as desired.


To finish the page, use a paint brush to splatter Brushed Pewter Distress Spray Stain over the page as desired. 


Here are a few closeup photos of the finished art journal page.


Here is the finished Dream Art Journal Page.


Elizabeth Craft Designs Supplies Used:

- 6mm

Other Supplies Used:

- Tim Holtz for Ranger Ink: Distress Ink - Black Soot, Distress Spray Stain - Brushed Pewter and Blending Tool with Foam
- Dina Wakley for Ranger Ink: Scribble Sticks 1 & 2
- Ranger Ink: Jet Black Archival Ink and Texture Paste Opaque Matte
- PaperArtsy - Fresco Finish Chalk Acrylics: Glacier Ice, Coral, Jade and Blue Lagoon
- Misc: Burlap, Cheesecloth, Black Cardstock, Kraft Cardstock, Watercolour Cardstock and Book page

I hope that my wall hanging has inspired you to recreate your own version of my Dream Art Journal Page.

- Katelyn


Wednesday, March 25, 2020

Happy Easter Card

Happy Wednesday! 
I'm up on Southern Ridge Trading Company's blog sharing my Happy Easter Card. I hope that my card inspires you to recreate your own version at home.


You'll want to stop by Southern Ridge Trading Company's blog so that you can learn how I created my Happy Easter Card at home.

- Katelyn


Tuesday, March 24, 2020

Inspire Tag

Happy Tuesday! I'm up on the Elizabeth Craft Designs blog today, sharing my Inspire Tag. My tag features a variety of the new Art Journal Specials Collection from Charlene & Ilse as well as dies from the Planner Essentials Collection and Joset Designs.


For a full tutorial on my tag, you'll want to head over to the Elizabeth Craft Designs blog for all the details. 

- Katelyn

Friday, March 20, 2020

Live Life in Full Bloom Wall Hanging

Happy Friday!
I'm over on Wild Whisper's blog, where I'm sharing my Live Life in Full Bloom Wall Hanging which features some products from Nicole Wright's Collection as well as the Strength of the Season Collection.


For all the details, more photos and a full tutorial on my Live Life in Full Bloom Wall Hanging you'll want to stop by the Wild Whisper blog. You'll want to make sure to keep checking out Wild Whisper's blog as the design team will be sharing lots of inspiration.

- Katelyn

Wednesday, March 18, 2020

Elizabeth Craft Designs March Group Post - Projects for the First Day of Spring

Happy Wednesday!

For March's Group Post it's all about Projects for the First Day of Spring. For this month's group post, I'm sharing my Bloom Card. To create my card, I've used dies from Els van de Burgt Studio, Suzanne Cannon - A Way With Words, Joset Designs as well as stamps from Joset Designs and the Planner Essentials Collection. Grab a cup of your favourite Spring beverage and read below as I have a tutorial for you so that you can re-create my Bloom Card at home. You'll also want to make sure to stop by the Elizabeth Craft Designs Blog to check out the rest of the projects.


To start, die cut a 3" Stitched Rectangle out of White Soft Finish Cardstock.


Apply Cracked Pistachio, Peacock Feathers and Squeezed Lemonade Distress Oxide Ink on a 3" x 4" clear block. Spritz the ink with water and then placed the inked block onto the 3" rectangle. Dry the rectangle with a heat tool.


Apply Mermaid Lagoon Distress Ink to the chicken wire stamp from the Background Stamps 1 stamp set and stamp randomly on the 3" rectangle. Reapply ink as needed to the stamp. You'll want to stamp a total of five times. Distress the edges of the rectangle. Ink the edges of the rectangle using Black Soot Distress Ink and a blending tool with foam.


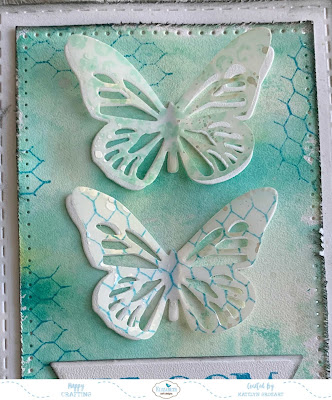
Die cut two medium butterflies from the Butterfly Flourish die out of vellum. Apply Mermaid Lagoon Distress Ink to the chicken wire stamp and stamp onto one of the vellum butterflies. You'll need to stamp the chicken wire twice on the butterfly. Apply Cracked Pistachio Distress Ink to the dots stamp from the Background Stamps 1 and stamp onto the other vellum butterfly. You'll need to stamp the dots twice on the butterfly. Dry the ink on the butterflies with a heat tool.


Die cut two medium butterflies from the Butterfly Flourish die out of White Soft Finish Cardstock.


Die cut a 5/8" Fitted Fishtail out of White Soft Finish Cardstock. Cut the fishtail down to 2 5/8". Place the notched side of the fitted fishtail onto the straight edge of the banner and die cut the notch portion out of the right hand side. Apply Mermaid Lagoon Distress Ink to the Bloom stamp from the Spring Sentiments stamp set and stamp in the middle of the banner. Ink the edges of the banner using Black Soot Distress Ink and a blending tool with foam.


Die cut a 3 1/2" Stitched Rectangle out of White Soft Finish Cardstock. Distress the edges of the rectangle. Ink the edges of the rectangle using Black Soot Distress Ink and a blending tool with foam.


Adhere the 3" rectangle to the 3 1/2" rectangle.


Adhere one of the vellum butterflies to one of the white soft finish cardstock butterfly. Adhere the other vellum butterfly to the other white soft finish cardstock butterfly. Adhere one of the butterflies 1/4" from the top and 3/8" from the right of the 3" rectangle. Adhere the other butterfly 1 1/8" from the bottom and 3/8" from the right of the 3" rectangle. Adhere the Bloom banner 1/4" from the bottom and 1/4" from the right of the 3" rectangle. 


Cut a cardbase out of White Soft Finish Cardstock that measures 3 1/2" x 9 1/2", score at 4 3/4". Adhere the cardfront to the cardbase.


To finish the card, splatter Picket Fence Distress Spray Stain using a paint brush over the cardfront as desired.


Here are a few closeup photos of the card.


Here is the finished Bloom Card.


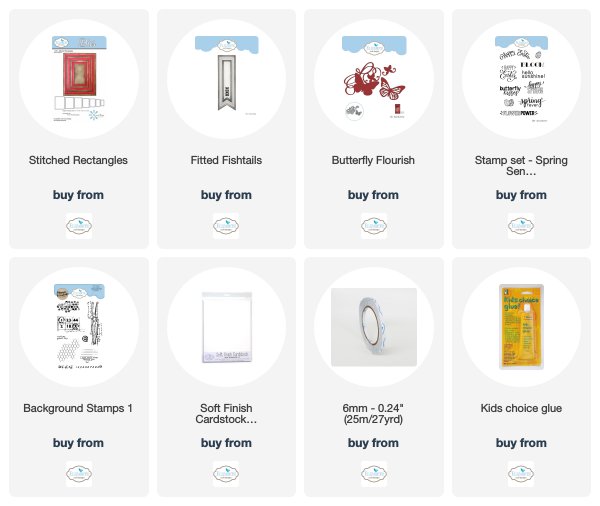
Elizabeth Craft Designs Supplies Used:


Other Supplies Used:

- Tim Holtz for Ranger Ink: Distress Oxide Ink - Cracked Pistachio, Peacock Feathers & Squeezed Lemonade, Distress Ink - Cracked Pistachio, Mermaid Lagoon & Black Soot, Distress Spray Stain - Picket Fence and Blending Tool with Foam
- Misc: Vellum

Thanks so much for joining me today and I hope that I have inspired you to recreate your own version of my Bloom Card.

- Katelyn


Monday, March 16, 2020

The Real Voyage of Discovery Art Journal Page

Happy Monday!
I'm up on the Quietfire Design blog today, where I'm sharing my The Real Voyage of Discovery Art Journal Page. My art journal page features a variety of Quietfire stamps, dies and the Modern Gilding Powder.


For a full tutorial and a few more photos of my project, you'll want to head over to Quietfire Design blog for all the details. 

- Katelyn

Friday, March 13, 2020

Proud, Loved, Creative Art Journal Page

Happy Friday! 

I have been busy playing with the planner dies this week, to create this Proud, Loved, Creative Art Journal Page. To create my page, I've combined some of the dies and stamps from the Planner Essentials Collection as well as stamps from Charlene van der Vorst. You'll want to grab a cup of your favourite beverage and learn how to recreate my Proud, Loved, Creative Art Journal Page at home.


Die cut the page from the Planner Essentials - 4 die out of White Soft Finish Cardstock. Cut the page down to 7 1/4". Using Magenta Nuance - Aquamarine and paint brush with water to add colour about 3 1/2" x 5 3/4" patch. Allow the coloured area to dry. 


Die cut the numbers from the Planner Patterns die out of a scrap piece of paper. Place the stencil randomly on the page and place texture paste through the stencil. Repeat the previous step three more times. Allow the texture paste to dry.


Apply Jet Black Archival Ink to the Chicken Wire stamp set from the Background Stamps 1 stamp set and stamp randomly on the page as desired. You will need a total of five chicken wire images on the page. Reapply ink to the stamp as needed. Apply Jet Black Archival Ink to the Dots stamp set from the Background Stamps 1 stamp set and stamp randomly on the page as desired. You will need a total of four dots images on the page. Reapply ink to the stamp as needed. Distress the edges of the page. Ink the edges of the page using Black Soot Distress Ink and a blending tool with foam.


Next, you'll need two Index Clips. 


From the Planner Essentials 24 - Photo Frame Pages, die cut the film strip three times out of black cardstock.


Die cut the number pattern from the Planner Patterns out of a piece of light cardboard.


Die cut the diamond pattern from the Planner Patterns out of White Soft Finish Cardstock.


Choose one of the reinforcement styles out of the Reinforcement Variety Pack. Die cut the reinforcements out of black cardstock.


Choose one of the Celebration Flags and die cut the flags once out of kraft cardstock and a second time out of black cardstock.


Apply Jet Black Archival Ink to the girl from the Make a Wish Stamp set. Stamp the girl onto a piece of watercolour cardstock. Using a waterbrush, colour the girl in using Prima Marketing - Tropicals Watercolour Confections and Dina Wakley - Scribble Sticks #2 - Blushing. Once the girl has dried, fussy cut the girl out. Ink the edges of the girl using Black Soot Distress Ink and a blending tool with foam.


Apply Jet Black Archival Ink to the Proud, Loved and Creative words from the Journaling Elements stamp set and stamp onto a piece of White Soft Finish Cardstock. Cut each word out in a strip. Distress the edges of the word strips. Ink the edges of the word strips using Black Soot Distress Ink and a blending tool with foam. 


Next, you'll need the medium and small Note Pieces from the Planner Essentials 21 - Note Pieces die. Die cut the medium note piece out of kraft cardstock and a piece of book page. Die cut the small note piece out of a piece of book page. Cut the small note piece in half. Distress the edges of the note pieces. Ink the edges of the note pieces using Black Soot Distress Ink and a blending tool with foam.


Adhere the reinforcement circles overtop of the circles on the page. Adhere one filmstrip 3/8" from the top and 2" from the left of the page. Adhere the second filmstrip 5/8" from the top and 1" from the right of the page. Adhere the third filmstrip 1/2" from the bottom and 1 1/2" from the right of the page. 


Adhere one of the half small note piece 1/2" from the right and 1" from the top of the page. Adhere the other half of the small note piece 1/4" from the right and 3/4" from the bottom of the page. Adhere the number pattern 1 3/8" from the top and 3/4" from the left of the page. 


Foam square the medium kraft piece 1 3/4" from the top and 1/8" from the right of the page. Adhere the diamond pattern 1 7/8" from the top and 3/8" from the right of the page. Use adhesive and foam squares to adhere the medium book page note piece 2 3/8" from the top and 7/8" from the right of the page. Adhere one of the index clips to the top right side of the kraft note piece. Adhere the other index clip 1" from the top of the diamond pattern on the left hand side of the pattern.


Foam square the girl 3/4" from the bottom and 1/2" from the right of the page. Adhere the proud word to the left of the hair. Use adhesive and foam squares to adhere the Loved word to the left of the girl as desired. Use adhesive and foam squares to adhere the Creative word to the left of the the girl as desired. 


To finish off the page, adhere the black banner to the page as desired. Adhere the kraft banner overtop of the black banner as desired. 


Here are a few closeup photos of the art journal page.


Here is the finished Proud, Loved, Creative Art Journal Page.


Elizabeth Craft Designs Supplies Used:


Other Supplies Used:

- Magenta Nuance: Aquamarine
- Prima Marketing: Tropicals Watercolour Confections
- Dina Wakley for Ranger Ink: Scribble Sticks #2 - Blushing
- Ranger Ink: Jet Black Archival Ink and Texture Paste Opaque Matte
- Tim Holtz for Ranger Ink: Distress Ink - Black Soot and Blending Tool with foam
- Tim Holtz Idea-ology: Index Clips
- Misc: Kraft Cardstock, Black Cardstock, Watercolour Cardstock and Book Page

Thanks so much for joining me today and I hope that I have inspired you to recreate your own version of my Proud, Loved, Creative Art Journal Page.

- Katelyn