Wednesday, September 27, 2023

Sun Kissed Mini Album

Happy Wednesday!

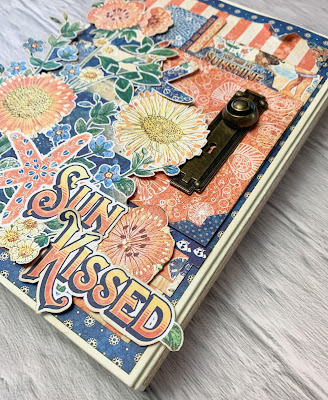
Today, my #G45LeveledUp Sun Kissed Mini Album is being shared over on Graphic 45's Blog. To create the mini album, I based it off of the Album Kit Vol 23 V5 which features the Sun Kissed Deluxe Collectors Edition as well as a variety of Staples from Graphic 45. 


Head over to Graphic 45's Blog as I have shared how I changed this beautiful vintage Sun Kissed Mini Album from the original of the Album Kit Vol 23 V5. Make sure to check Graphic 45's Blog out as well as their instagram page for more inspiration from the team.

- Katelyn


Tuesday, September 26, 2023

Oh Darling, Let's Be Adventurers Mini Album

   Happy Tuesday !

 I'm back on Creative Scrapbooker Magazine's Blog today as a monthly blogger sharing with you  this adorable Oh Darling, Let's Be Adventurers Mini Album. My mini album features the Here & There Collection from Simple Stories and adhesive from Scrapbook Adhesives by 3L.


You'll want to make sure to stop by the Creative Scrapbooker Blog for a tutorial and more photos of my Oh Darling, Let's Be Adventurers Mini Album.

Thanks for stopping by!
- Katelyn


Monday, September 25, 2023

Wild & Free Traveler's Notebook Page

   Happy Monday!

Today, I'm sharing this Wild & Free Traveler's Notebook Page over on Jennifer Edwardson Creative Inc. Blog. My page features the BRAND NEW Birth Flowers July-Sept Cut File Bundle, Tabs & Shapes Cut File Bundle and Wildflower Creative Kit from Jennifer Edwardson Creative Inc. Shop.


For all of the details on my Wild & Free Traveler's Notebook Page, you'll want to head over to Jennifer Edwardson Creative Inc. blog.


- Katelyn


Tuesday, September 19, 2023

Fall-Elujah Envelope

 Happy Tuesday!

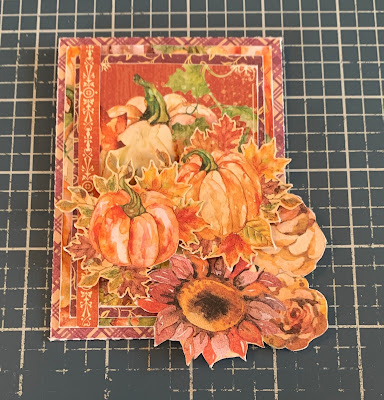
I'm in the Fall mood and have been creating some Fall projects over the last few weeks. So, for today's post I'm sharing this vintage Fall-Elujah Envelope using Graphic 45's Hello Pumpkin Collection.


To start, cut out the policy envelope from the Policy & Decorative Dies out of the purple plaid paper from the Hello Pumpkin 12x12 Patterns & Solids. Die cut the scallop circles from the same die out of a piece of orange paper from the Hello Pumpkin 12x12 Patterns & Solids. Sand the edges of the envelope and circles.


From the Hello Pumpkin 12x12 Collection Pack, you'll need the Harvest Time Paper and Falling Leaves Paper. Cut the Harvest Time paper to 2 3/8" x 3 3/8". Cut the Falling Leaves paper to 2 5/8" x 3 5/8". Sand the edges of the papers. 


Cut the flourish border strip and pumpkin image from the Beautiful Bounty Paper. Cut the flourish border strip to 3 5/8". Cut the pumpkin image to 2 1/4" x 3 1/8". Sand the edges of both papers.


From the Color Me Happy Paper, fussy cut three pumpkins out. Sand the edges of the pumpkins.


From the Hello Pumpkin paper, fussy cut a three flower bunch, a two acorn bunch a single yellow flower and a double yellow flower. Sand the edges of the images.


Out of the Hello Pumpkin Ephemera, you'll need the Fall-Elujah banner. Sand the edges of the banner.


Adhere the policy envelope together. 


Adhere the circles over the dots on the back of the policy envelope.


Adhere the pumpkin paper to the envelope. Adhere the purple vine paper to the pumpkin paper. Adhere the pumpkin image to the purple vine paper. Adhere the flourish border strip to the left side of the pumpkin image. 


Adhere the three flower bunch to the bottom right corner of the envelope. Use foam squares and adhesive to adhere two pumpkins slightly over top of the flowers and around the large pumpkin on the image. 


Use adhesive and foam squares to adhere the last pumpkin to the bottom of the other two pumpkins. Adhere the acorns to the left of the bottom pumpkin.


Adhere the yellow flowers as desired in amongst the top portion of the foam squared pumpkins. Foam square the Fall-Elujah banner to the bottom left portion of the pumpkins and acorns.


To finish off the envelope, stick a total of five black and gold Matte Pearl Gems to the envelope as desired. 


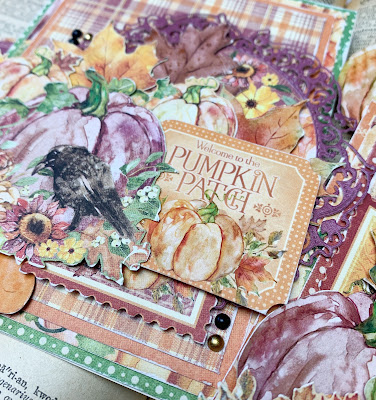
Here are a few closeups of the finished envelope.


Here is the finished Fall-Elujah Envelope.


Supplies Used:

- Graphic 45: Hello Pumpkin 12x12 Collection Pack, Hello Pumpkin 12x12 Patterns & Solids Pack, Hello Pumpkin Ephemera, Matte Pearl Gems and Policy & Decorative Dies

I hope that my Fall-Elujah Envelope has inspired you to recreate your own at home!

- Katelyn


Friday, September 15, 2023

Bloom Baby, Bloom Wall Hanging

  Happy Friday!

 I'm up on Wild Whisper's blog today, sharing this Bloom Baby, Bloom Wall Hanging which features the BRAND NEW In Nature Collection.


For all the details and a tutorial on my Bloom Baby, Bloom Wall Hanging, you'll want to stop by the Wild Whisper blog. You'll want to make sure to keep checking out Wild Whisper's blog as the design team will be sharing lots of inspiration.

Don't forget to use DTKATELYNG to receive 10% off your order on Wild Whisper's Website.

- Katelyn


Monday, September 11, 2023

You're My Main Squeeze Card

Happy Monday! 

Today, I'm sharing this adorable You're My Main Squeeze Card that features the Lemon Squeeze Collection from Simply Stated Design.


From the Lemon Squeeze 12x12 Paper Pack, you'll need yellow white dot paper, daisy paper and lemon paper. Cut a piece from the lemon paper that measures 4" x 5 1/4". Cut a piece from the yellow white dot paper that measures 3 3/4" x 5". Cut a piece from the daisy paper that measures 3 1/2" x 4 3/4". Sand the edges of the three papers.


From the Lemon Squeeze Essentials Ephemera, you'll need the green tab, yellow/white striped tag, dotted circle and you're my main squeeze lemon. Sand the edges of all of the pieces. 


From the Lemon Squeeze Ephemera, you'll need the two lemon rounded corner border and lemon with flowers. Sand the edges of the images. 


From the Lemon Squeeze Single Ephemera, you'll need two daisies and two leaves.


Adhere the yellow white dot paper to the lemon paper. Adhere the green tab 7/8" from the top on the right hand side of the daisy paper. Adhere the daisy paper to the yellow white dot paper. 


Foam square the yellow white striped tag 1/2" from the right and 1/2" from the top of the tag. Adhere the lemon with white flowers to the top right side of the tag. Adhere the main squeeze lemon circle to the dotted circle. Use adhesive and foam squares to adhere the dotted circle 1/4" from the left and 1 3/4" from  the top of the daisy paper.


Adhere a daisy and leaf to the right side of the dotted circle as desired. Adhere the other daisy and leaf to the top left side of the dotted circle. Use adhesive and foam squares to adhere the two lemon border to the bottom left portion of the dotted circle as desired. 


To finish the card, cut a cardbase out of white cardstock that measures 4 1/4" x 11", score at 5 1/2". Adhere the cardfront to the cardbase.


Here are a few closeup photos of the finished card.


Here is the finished You're My Main Squeeze Card.


Supplies Used:

- Simply Stated Design: Lemon Squeeze 12x12 Paper Pack, Lemon Squeeze Ephemera, Lemon Squeeze Single Ephemera and Lemon Squeeze Essentials Ephemera 
Misc: White Cardstock 

I hope that my You're My Main Squeeze Card have inspired you to recreate your own at home!

- Katelyn


Saturday, September 9, 2023

Fall Cards

  Happy Saturday!

Yesterday, my Fall Cards were shared over on Graphic 45's Blog as well as a reel on their Instagram page. To create the cards, I used the Hello Pumpkin Collection as well as a variety of other products from Graphic 45.


Head over to Graphic 45's Blog as I have a tutorial on how I created these beautiful vintage Fall Cards. Make sure to check Graphic 45's Blog out as well as their instagram page for more inspiration from the team.

- Katelyn


Friday, September 8, 2023

Hello September

  Happy Friday!

Today, I'm sharing this Hello September Page over on Jennifer Edwardson Creative Inc. Blog. My page features the BRAND NEW Hello September Cut File, Summer Blooms Clear Stamps and the Simple Vintage Weathered Garden Add On Kit from Jennifer Edwardson Creative Inc. Shop.


For all of the details on my Hello September Page, you'll want to head over to Jennifer Edwardson Creative Inc. blog.


- Katelyn