Thursday, April 29, 2021

Welcome Little One Gift Tag

   Happy Thursday!

Today's post, I'm sharing this Welcome Little One Gift Tag.  To create my gift tag, I've used dies from the Planner Essentials Collection as well as dies and stamps from Joset Designs. You'll want to read below as I have a full tutorial on how to recreate my gift tag at home.  


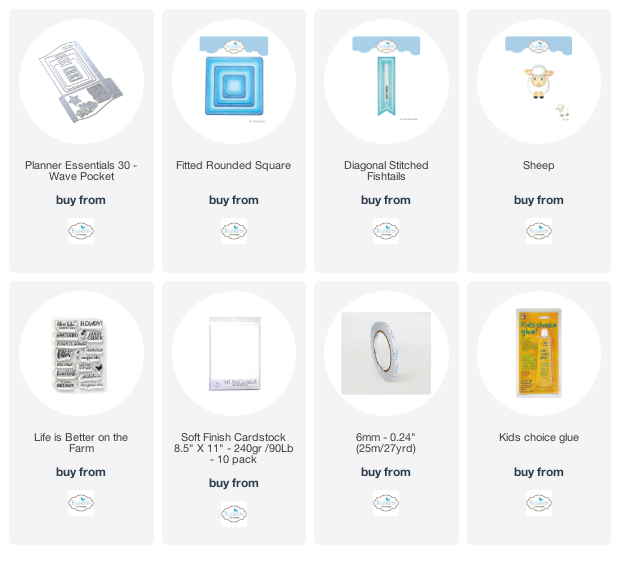
To start, choose a piece of baby themed patterned paper. Die cut the 3" Tag from the Planner Essentials 30 - Wave Pocket die out of the patterned paper. Ink the edges of the tag using Walnut Stain Distress Ink and a blending tool with foam.


Choose a piece of coordinating patterned paper. Die cut a 2 1/4" Fitted Rounded Square out of the patterned paper. Cut the square down to 2 1/8". Ink the edges of the square using Walnut Stain Distress Ink and a blending tool with foam.


Choose a third piece of coordinating patterned paper. Die cut a 3/4" Diagonal Stitched Fishtail out of the patterned paper. Cut the fishtail down to 3 5/8". Ink the edges of the fishtail using Walnut Stain Distress Ink and a blending tool with foam.


The next four steps use the Sheep die.

Die cut the eyes and the three scalloped circles out of a piece of White Soft Finish Cardstock.


Die cut the head, ears and feet out of a piece of White Soft Finish Cardstock. Using a blending tool with foam, blend Tattered Rose Distress Ink over the entire surface of the pieces. 


Die cut the plain eyes out of a piece of White Soft Finish Cardstock. Colour the eyes using a black marker.


Die cut the hooves out of a piece of black cardstock.


Adhere the fishtail 1 1/8" from the bottom and all the way to the right hand side of the tag. Adhere the square 1/2" from the bottom of the tag and all the way to the right hand side of the tag.


Adhere the sheep together.


Foam square the sheep to the middle of the square.


To finish the tag, tie a piece of twine through the hole at the top of the tag.


Here are a few closeup photos of the finished gift tag.


Here is the finished Welcome Little One Gift Tag.


Elizabeth Craft Designs Supplies Used:

Other Supplies Used:

- Tim Holtz for Ranger Ink: Distress Ink - Walnut Stain & Tattered Rose and Blending Tool with Foam
- Pink Fresh: Detail Black Ink
- Echo Park Paper: Welcome Baby Paper Pack
- Misc: Twine and Black Cardstock

I hope that my gift tag has inspired you to recreate your own version at home.

- Katelyn


Tuesday, April 27, 2021

Destiny Card

 Happy Tuesday!

I'm up on the Quietfire Design blog today, where I'm sharing my Destiny Card. My card features a variety of A Way With Words Dies and stamps from Quietfire Design.


For a full tutorial on my card, you'll want to head over to Quietfire Design blog for all the details. 

- Katelyn


Monday, April 26, 2021

Grow Art Journal Page

I have one more post to share with you today.

I'm back on Creative Scrapbooker Magazine's Blog today as a monthly blogger sharing with you how to create this Grow Art Journal Page. My art journal page features a variety of products from the Ranger Ink and adhesive from Scrapbook Adhesives by 3L.   


You'll want to make sure to stop by the Creative Scrapbooker Blog to learn how to recreate my Grow Art Journal Page at home.

Thanks for stopping by!
- Katelyn


Live in the Moment Wall Hanging

 Happy Monday!

I'm up on the Elizabeth Craft Designs blog today, where I'm sharing my Live in the Moment Wall Hanging which features dies from the Paper Flower Collection as well as dies and stamps from Joset Designs.


For a full tutorial on my Live in the Moment Wall Hanging, you'll want to head over to the Elizabeth Craft Designs blog for all the details. 

- Katelyn


Sunday, April 25, 2021

Planted With Love Card

 Happy Sunday! 

Today's post, is all about this Planted With Love Card. My card uses dies from the Planner Essentials Collection and Joset Designs as well as stamps from the Sidekick Essentials Collection. You'll want to grab a cup of your favourite beverage and learn how to recreate my card at home. 


To start, choose two pieces of patterned paper out of the Reminiscence the Book. From the first patterned paper, die cut a 3 1/2" Stitched Indented Rectangle. From the second piece of patterned paper, die cut a 3" Stitched Indented Rectangle. Ink the edges of both rectangles using Walnut Stain Distress Ink and a blending tool with foam.


From a piece of kraft cardstock, die cut a 3 1/4" Fitted Indented Rectangle. Ink the edges of the rectangle using Walnut Stain Distress Ink and a blending tool with foam.


From the Planner Essentials 21 - Note Pieces die, you'll need the 1 1/2" note piece. Choose another piece of patterned paper out of the Reminiscence the Book. Die cut the note piece out of the patterned paper. Ink the edges of the note piece using Walnut Stain Distress Ink and a blending tool with foam.


From the Sidekick Essentials - In My Garden Stamp Set, you'll need the bee hexagon stamp. Apply Wild Honey Distress Ink to the stamp and stamp onto a piece of White Soft Finish Cardstock. Fussy cut the hexagon out. Ink the edges of the hexagon using Walnut Stain Distress Ink and a blending tool with foam.


From the Sidekick Essentials - Planted With Love Stamp Set, you'll need the square, 15 cents and planted with love stamps. Apply Fired Brick Distress Ink to the square stamp and stamp onto a piece of White Soft Finish Cardstock. Apply Detail Black Ink to the 15 cents and Planted with love stamps and stamp onto a piece of kraft cardstock. Fussy cut the square, 15 cents and planted with love pieces out. Ink the edges of the pieces using Walnut Stain Distress Ink and a blending tool with foam.


From the Sidekick Essentials - Home & Nature Stamp Set, you'll need the Forget Me Not stamp. Apply Forest Moss Distress Ink to the stamp and stamp onto a piece of White Soft Finish Cardstock. Fussy cut the forget me not rectangle out. Ink the edges of the rectangle using Walnut Stain Distress Ink and a blending tool with foam.


Adhere the 3 1/4" rectangle to the 3 1/2" rectangle. Foam square the 3" rectangle to the 3 1/2" rectangle.


Adhere the note piece 1/2" from the bottom and 1/8" from the right of the 3" rectangle. Adhere the forget me not rectangle 1/2" from the right and 3/4" from the bottom of the 3" rectangle.


Adhere the 15 cents underneath the forget me not rectangle. It will sit just above the orget. Adhere the bee hexagon to the left of the 15 cents and forget me not rectangle.


Foam square the flower square 1/4" from the bottom and all the way to the left hand side of the 3" rectangle. Use adhesive and foam squares to adhere the planted with love sentiment 1 3/8" from the right and 1/2" from the bottom of the 3" rectangle.


To finish the card, cut a cardbase out of White Soft Finish Cardstock that measures 4 3/4" x 7", score at 3 1/2". Adhere the cardfront to the cardbase.


Here are a few closeup photos of the finish card.


Here is the finished Planted With Love Card.


Elizabeth Craft Designs Supplies Used:

 
Other Supplies Used:

- Tim Holtz for Ranger Ink: Distress Ink - Walnut Stain, Fired Brick, Forest Moss & Wild Honey and Blending Tool with Foam
- Pink Fresh: Detail Black Ink
- Misc: Kraft Cardstock 

Thanks so much for joining me today and I hope that I have inspired you to recreate your own version of my Planted With Love Card.

- Katelyn


Thursday, April 22, 2021

Blossom Notecard

 Happy Thursday!

For today's project I'm back with a Blossom Notecard. To create my notecard, I've used a variety of dies from the Paper Flower Collection as well as stamps and dies from Joset Designs. You'll want to read below as I have a full tutorial on how to recreate my notecard at home.


To start, choose two pieces of coordinating patterned paper. Die cut a 3 1/2" Stitched Rounded Rectangle out of one of the patterned papers. Die cut a 3" Stitched Rounded Rectangle out of the other patterned paper. Ink the edges of both patterned papers using Walnut Stain Distress Ink and a blending tool with foam.


Die cut a 3 1/4" Fitted Rounded Rectangle out of a piece of White Soft Finish Cardstock. Ink the edges of the rectangle using Walnut Stain Distress Ink and a blending tool with foam.


Die cut a 5/8" Fitted Fishtail out of a piece of White Soft Finish Cardstock. Cut the fishtail down to 3". From the Zen Sentiments stamp set, you'll need the blossom sentiment. Apply Detail Black Ink to the sentiment and stamp on the right hand side of the fishtail. Ink the edges of the fishtail using Walnut Stain Distress Ink and a blending tool with foam.


The next four steps use the Florals 9 die.

Die cut the small leaf set once and the large leaf set twice out of a piece of green paper.


Die cut the centres once out of a piece of White Soft Finish Cardstock. You'll need a total of three centres.


Die cut two large, two medium and two small flowers out of a piece of pink paper.


Die cut one extra large, one large, one medium and one small flower out of a piece of blue patterned paper.


Adhere the 3 1/4" rectangle to the 3 1/2" rectangle. Foam square the 3" rectangle to the 3 1/4" rectangle.


Adhere the blossom fishtail 1/4" from the right and 1" from the bottom of the 3" rectangle.


Adhere the blue flowers together with a white centre. Adhere the pink flowers together with a white centre. Shape the leaves and flowers as desired.


Adhere the leaves as desired on the left hand side of the 3" rectangle.


Adhere the blue patterned flower to the end of the fishtail. Adhere the two remaining pink flowers around the blue patterned flower as desired.


To finish the card, cut a cardbase out of White Soft Finish Cardstock that measures 4 3/4" x 7", score at 3 1/2". Adhere the cardfront to the cardbase.


Here are a few closeup photos of the finished notecard.


Here is the finished Blossom Notecard.


Elizabeth Craft Designs Supplies Used:

Other Supplies Used:

- Tim Holtz for Ranger Ink: Distress Ink - Walnut Stain and Blending Tool with Foam
- Pink Fresh: Detail Black Ink
- Graphic 45: Woodland Friends - 12x12 Patterns & Solids and Woodland Friends Collection Pack

I hope that my notecard has inspired you to recreate your own version of my Blossom Notecard.

- Katelyn