Wednesday, March 31, 2021

Bloom Card

  Happy Wednesday!

Today's post, I'm sharing this Bloom Card.  To create my card, I've used stencils, dies and stamps from the Art Journal Collection. You'll want to read below as I have a full tutorial on how to recreate my card at home.  


To start, die cut a 4" Stitched Rounded Rectangle out of a piece of White Soft Finish Cardstock. Ink the edges of the rectangle using Walnut Stain Distress Ink.


Choose a piece of patterned paper out of the Worn Wood Paper Pack. Die cut a 3 3/4" Fitted Rounded Rectangle out of the paper. Ink the edges of the rectangle using Walnut Stain Distress Ink and a blending tool with foam.


Die cut a 3 1/2" Stitched Rounded Rectangle out of a piece of kraft cardstock. Place the Bloom stencil on the left hand side of the rectangle. Using a palette knife, put Texture Paste Opaque Matte through the stencil as desired. Remove the stencil. Once the texture paste has dried, ink the edges of the rectangle using Walnut Stain Distress Ink and a blending tool with foam.


From the Flower Power die, die cut the flower and one of the flower branches out of a piece of White Soft Finish Cardstock. Using a waterbrush and the Watercolour Palette, colour the two flowers as desired.


From the Morning Letters stamp set, you'll need the letters to spell out bloom. Apply Black Archival Ink to the letters and stamp onto a piece of White Soft Finish Cardstock. Fussy cut the bloom word out. Ink the edges of the word using Walnut Stain Distress Ink and a blending tool with foam.


Adhere the 3 3/4" rectangle to the 4" rectangle. Foam square the 3 1/2" rectangle to the 3 3/4" rectangle.


Adhere the two flowers as desired to the left hand side of the card. Adhere the bloom word to the bottom stems of the flowers as desired.


To finish the card, cut a piece of White Soft Finish Cardstock that measures 4" x 10 1/2", score at 5 1/4". Adhere the cardfront to the cardbase.


Here are a few closeup photos of the finished card.


Here is the finished Bloom Card.


Elizabeth Craft Designs Supplies Used:


Other Supplies Used:

- Tim Holtz for Ranger Ink: Distress Ink - Walnut Stain and Blending Tool with Foam
- Ranger Ink: Texture Paste Opaque Matte and Jet Black Archival Ink
- Misc: Kraft Cardstock

I hope that my card has inspired you to recreate your own version at home.

- Katelyn


Monday, March 29, 2021

Hi Notecard

Happy Monday!

I'm up on the Elizabeth Craft Designs blog today, where I'm sharing my Hi Notecard which features dies from the Paper Flower Collection, Els van de Burgt Studio and Joset Designs as well as stamps from the Art Journal Collection.


For a full tutorial on my Hi Notecard, you'll want to head over to the Elizabeth Craft Designs blog for all the details. 

- Katelyn


Friday, March 26, 2021

Memories Tag

  Happy Friday! 

Today's post, is all about this vintage Memories Tag. My tag uses the Sidekick Essentials Collection as well as stamps and dies from the Planner Essentials Collection. You'll want to grab a cup of your favourite beverage and learn how to recreate my tag at home. 


To start, die cut the 3 1/2" Tag from the Planner Essentials 30 - Wave Pocket out of a piece of kraft cardstock.


From the Planner Essentials - Background Stamps 1, you'll need the chicken wire stamp. Apply Emboss It Ink to the stamp and start stamping at the top of the tag. Reapply ink as needed and stamp the stamp all the way to the bottom of the tag. Once the ink has dried, ink the edges of the tag using Walnut Stain Distress Ink and a blending tool with foam.


Choose a piece of patterned paper from the Reminiscence the Book. Die cut the geometric pattern from the Planner Patterns die out of the paper. Cut the pattern down to 2 3/4" wide.


From the Sidekick Essentials - 7 you'll need the leaf branch and the two single leaves. Die cut the leaf branch out of a piece of White Soft Finish Cardstock. Die cut the two single leaves out of a piece of green patterned paper out of the Reminiscence the Book. 


Choose another piece of patterned paper out of the Reminiscence the Book. Die cut the rectangle from the Sidekick Essentials 11 - This Week Fold Out out of the patterned paper. Ink the edges of the rectangle using Walnut Stain Distress Ink and a blending tool with foam.


Choose another piece of patterned paper out of the Reminiscence the Book. Die cut the 2" Note Piece from the Planner Essentials 21 - Note Pieces out of the patterned paper piece. Ink the edges of the note piece using Walnut Stain Distress Ink and a blending tool with foam.


From the Planner Essentials 36 - Windows Overlay die, you'll need the plain small banner and the memories banner. Die cut the plain small banner out of a piece of White Soft Finish Cardstock. Die cut the memories banner out of a piece of kraft cardstock. Ink the edges of both banners using Walnut Stain Distress Ink and a blending tool with foam.


Adhere the geometric pattern to the left hand side of the tag. Adhere the rectangle 3/4" from the right and 1/2" from the bottom of the tag.


Use adhesive and foam squares to adhere the note piece 1 1/4" from the right and 3/4" from the bottom of the tag. Staple the large leaf branch to the left hand side of the tag as desired.


Adhere the two single leaves as desired on the tag.


Adhere the memories banner to the plain banner. Adhere the memories banner 1 1/4" from the bottom and 1 3/8" from the left of the tag. Staple the bottom right corner of the banner to the tag.


Tie a piece of white ribbon through the top of the tag.


Here are a few closeup photos of the tag.


Here is the finished Memories Tag.


Elizabeth Craft Designs Supplies Used:

- Sidekick Essentials 11 - This Week Fold Out

Other Supplies Used:

- Tim Holtz for Ranger Ink: Distress Ink - Walnut Stain and Blending Tool with Foam
- Ranger Ink: Emboss It Dabber
- Stella & Wolfe Ribbon: White Ribbon
- Misc: Kraft Cardstock and Mini Stapler

Thanks so much for joining me today and I hope that I have inspired you to recreate your own version of my Memories Tag.

- Katelyn


Wednesday, March 24, 2021

Let Your Feet Wander Wall Hanging

 Happy Wednesday!

I'm up on Wild Whisper's blog today, where I'm sharing my Let Your Feet Wander Wall Hanging. The wall hanging features the No Place Like Home Collection as well as stamps from the Floral Collection, Where to Next? and the Riverbed stamp from Pam Bray.


For all the details and a full tutorial on my wall hanging, you'll want to stop by the Wild Whisper blog. You'll want to make sure to keep checking out Wild Whisper's blog as the design team will be sharing lots of inspiration.

- Katelyn


Tuesday, March 23, 2021

Let Your Dreams Soar Tag

 Happy Tuesday!

I'm up on the Quietfire Design blog today, where I'm sharing my Let Your Dreams Soar Tag. My tag features a variety of A Way With Words Dies and stamps  as well as Modern Gilding Powders.  


For a full tutorial on my tag, you'll want to head over to Quietfire Design blog for all the details. 

- Katelyn


Monday, March 22, 2021

Happy Day Wall Hanging

Happy Monday!

I'm back on Creative Scrapbooker Magazine's Blog today as a monthly blogger sharing with you how to create this cute Happy Day Wall Hanging. My wall hanging features a variety of products from the Bunnies & Blooms Collection by Simple Stories, Ranger Ink, dies from Elizabeth Craft Designs and adhesive from Scrapbook Adhesives by 3L.   


You'll want to make sure to stop by the Creative Scrapbooker Blog to learn how to recreate my Happy Day Wall Hanging at home.

Thanks for stopping by!
- Katelyn


Sunday, March 21, 2021

Flowers Pocket

 Happy Sunday!

Today's project is all about spring time flowers. I've created this pretty Flowers Pocket perfect for inside of my planner and just awaiting for something else that is flowery to add into the pocket. To create my pocket, I've used a variety of dies from the Paper Flower Collection, Joset Designs, the Sidekick Essentials Collection and the Planner Essentials Collection. You'll want to read below as I have a full tutorial on how to recreate my pocket at home. 
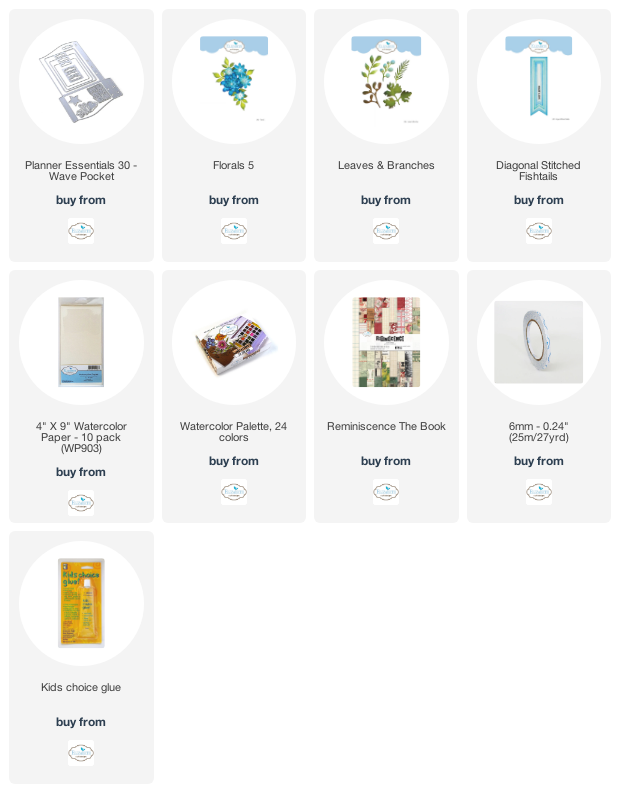

To start, choose a piece of patterned paper out of the Reminiscence the Book. Die cut the pocket from the Planner Essentials 30 - Wave Pocket Die. Ink the edges of the pocket using Walnut Stain Distress Ink and a blending tool with foam.


From the Leaves & Branches die, you'll need to choose one of the leaves. Die cut the chosen leaf twice out of watercolour cardstock. Using a waterbrush and the watercolour palette, colour the leaves. Set aside to dry.


The next two steps use the Florals 5 die.

Die cut the leaf and centres once out of a piece of watercolour cardstock. You'll need a total of three centres. Using a waterbrush and the watercolour palette, colour the leaf. Using a waterbrush and the watercolour palette, colour the centres. Set aside to dry.


Die cut the extra large flower once, the large flower three times, the medium flower three times and the small flower three times out of a piece of watercolour cardstock. Using a waterbrush and the watercolour palette, colour a extra large flower, a large flower, a medium flower and a small flower all in the same colour. Using a waterbrush and the watercolour palette, colour the remaining flowers with the same colour. Set aside to dry.


Die cut a 1 1/8" Diagonal Stitched Fishtail out of a piece of kraft cardstock. From the Sidekick Essentials - Planted with Love stamp set, you'll need the flowers definition. Apply Jet Black Archival Ink to the stamp and stamp onto the fishtail. Trim the fishtail down to 3 1/2". Ink the edges of the fishtail using Walnut Stain Distress Ink and a blending tool with foam.


Adhere the pocket together.


Shape and adhere the flowers together. Don't forget to add a centre to each flower.


Adhere the extra large flower to the middle left hand side of the pocket. Adhere the remaining flowers one above the extra large flower and one below the extra large flower as desired. Adhere one the leaves that you have two of to the bottom right of the flowers as desired. Adhere the remaining leaves in the top left corner of the flowers as desired.


To finish the pocket, adhere the Flowers fishtail 1/2" from the bottom and 1 1/4" from the left of the pocket.


Here are a few closeup photos of the finished pocket.


Here is the finished Flowers Pocket.


Elizabeth Craft Designs Supplies Used:

- Sidekick Essentials - Planted with Love

 
Other Supplies Used:

- Tim Holtz for Ranger Ink: Distress Ink - Walnut Stain and Blending Tool with Foam
- Ranger Ink: Jet Black Archival Ink
- Misc: Kraft Cardstock

I hope that my pocket has inspired you to recreate your own version of my Flowers Pocket.

- Katelyn