Wednesday, September 30, 2020

Beauty Tag

Happy Wednesday!

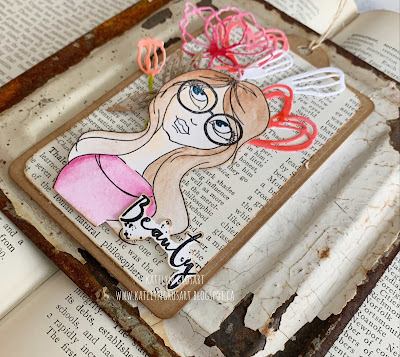
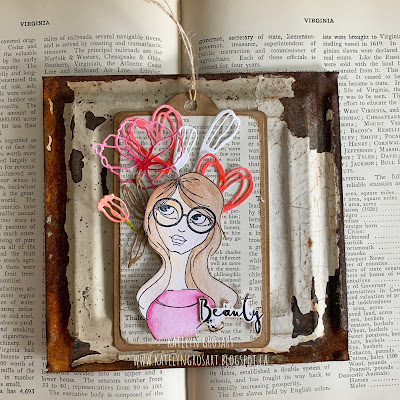
For today's post, I've created this pretty Beauty Tag. To create the tag, I've used a variety of dies and stencils from the new release from the Art Journal Specials Collection. You'll want to read below as I have a full tutorial on how to recreate my tag at home. 


To start, die cut the tag from the Butterfly Pocket Insert die out of a piece of kraft cardstock. Ink the edges of the tag using Walnut Stain Distress Ink and a blending tool with foam.


Cut a piece of book page that measures 2 7/8" x 4 5/8". Use a corner rounder to round all four corners of the cut book page piece. Ink the edges of the book page using Walnut Stain Distress Ink and a blending tool with foam.


From the Flower Power Die, you'll need to choose two of the flowers. Die cut one flower out of White Soft Finish Cardstock. Die cut the other flower out of kraft cardstock.


From the Decorative Insert die, die cut one of the hearts twice out Watercolour Cardstock. Using a waterbrush and the Watercolour Palette, colour the two hearts.


Die cut one of the floral pieces from the Floral Insert Die out of a piece of Watercolour cardstock. Using a waterbrush and the Watercolour Palette, colour the floral piece.


Choose one of the girls from the Funky Chicks Stamp. Apply Jet Black Archival Ink to the girl stamp and stamp onto a piece of watercolour cardstock. Using a waterbrush and the Watercolour Palette, colour the girl in. Once the girl has dried, fussy cut her out. Ink the edges of the girl using Walnut Stain Distress Ink and a blending tool with foam.


From the Journal Words Stamp Set you'll need the Beauty Word. Apply Jet Black Archival Ink to the beauty word and stamp onto a piece of White Soft Finish Cardstock. Fussy cut the word out. Ink the edges of the word using Walnut Stain Distress Ink and a blending tool with foam.


Adhere the book page piece to the tag.


Adhere the three floral pieces to the left hand side of the tag as desired.


Use foam squares to adhere the girl 1/2" from the left and 1/4" from the bottom of the tag. Use adhesive and foam squares to adhere the beauty word 1/8" from the right and 1/4" from the bottom of the tag.


Adhere the hearts as desired amongst the flowers and girl.


To finish the tag, tie a piece of twine through the hole at the top of the tag.


Here are a few closeup photos of the finished tag.


Here is the finished Beauty Tag.


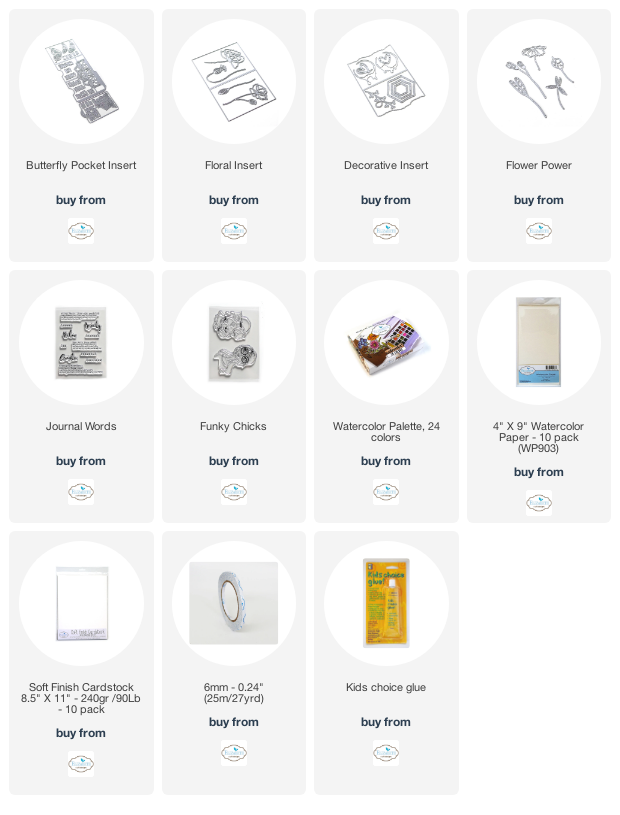
Elizabeth Craft Designs Supplies Used:

 
Other Supplies Used:

- Tim Holtz for Ranger Ink: Distress Ink - Walnut Stain and Blending Tool with Foam
- Ranger Ink: Jet Black Archival Ink 
- Misc: Kraft Cardstock, Bookpage and Twine

I hope that my tag has inspired you to recreate your own version at home.

- Katelyn


Tuesday, September 29, 2020

Smile Tag

  Happy Wednesday!

I'm up on the Elizabeth Craft Designs blog today, where I'm sharing a project that features the new Flower Release designed by Anita Izendoorn. To create my Smile Tag,  I've used a variety of dies from the Paper Flower Collection, Joset Designs, the Planner Essentials Collection and Els van de Burgt Studio.


For a full tutorial on my Smile Tag, you'll want to head over to the Elizabeth Craft Designs blog for all the details. 

- Katelyn


Monday, September 28, 2020

Hello Dear Friend Card

 Happy Monday! 

I'm back on Creative Scrapbooker Magazine's Blog today as a monthly blogger sharing my Hello Dear Friend Card. My card features the Hello Autumn Collection from Carta Bella, cardstock from Creative Scrapbooker Magazine, dies from Elizabeth Craft Designs, ink from Ranger Ink and adhesive from Scrapbook Adhesives by 3L.


You'll want to make sure to stop by the Creative Scrapbooker Blog to learn how to recreate my Hello Dear Friend Card at home.

Thanks for stopping by!
- Katelyn


Friday, September 25, 2020

Hit the Books Bookmark

 Happy Friday!

I'm up on Wild Whisper's blog today, where I'm sharing this fun Hit the Books Bookmark. The bookmark features the re-release of the One More Chapter Collection.


For all the details, more photos and a full tutorial on my bookmark, you'll want to stop by the Wild Whisper blog. You'll want to make sure to keep checking out Wild Whisper's blog as the design team will be sharing lots of inspiration.

- Katelyn


Thursday, September 24, 2020

Fall Planner Insert

 Happy Thursday!

I'm up over on the Elizabeth Craft Designs blog today, where I'm sharing my Fall Planner Insert. My planner insert features a variety of dies from the Planner Essentials Collection, the Art Journal Specials and stamps from Charlene.


For a full tutorial on my Fall Planner Insert, you'll want to head over to the Elizabeth Craft Designs blog for all the details. 

- Katelyn


Have Yourself a Merry Little Christmas Card

 Happy Thursday!

I'm up on the Quietfire Design blog today, where I'm sharing my Have Yourself a Merry Little Christmas Card. My card features a variety of A Way With Words Dies, Quietfire Design Stamps and Modern Gilding Powders.


For a full tutorial of my card, you'll want to head over to Quietfire Design blog for all the details. 

- Katelyn


Tuesday, September 22, 2020

Sunshine, Relax, Sea Card

Happy Tuesday!

For today's post, I've created this pretty Sunshine, Relax, Sea Card perfect to send to a loved one or a friend with a little note in it. To create the card, I've used a variety of stamps, dies and stencils from the new release from the Art Journal Specials Collection as well as Joset Designs.  You'll want to read below as I have a full tutorial on how to recreate my card at home. 


To start, die cut a 3 1/2" Fitted Indented Square out of White Soft Finish Cardstock. Apply the Waves stencil to the left hand side of the square. Using a palette knife, put Texture Paste Opaque Matte through the stencil. Once the stenciled image has dried, sprinkle Turquoise Magenta Nuance Powder. Spritz the powder with water. After the powder has dried, apply Jet Black Archival Ink to the Sunshine and Sea words from the Journal Words stamp set and stamp on the bottom right side of the square as desired. Just remember that the word relax will be going in the middle of the two words. Ink the edges of the square using Black Soot Distress Ink and a blending tool with foam.


Choose a piece of patterned paper from the Worn Wood Paper Pack. Die cut the 3 3/4" Stitched Indented Square out of the patterned paper piece. Ink the edges of the square using Black Soot Distress Ink and a blending tool with foam.


From the Water Creatures Stamp Set, you'll need the starfish and bubble stamps. Apply Jet Black Archival Ink to the starfish stamp and stamp onto a piece of watercolour cardstock. Apply Jet Black Archival Ink to the bubbles stamp and stamp onto the same piece of watercolour cardstock. Reapply ink to the bubbles stamp and stamp onto the same piece of watercolor cardstock. Colour the starfish and bubbles in using a waterbrush and the Watercolor Palette. Fussy cut the starfish and bubbles out. Ink the edges of the images using Black Soot Distress Ink and a blending tool with foam.


Apply Jet Black Archival Ink to the Relax stamp from the Journal Words stamp set and stamp onto a piece of White Soft Finish Cardstock. Fussy cut the word out. Ink the edges of the word using Black Soot Distress Ink and a blending tool with foam.


From the Summer Journal Specials Die, die cut two seahorses, two leaves and one of each of the coral pieces out of a piece of White Soft Finish Cardstock. Colour the die cut images using a waterbrush and the Watercolor Palette. 


Adhere the 3 1/2" square to the 3 3/4" square.


Adhere one bubble 1" from the right and 1/4" from the bottom of the 3 1/2" square. Adhere the two leaves to the left of the bubble as desired.


Foam square the other bubble 5/8" from the bottom and all the way to the left hand side of the 3 1/2" square. Adhere a seahorse slightly underneath the bubble you just foam squared to the square. Adhere one of the coral pieces in between the two bubbles.


Adhere the other coral piece to the left of the adhered coral piece as desired. Foam square the starfish overtop of the two coral pieces. Adhere the last seahorse in amongst the coral pieces and seahorse as desired. 


Foam square the remaining bubbles as desired in amongst the leaves and seahorses. Foam square the Relax word in between the Sunshine and Sea words.


Cut a cardbase out of White Soft Finish Cardstock that measures 3 3/4" x 7 1/2", score at 3 3/4". Adhere the cardfront to the cardbase.


Here are a few closeup photos of the finished card.


Here is the finished Sunshine, Relax, Sea Card.


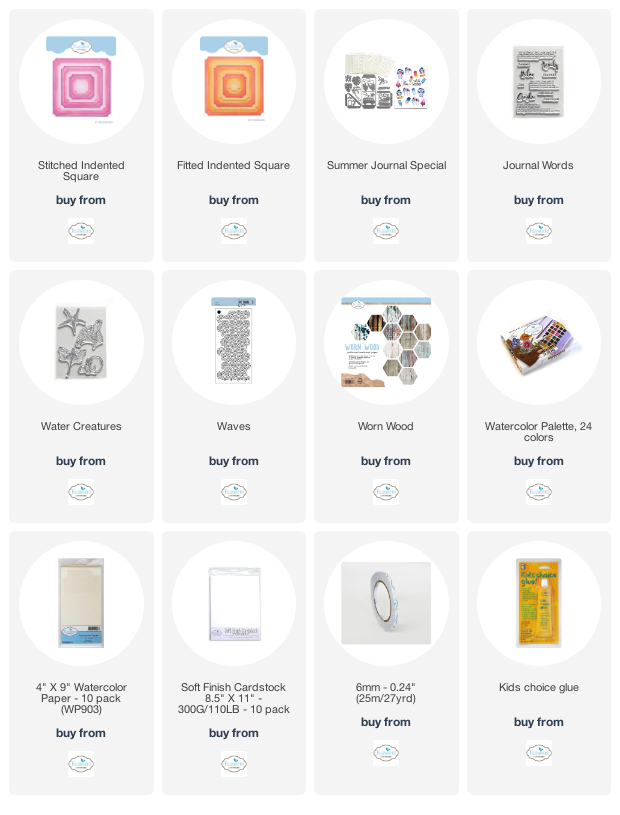
Elizabeth Craft Designs Supplies Used:

 
Other Supplies Used:

- Tim Holtz for Ranger Ink: Distress Ink - Black Soot and Blending Tool with Foam
- Ranger Ink: Jet Black Archival Ink and Texture Paste Opaque Matte
- Magenta Nuance: Turquoise

I hope that my card has inspired you to recreate your own version at home.

- Katelyn