Friday, November 29, 2019

December Day By Day: December Title Page

Happy Friday! 
I've decided that I will be playing along with the December Day By Day happening in the Elizabeth Craft Designs Planner Facebook Group. So, needless to say that you will be seeing lots of posts of the different days in my planner through out December on my blog.  For this post, I thought I would share with you how to recreate the December Title page to mark the start of my December Day By Day. 


To start, you'll need the page from the Planner Essentials Die - 1. Choose a piece of patterned paper from the Christmas Market Collection by Carta Bella and die cut the page out. Ink the edges of the page using Black Soot Distress Ink and a blending tool with foam.


From the Planner Essentials Die - 14 die, you'll need the star reinforcements. Choose a piece of patterned paper from the Christmas Market Collection by Carta Bella and die cut the reinforcement stars out. Ink the edges of the stars using Black Soot Distress Ink and a blending tool with foam.


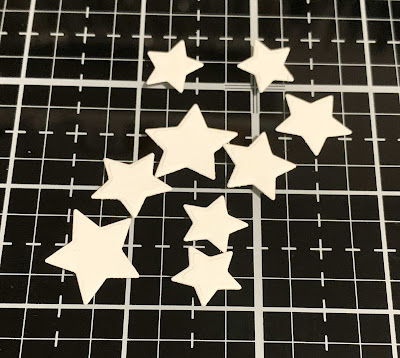
From the Planner Essentials - 12 die, die cut the base of the tree twice out of green patterned paper from the Christmas Market Collection by Carta Bella. Die cut the dotted tree out of red patterned paper from the same collection. Die cut the zig zag tree out of White Soft Finish Cardstock. Ink the edges of all the trees using Black Soot Distress Ink and a blending tool with foam. You will also want to die cut a total of nine stars out of White Soft Finish Cardstock using the stars from that die set.


Next, you'll need to choose two patterned papers. From the first patterned paper, die cut the 3 1/2" Stitched Indented Rectangle. Flip that patterned paper over and die cut the 3" Stitched Indented Rectangle. From the second patterned paper, die cut the 2 1/2" Stitched Indented rectangle out of it. Ink the edges of all three rectangles using Black Soot Distress Ink and a blending tool with foam.


You'll need one doily. 


From the Planner Months die, die cut the December word out of green patterned paper from the Christmas Market Collection from Carta Bella.


Out of the Blackboard Numbers die, die cut the numbers 2019 out of the same patterned paper that you used for your page.


Choose three patterned papers that coordinate with the papers you've already used from the Christmas Collection by Carta Bella. Die cut a planner label out of each of the papers. Cut two of the labels in half. You will need three of the halves. Set the other half of the one label aside. Ink the edges of all of the labels using Black Soot Distress Ink and a blending tool with foam.


Adhere the reinforcement stars over top of the circles on the page.


Adhere the doily to the middle of the 3 1/2" rectangle. Adhere the 3" rectangle to the middle of the 3 1/2" rectangle. Foam square the 3 1/2" rectangle 1/2" from the right and 1 3/4" from the top of the page. Adhere one of the half labels to the top right side of the 3 1/2" rectangle. Adhere another half of the label to the top right side of the 3 1/2" rectangle. Adhere the third half label to the bottom left side of the 3 1/2" rectangle. 


Adhere the 2 1/2" rectangle 7/8" from the bottom and 1/4" from the right of the page. Adhere the trees together. Use foam squares to adhere the zig zag tree to the middle of the rectangles. Use adhesive and foam squares to adhere the dotted tree to the left of the zig zag tree. 


Adhere the December word to the label. Foam square the label to the middle of the trees. Adhere the 2019 underneath the December label.


To finish the page, adhere the nine stars as desired around the page.


Here are a few closeup photos of the finished page.


Here is the finished December Title Page.


Elizabeth Craft Designs Supplies Used:


Other Supplies Used:

- Carta Bella: Christmas Market - Snowflakes, Wreaths, Deck The Halls, Border Strips, Buffalo Plaid and Holiday Floral
- Tim Holtz for Ranger Ink: Distress Ink - Black Soot and Blending Tool with Foam
- Misc: Doily

Thanks so much for joining me today and I hope that I have inspired you to recreate your own version of my December Title Page. If you decide to play along with the December Day By Day, make sure to hashtag your projects using this hashtag - #decemberDBD

- Katelyn


Wednesday, November 27, 2019

Merry Christmas Ornament

Happy Wednesday! 
I'm thrilled to be back on Southern Ridge Trading Company's blog sharing my Merry Christmas Ornament. I hope that my ornament inspires you to want to recreate your own version at home.


You'll want to stop by Southern Ridge Trading Company's blog so that you can learn how I created my Merry Christmas Ornament at home.

- Katelyn

Monday, November 25, 2019

The Most Wonderful Time of the Year Tag

Happy Monday!

I'm thrilled to be back on Creative Scrapbooker Magazine's Blog as a monthly blogger sharing my The Most Wonderful Time of the Year Tag. My project features patterned paper from Prima Marketing Inc., dies from Elizabeth Craft Designs, ink from Ranger Ink, Tag from Stampers Anonymous and adhesive from Scrapbook Adhesives by 3L.


You'll want to make sure to stop by the Creative Scrapbooker Blog to learn how I created my The Most Wonderful Time of the Year Tag.

Thanks for stopping by!
- Katelyn

Saturday, November 23, 2019

Joy Christmas Tag

Happy Saturday!
I've been busy with my Christmas crafting this week. So, for today's project, I created this Joy Christmas Tag. To create my tag, I've used a variety of stamps from Charlene as well as dies from Joset Designs and the Planner Essentials Collection. You'll want to read below as I have a full tutorial on how to recreate my Christmas tag at home.


To start, die cut the large tag from the Planner Essentials - 2 die out of White Soft Finish Cardstock. Apply Emboss It Ink to the star stamp from the Oh the Joy of Christmas stamp set and stamp randomly on the tag. Reapply ink to the stamp three more times and continue to stamp randomly. Sprinkle Kells Gold Modern Gilding Powder over the stamped areas. Tap off the excess powder and emboss with a heat tool.


In the top left portion of the tag, adhere three strips of Christmas themed washi tape. In the bottom right portion of the tag, adhere two pieces of Christmas themed washi tape. Distress the edges of the tag. Ink the edges of the tag using Black Soot Distress Ink and a blending tool with foam.


Die cut the 1" Diagonal Stitched Fishtail out of White Soft Finish Cardstock. Cut the fishtail down to 2 1/2". Apply Festive Berries Distress Ink to the Joy stamp from the Oh the Joy of Christmas stamp set and stamp onto the fishtail. Distress the edges of the fishtail. Ink the edges of the fishtail using Black Soot Distress Ink and a blending tool with foam.


Apply Jet Black Archival Ink to the Candy Cane and Mistletoe stamps from the Oh the Joy of Christmas stamp set and stamp onto a piece of White Soft Finish Cardstock. Reapply ink to the Candy Cane and stamp on the same piece of White Soft Finish Cardstock. Colour the mistletoe using a light green and red Stabilo Woody pencil and a waterbrush. Colour the candy canes using a dark green and red Stabilo Woody pencils and a waterbrush. Once the images have dried, fussy cut the images out. Ink the edges of the images using Black Soot Distress Ink and a blending tool with foam.


Adhere Jet Black Archival Ink to the Holly Branch Stamp from the Christmas Garden stamp set and stamp onto a piece of White Soft Finish Cardstock. Colour the holly branch using a dark green, red and brown Stabilo Woody pencils and a waterbrush. Ink the edges of the holly branch using Black Soot Distress Ink and a blending tool with foam.


Use foam squares to adhere the Joy fishtail 1" from the bottom and 1 1/4" from the left of the tag. Use adhesive and foam squares to adhere the holly branch to the left of the Joy fishtail. 


Use adhesive to adhere the mistletoe overtop of the holly branch. Adhere the two candy canes overtop of the mistletoe. 


To finish the tag, tie a piece of twine to the top of the tag.


Here are a few closeup photos of the finished Christmas Tag.


Here is the finished Joy Christmas Tag.


Elizabeth Craft Designs Supplies Used:


Other Supplies Used:

- Quietfire Design: Kells Gold Modern Gilding Powder
- Tim Holtz for Ranger Ink: Distress Ink - Black Soot & Festive Berries and Blending Tool with foam
- Ranger Ink: Jet Black Archival Ink and Emboss It Ink
- Stabilo Wood Pencils: Light Green, Dark Green, Red and Brown
- Misc: Christmas Washi Tape, Twine and Waterbrush

I hope that my card has inspired you to recreate your own version of my Joy Christmas Tag.

- Katelyn


Friday, November 22, 2019

Congrats Baby Card

Happy Friday! 

I've been busy creating with Joset Designs dies this past week and created this  Congrats Baby Card.  You'll want to read below as I have a full tutorial on how to recreate my card at home. 


To start, die cut the 4 1/2" Stitched Indented Rectangle out of a piece of kraft cardstock. Choose a piece of patterned paper from the Pink Cotton Candy Paper Pack and die cut the 4" Stitched Indented Rectangle. Distress the edges of both pieces. Ink the edges of both pieces using Vintage Photo Distress Ink and a blending tool with foam.


Choose three more patterned papers from the Pink Cotton Candy Paper Pack. From one of the papers, die cut the 1" Stitched Fishtail Banner. From the second paper, die cut another 1" Stitched Fishtail Banner. From the third paper, die cut a 1 1/2" Stitched Fishtail Banner. Cut the 1 1/2" banner down to 4 5/8". Cut down one of the 1" banners to 4 1/8", this one will layer overtop of the 1 1/2" banner. Cut the other 1" banner to 4 1/2". Distress the edges of all three banners. Ink the edges of all three banners using Vintage Photo Distress Ink and a blending tool with foam.


Die cut a 2 1/4" Stitched Circle out of White Soft Finish Cardstock. Distress the edges of the circle. Ink the edges of the circle using Vintage Photo Distress Ink and a blending tool with foam.


Choose three patterned papers from the Pink Cotton Candy Paper Pack. Die cut the three feathers out of the patterned papers, giving you one feather in one of the patterned papers. Ink the edges of the feathers using Vintage Photo Distress Ink and a blending tool with foam.


Choose one more patterned paper from the Pink Cotton Candy Paper Pack and die cut the Congrats word from the Words 1 - Celebration die out of the paper.


Choose two of the flowers from the Small Flower Set. You can either use the same patterned paper you've used before or choose two more patterned papers. Die cut one of the flowers three times out of one of the papers as well as you'll need to die cut the centers. Die cut the other flower twice out of the other paper as well as you'll need to die cut the centers. Ink the edges of the flowers and centers using Vintage Photo Distress Ink and a blending tool with foam.


Adhere the 4" rectangle to the 4 1/2" rectangle.


Use thin 3D foam squares to adhere the 1" x 4 1/2" banner 5/8" from the bottom of the 4" rectangle and all the way to the left hand side. Adhere the other 1" banner to the 1 1/2" banner. Use adhesive and foam squares to adhere the 1 1/2" banner 1 1/2" from the top and all the way to the left hand side of the 4" rectangle.


Shape the three feathers. Adhere the three feathers together. Adhere the three feathers 3/4" from the left of the left hand side of the 4" rectangle. Use foam squares to adhere the circle overtop of the feathers.


Adhere the flowers together. Adhere two of the flowers to the top left side of the circle. Adhere the other three flowers to the bottom right side of the circle. Adhere the congrats sentiment to the middle of the circle.


Cut a cardbase out of kraft cardstock that measures 4 3/4" x 9", score at 4 1/2". Adhere the cardfront to the cardbase.


Here are a few closeup photos of the finished card.


Here is the finished Congrats Baby Card.


Elizabeth Craft Designs Supplies Used:


Other Supplies Used:

- Tim Holtz for Ranger Ink: Vintage Photo Distress Ink and a Blending Tool with Foam
- Misc: Kraft Cardstock

Thanks so much for joining me today and I hope that I have inspired you to recreate my baby card at home.

- Katelyn