Happy Sunday!
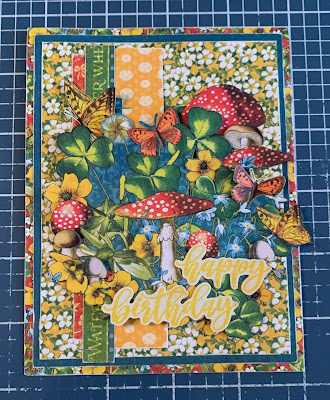
A couple of weeks ago I shared some beautiful Just For You Tags over on Graphic 45's Blog. For today's post I'm sharing a card version of the tags.
The first six steps use patterned paper out of the Little Things 12x12 Collection Pack.
From the What's Up Buttercup paper, cut a piece from the floral side that measures 4 1/4" x 5 1/2". Flip the paper over and cut a piece that measures 1" x 2 7/8". Sand the edges of both papers.
Next, you'll need the Hello Ladybug patterned paper. Cut a piece that measures 3 3/4" x 5". Sand the edges of the paper.
From the Bloom & Grow paper, choose two border strips. Cut one border down to 5". Cut the second border to 3 1/2". Sand the edges of both borders.
From the Lazy Daisy patterned paper, fussy cut one of the mushroom focal images out.
Next, you'll need the Forget Me Not patterned paper. Fussy cut two butterflies and three yellow flowers.
Next, you'll need to fussy cut five single mushrooms and one mushroom bunch out of the Sprinkle Kindness patterned paper.
Next, you'll need the Little Things Patterns & Solids Paper Pack. Cut a piece from the plain blue paper that measures 4" x 5 1/4". Cut the red word paper to 1 1/4" x 4 1/2". Cut the yellow dot paper that measures 1" x 4 3/4". Sand the edges of all the papers.
Apply Sweet Mustard Ink to the Happy Birthday sentiment from the Sentiment Stamps and stamp onto a piece of light kraft cardstock. Fussy cut around the sentiments.
Adhere the blue paper to the yellow floral paper. Adhere the white floral paper to the blue paper.
Adhere the red word paper 1/2" from the left and 1/4" from the bottom of the white flower paper. Adhere the green dot paper 1/2" from the right and 1" from the top of the white flower paper. Adhere the yellow dot paper 1 7/8" from the right and 1/8" from the top of the white flower paper. Staple the 5" border 5/8" from the left and 1/16" from the top of the white flower paper. Staple the 3 1/2" border strip 2 1/2" from the right and 7/8" from the bottom of the white flower paper.
Foam square the focal image to the middle of the card. Foam square the two bunch mushrooms to the top right corner of the focal image. Adhere on butterfly to the bottom of the mushroom bunch. Adhere a single flower in between the clovers by the mushroom bunch.
Adhere a mushroom and two yellow flowers as desired in the bottom right corner of the focal image.
In the bottom left corner of the focal image, adhere a single yellow flower and three mushrooms as desired. In the top left corner of the focal image, adhere the other butterfly as desired.
Use adhesive and foam squares to adhere the Happy Birthday sentiment to the bottom right of the focal image as desired.
To finish the card, cut a cardbase out of light kraft cardstock that measures 4 1/4" x 11", score at 5 1/2". Adhere the cardfront to the cardbase .
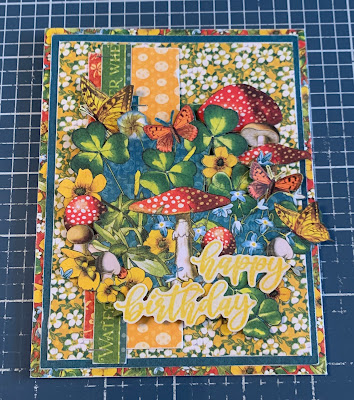
Here are a few closeups of the finished card.
Here is the finished Happy Birthday Card.
Supplies Used:
- Graphic 45: Little Things 12x12 Collection Pack, Little Things 12x12 Patterns & Solids Pack and Sentiment Stamps
- PinkFresh Studio: Sweet Mustard Ink
- Misc: Kraft Cardstock
I hope that my Happy Birthday Card has inspired you to recreate your own at home!
- Katelyn


No comments:
Post a Comment