Happy Wednesday! I'm sharing last week's planner spread from inside my planner with you today. To create my planner spread, I've used a variety of the dies from the Planner Essentials line. You'll want to read below to learn how to recreate my July Week #3 Planner Spread at home.
To start, choose a couple of patterned papers from the Mintay - 7th Heaven Paper Pack as well as the matching cut aparts. Next, you'll need the page from the Planner Essentials - 10 die, die cut the page out of one of the patterned papers. Ink the edges of the page using Black Soot Distress Ink and a blending tool with foam.
You'll need the page from the Planner Essentials - 3 die, die cut the page out of the other patterned paper. Apply Victorian Velvet Distress Ink to the July word off of the Months stamp set and stamp onto the tab of the page. Ink the edges of the page using Black Soot Distress Ink and a blending tool with foam.
Next, you'll need the large rectangle off of the My Life stamp set. Apply Victorian Velvet Distress Ink to the stamp and stamp onto a piece of White Soft Finish Cardstock. Reapply the ink to the stamp and stamp again. Repeat the previous step five more times. Cut each box out. Apply Stormy Sky Distress Ink to each of the days of the week from the Calendar stamp set and stamp one of the days on each of the boxes. Write in the boxes. Ink the edges of the boxes using Black Soot Distress Ink and a blending tool with foam.
Die cut the bow from the Planner Essentials - 9 die out of each of the patterned papers used for the pages.
Apply Victorian Velvet Distress Ink to the checklist stamp off of the Bullet Journaling 3 stamp set and stamp onto a piece of White Soft Finish Cardstock. Reapply ink to the checklist stamp and stamp onto the same piece of White Soft Finish Cardstock. Cut the checklists out. Fill in the checklists as desired. Ink the edges fo the checklists using Black Soot Distress Ink and a blending tool with foam.
Apply Victorian Velvet Distress Ink to the large circle stamp off of the Moments in Life stamp set and stamp onto a piece of White Soft Finish Cardstock. Repeat the previous step. Apply Victorian Velvet Distress Ink to the small circle stamp off the same stamp set and stamp onto the same piece of White Soft Finish. Repeat the previous step three more times. Apply Smoky Slate Distress Ink to the large circle stamp and stamp onto a piece of White Soft Finish Cardstock. Repeat the previous step. Apply Smoky Slate Distress Ink to the small circle stamp and stamp onto the same piece of White Soft Finish. Repeat the previous step three more times. Fussy cut all the circles out. Ink the edges of the circles using Black Soot Distress Ink and a blending tool with foam.
From the 7th Heaven cut apart paper, fussy cut a flower bunch, three flowers, four butterflies, small jar and lanterns. Ink the edges of all the images using Black Soot Distress Ink and a blending tool with foam.
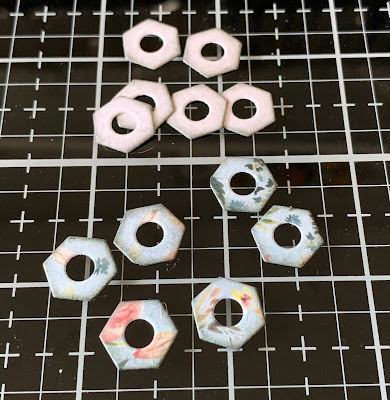
Die cut the reinforcements from the Planner Essentials - 5 die out of each of the patterned papers used for the pages. Ink the edges of the reinforcements using Black Soot Distress Ink and a blending tool with foam.
Adhere the patterned reinforcement circles overtop of the left hand page circles. Adhere the patterned bow to the middle of the left hand page.
On the top half of the left page, use adhesive and foam squares to adhere the flower bunch, small blue circle, large pink circle, Monday and Tuesday boxes as well as a butterfly.
On the bottom half of the left page, use adhesive and foam squares to adhere a flower, large blue circle, small pink circle, small blue circle, Wednesday and Thursday boxes as well as the jar.
Adhere the other reinforcement circles overtop of the right hand page circles. Adhere the other bow to the middle of the right hand page.
On the top half of the left page, use adhesive and foam squares to adhere the lanterns, large blue circle, small pink circle, small blue circle, large flower, Friday box, both checklists and a butterfly.
On the bottom half of the right page, use adhesive and foam squares to adhere a flower, large pink circle, two small pink circle, small blue circle, Saturday and Sunday boxes as well as the last two butterflies.
Here are a few closeup photos of the finished planner spread.
Here is the finished July Week #3 Planner Spread.
Elizabeth Craft Designs Supplies Used:
- My Life
- Calendar
- Months
Other Supplies Used:
- Tim Holtz for Ranger Ink: Distress Ink - Black Soot, Stormy Sky & Victorian Velvet and a Blending tool with foam
- Mintay Paper: 7th Heaven Paper Collection
- Misc: Black Gel Pen
- Katelyn


Such a lovely page! Love the colors and the layout!
ReplyDelete