Wednesday, June 30, 2021

Be Still and the Earth Notecard

    Happy Wednesday!

For today's project I have this Be Still and the Earth Notecard. To create my notecard, I've used dies from Joset Designs as well as stamps from the Beautiful Blooms Collection. You'll want to read below as I have a full tutorial on how to recreate my notecard at home.


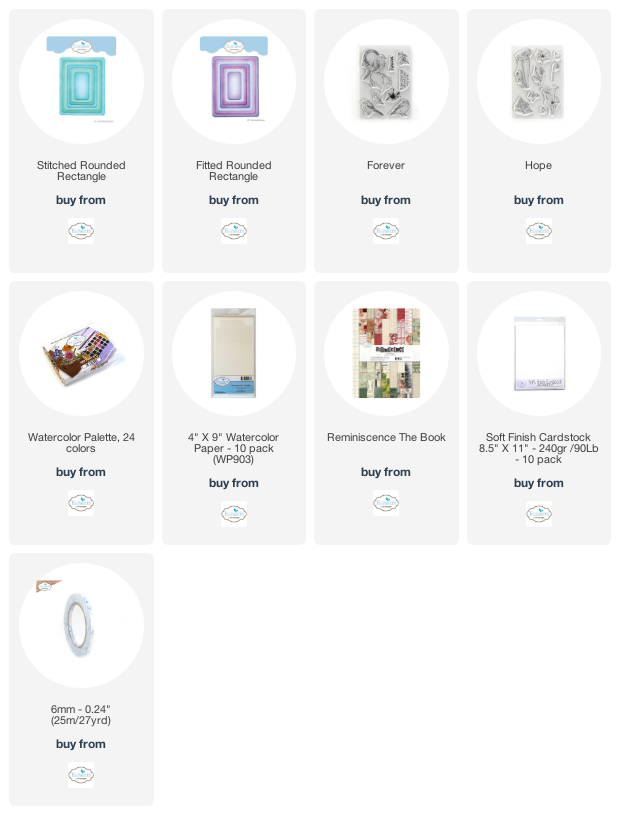
To start, die cut a 4" Stitched Rounded Rectangle out of a piece of watercolour cardstock. From the Hope Stamp Set, you'll need the group of poppies as well as the one single poppy bud. Apply Jet Black Archival Ink to the poppy stamps and stamp on the left hand side of the 4" rectangle. Colour the stamped images in using a waterbrush and the Watercolor Palette. Set aside to dry.


From the Forever Stamp Set, you'll need the Be Still quote. Apply Festive Berries Distress Ink to the quote and stamp onto a piece of White Soft Finish Cardstock. Cut the quote into three strips. Ink the edges of all three strips using Black Soot Distress Ink and a blending tool with foam.


Choose a piece of patterned paper out of the Reminiscence the Book. Die cut a 4 1/4" Fitted Rounded Rectangle out of the patterned paper. Ink the edges of the rectangle using Black Soot Distress Ink and a blending tool with foam.


Ink the edges of the 4" rectangle using Black Soot Distress Ink and a blending tool with foam.


Foam square the 4" rectangle to the 4 1/4" rectangle.


Adhere the quote strips to the bottom right corner of the 4" rectangle as desired. 


To finish the card, cut a cardbase out of White Soft Finish Cardstock that measures 5 1/2" x 8 1/2", score at 4 1/4". Adhere the cardfront to the cardbase.


Here are a few closeup photos of the finished notecard.


Here is the finished Be Still and the Earth Notecard.


Elizabeth Craft Designs Supplies Used:

Other Supplies Used:

- Tim Holtz for Ranger Ink: Distress Ink - Black Soot & Festive Berries and Blending Tool with Foam
- Ranger Ink: Jet Black Archival Ink

I hope that my notecard has inspired you to recreate your own version of my Be Still and the Earth Notecard.

- Katelyn


Monday, June 28, 2021

Wander, Explore Wall Hanging

 Happy Monday!

 I'm back on Creative Scrapbooker Magazine's Blog today as a monthly blogger sharing with you how to create this Wander, Explore Wall Hanging. My wall hanging features the Safe Travels Collection from Simple Stories, Dies from Elizabeth Craft Designs, Ink from Ranger Ink and adhesive from Scrapbook Adhesives by 3L.   


You'll want to make sure to stop by the Creative Scrapbooker Blog to learn how to recreate my Wander, Explore Wall Hanging at home.

Thanks for stopping by!
- Katelyn


Sunday, June 27, 2021

You Rock Tag

   Happy Sunday!

For today's project I have this You Rock Tag. To create my tag, I've used a variety of dies from the Paper Flower Collection and the Planner Essentials Collection as well as stamps from Jost Designs. You'll want to read below as I have a full tutorial on how to recreate my tag at home.


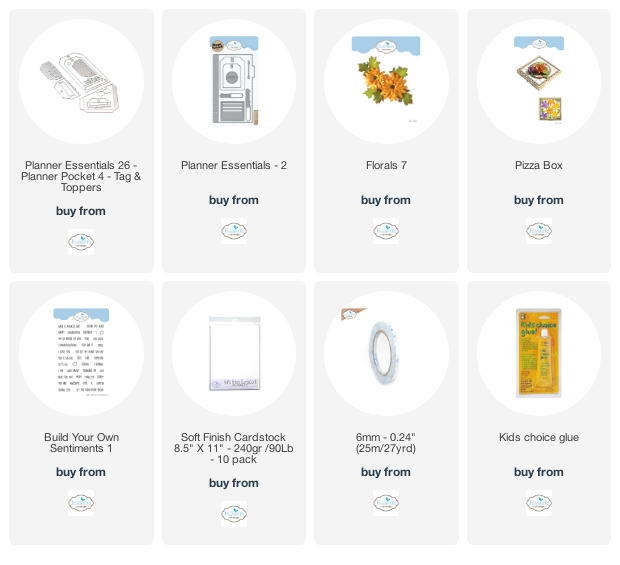
From the Planner Essentials -2 Die, you'll need the large tag. Die cut the tag out of a piece of White Soft Finish Cardstock. Ink the edges of the tag using Walnut Stain Distress Ink and a blending tool with foam.


From the Pizza Box die, you'll need the stitched circle and the smaller fitted circle. Die cut the stitched circle out of a piece of kraft cardstock. Die cut the smaller fitted circle out of a piece of White Soft Finish Cardstock. Ink the edges of both circles using Walnut Stain Distress Ink and a blending tool with foam.


From the Planner Essentials 26 - Planner Pocket 4 - Tag & Toppers Die, you'll need the stitched banner. Next you'll need the You Rock sentiment from the Build Your Own Sentiments Stamp Set. Apply Detail Black Ink to the sentiment and stamp onto the banner. Ink the edges of the banner using Walnut Stain Distress Ink and a blending tool with foam.


The next two steps use the Florals 7 die. Die cut the small and medium leaves twice out of a piece of olive cardstock. Ink the edges of the leaves using Walnut Stain Distress Ink and a blending tool with foam.


Die cut the large, medium and small flowers two times out of Sky Textured Cardstock. Die cut the large, medium and small flowers three times out of Blush Textured Cardstock. Die cut the centres three times out of Mustard Textured Cardstock. You'll need a total of five centres. Shapes the flowers as desired.


Adhere the fitted circle to the stitched circle. Foam square the stitched circle to the middle of the tag. Foam square the stitched banner to the middle of the circles as desired.


Adhere two of the leaves in the bottom right side of the circles. Adhere the remaining two leaves in the top left side of the circles.


Adhere the flowers together, making sure each flower bunch has a centre.


Adhere a blue and blush flower in the top left side of the circles, making sure it covers the bottom portion of the leaves. Adhere the remaining three flowers in the bottom right side of the circles, making sure it covers the bottom portion of the leaves.


To finish the tag, tie a piece of twine through the top of the tag.


Here are a few closeup photos of the finished tag.


Here is the finished You Rock Tag.


Elizabeth Craft Designs Supplies Used:

 
Other Supplies Used:

- Tim Holtz for Ranger Ink: Distress Ink - Walnut Stain and Blending Tool with Foam
- Simple Stories: Textured Cardstock - Blush, Olive, Mustard and Sky
- Pink Fresh: Detail Black Ink
- Misc: Kraft Cardstock, Flower Shaping Tools and Twine

I hope that my tag has inspired you to recreate your own version of my You Rock Tag.

- Katelyn


Friday, June 25, 2021

Happy Gardening Card

 Happy Friday!

I'm up on the Elizabeth Craft Designs blog today, where I'm sharing my Happy Gardening Card. My card features dies and stamps from the Sidekick Essentials as well as dies from the Planner Essentials Collections and Joset Designs. 


For a full tutorial on my Happy Gardening Card, you'll want to head over to the Elizabeth Craft Designs blog for all the details. 

- Katelyn

Tuesday, June 22, 2021

Thinking of You Card

  Happy Tuesday!

I'm up on the Quietfire Design blog today, where I'm sharing my Thinking of You Card. My card features a variety of A Way With Words Dies and Stamps as well as Modern Gilding Powders.


For a full tutorial on my card, you'll want to head over to Quietfire Design blog for all the details. 

- Katelyn


Saturday, June 19, 2021

Carpe Diem Planner Page

Happy Saturday!

I'm up on the Elizabeth Craft Designs blog today, where I'm sharing my Carpe Diem Planner Page. My planner page features dies from the Sidekick Essentials and Planner Essentials Collections. 


For a full tutorial on my Carpe Diem Planner Page, you'll want to head over to the Elizabeth Craft Designs blog for all the details. 

- Katelyn


Wednesday, June 16, 2021

Dad Card

  Happy Wednesday!

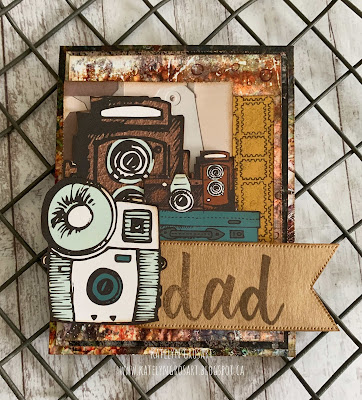
Father's Day is right around the corner and I'm up on Wild Whisper's blog today, where I'm sharing my Dad Card. The card features the Nature's Bliss Collection from Pam Bray Designs, the Brush Letters Stamp Set and the card pack from the Where to Next? Collection.


For all the details and a full tutorial on my card, you'll want to stop by the Wild Whisper blog. You'll want to make sure to keep checking out Wild Whisper's blog as the design team will be sharing lots of inspiration.

- Katelyn


Friday, June 11, 2021

Gratitude Card

   Happy Friday!

For today's project I have this pretty Gratitude Card. To create my card, I've used a variety of dies from the Paper Flower Collection and Joset Designs as well as stamps from the Beautiful Blooms Collection. You'll want to read below as I have a full tutorial on how to recreate my card at home.


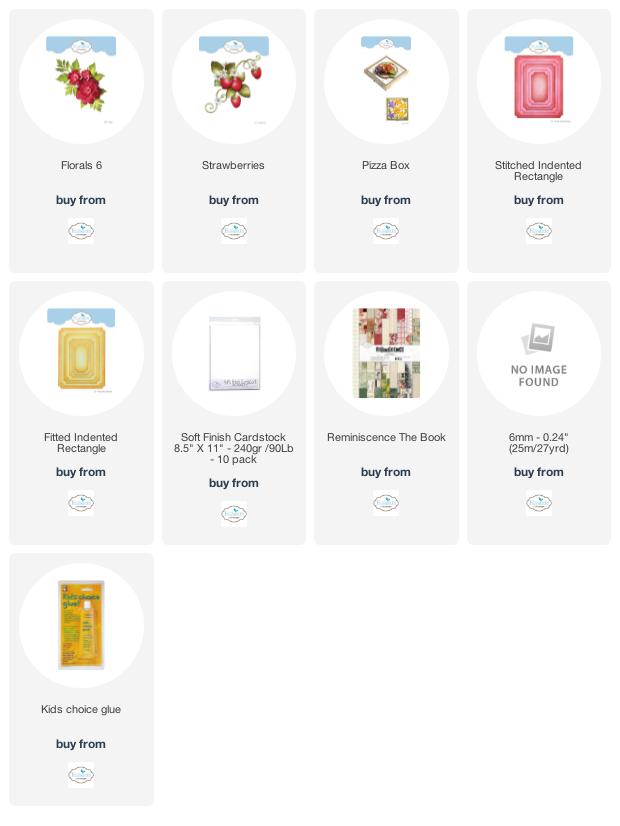
To start, you'll need to choose two pieces of patterned paper out of the Reminiscence the Book. Die cut a 4" Stitched Indented Rectangle out of one of the patterned papers. Die cut a 3 1/2" Stitched Indented Rectangle. Ink the edges of both pieces using Walnut Stain Distress Ink and a blending tool with foam.


Choose another piece of patterned paper out of the Reminiscence the Book. Die cut a 3 3/4" Fitted Indented Rectangle out of the patterned papers. Ink the edges of both pieces using Walnut Stain Distress Ink and a blending tool with foam.


The next two steps use the Pizza Box Die. 
Die cut the scallop circle out of a piece of kraft cardstock. Ink the edges of the circle using Walnut Stain Distress Ink and a blending tool with foam.


Die cut the large plain circle out of a piece of White Soft Finish Cardstock. Apply Detail Black Ink to the Gratitude word from the Beautiful Blooms - Gratitude Stamp Set and stamp in the middle of the circle. Using a paint brush, splatter a bit of Tarnished Brass Distress Spray Stain on the circle. Once the circle has dried, ink the edges of the circle using Walnut Stain Distress Ink and a blending tool with foam.


From the Strawberries die, die cut both swirls twice out of White Soft Finish Cardstock.


The next three steps use the Florals 6 die.
Die cut the leaves three times out of White Soft Finish Cardstock. Using a blending tool with foam, blend Rustic Wilderness Distress Ink over the entire surface of all three leaves.


Die cut the centres once out of White Soft Finish Cardstock. You'll need a total of three centres.


Die cut the extra large flower once, the large flower three times, the medium flower three times, the small flower three times and the extra small flower three times out of White Soft Finish Cardstock. Using a blending tool with foam, blend Kitsch Flamingo Distress Ink over the entire surface of all of the flowers. Using a paintbrush, splatter Tarnished Brass Distress Spray Stain over the flowers as desired.


Shape the three leaves as desired.


Shape the flowers. For one of the flowers, adhere a extra large, large, medium, small and extra small flower together as well as a centre. For the other two flowers, adhere a large, medium, small and extra small flower together as well as a centre to each.


Adhere the 3 3/4" rectangle to the 4" rectangle. Foam square the 3 1/2" rectangle to the 3 3/4" rectangle.


Adhere the large circle to the scallop circle. Foam square the scallop circle 1" from the left and 5/8" from the bottom of the 3 1/2" rectangle.


Adhere the three leaves and swirls as desired around the left hand side of the gratitude circle.


Adhere the two matching flowers to the top and bottom portion of the circle. Foam square the extra large flower in amongst the middle portion of the circle.


To finish the card, cut a cardbase out of White Soft Finish Cardstock that measures 4" x 11", score at 5 1/2". Adhere the cardfront to the cardbase.


Here are a few closeup photos of the finished card.


Here is the finished Gratitude Card.


Elizabeth Craft Designs Supplies Used:

- Beautiful Blooms - Gratitude

 
Other Supplies Used:

- Tim Holtz for Ranger Ink: Distress Ink - Walnut Stain, Kitsch Flamingo & Rustic Wilderness, Distress Spray Stain - Tarnished Brass and Blending Tool with Foam
- Pink Fresh: Detail Black Ink
- Misc: Kraft Cardstock and Flower Shaping Tools

I hope that my card has inspired you to recreate your own version of my Gratitude Card.

- Katelyn