Happy Sunday!
Today's post, is all about this 173 Wall Hanging. My wall hanging uses a variety of the new stamps and dies from the Planner Essentials. You'll want to grab a cup of your favourite beverage and learn how to recreate my wall hanging at home.

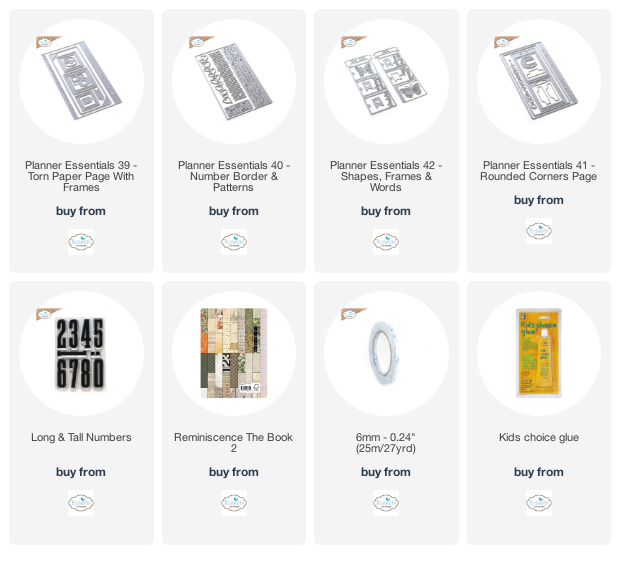
To start, choose a piece of patterned paper out of the Reminiscence the Book 2. Die cut the stitched rectangle piece from the Planner Essentials 41 - Rounded Corners Page out of the patterned paper piece. Distress the edges of the rectangle. Ink the edges of the rectangle using Walnut Stain Distress Ink and a blending tool with foam.

Choose a piece of patterned paper out of the Reminiscence the Book 2. Die cut the plain tag from the Planner Essentials 42 - Shapes, Frames & Words out of the patterned paper piece. Distress the edges of the tag. Ink the edges of the tag using Walnut Stain Distress Ink and a blending tool with foam.

Choose two more pieces of patterned paper out of the Reminiscence the Book 2. From the Planner Essentials 40 - Number Border & Patterns, you'll need the weave border and the number tag. Die cut the weave border out of one of the patterned papers. From the other piece of patterned paper, die cut the number tag. Distress the edges of the number tag. Ink the edges of the wave border and the number tag using Walnut Stain Distress Ink and a blending tool with foam.

From the Planner Essentials 39 - Torn Page with Frame, die cut the square frame out of a piece of kraft cardstock. Remove the middle of the square. Ink the edges of the square using Walnut Stain Distress Ink and a blending tool with foam.

Next, you'll need the number strip and two tabs from Planner Essentials 41 - Rounded Corner Page. Choose three pieces of coordinating patterned papers from the Reminiscence the Book 2. Die cut the number strip out of one patterned paper, die cut one of the tabs out of the second patterned paper and die cut the last tab out of the third piece of patterned paper. Ink the edges of both tabs using Walnut Stain Distress Ink and a blending tool with foam.

Next, you'll need to choose two banners from the Planner Essentials 42 - Shapes, Frames & Words. Use two of the previously used patterned papers. Die cut one banner from one of the patterned papers and die cut the other banner out of the second patterned paper. Ink the edges of both banners using Walnut Stain Distress Ink and a blending tool with foam.

Fussy cut the lemon balm label from the patterned paper out of the Reminiscence the Book 2. Distress the edges of the label. Ink the edges of the label using Walnut Stain Distress Ink and a blending tool with foam.

From the Long & Tall Numbers Stamp Set, you'll need the 1, 7 & 3. Apply Wild Honey Distress Ink to each number and stamp onto a piece of kraft cardstock. Fussy cut the numbers out. Ink the edges of all three numbers using Walnut Stain Distress Ink and a blending tool with foam.

Adhere the weave border 3/8" from the left and 1/2" from the bottom of the page. Adhere the number strip to the middle of the weave border.

Adhere one of the tabs to the bottom right corner of the plain tag. Foam square the plain tag 5/8" from the left and 2 1/4" from the top of the page. Adhere the two banners to the bottom portion of the tag as desired.

Adhere the other tab 1/8" from the left and 1/2" from the top of the plain tag. Adhere the number tag 1/8" from the left and 1" from the top of the plain tag. Foam square the frame square 1" from the top and 3/8" from the left of the plain tag.

Use adhesive and foam square to adhere the herb label 5/8" from the left and 1 1/4" from the top of the plain tag. Adhere the numbers as desired to the bottom left side of the herb label.

To finish the wall hanging, punch two holes at the top of the page and tie a piece of white twine through each hole.

Here are a few closeup photos of the finished 173 Wall Hanging.


Here is the finished 173 Wall Hanging.

Elizabeth Craft Designs Supplies Used:
Other Supplies Used:
- Tim Holtz for Ranger Ink: Distress Ink - Walnut Stain & Wild Honey and Blending Tool with Foam
- Misc: Kraft Cardstock and White Twine
Thanks so much for joining me today and I hope that I have inspired you to recreate your own version of my 173 Wall Hanging.
- Katelyn
No comments:
Post a Comment