Showing posts with label Creative Memories. Show all posts

Tuesday, September 15, 2020

Thankful Sidekick Essentials Page

Happy Tuesday! 

For today's post, I've created this fall like Thankful Sidekick Essentials Page Noted which features the Planner Essentials, the Sidekick Essentials Collection, stamps from Charlene and stamps from the Art Journal Specials Collection. You'll want to grab a cup of your favourite beverage and learn how to recreate my Page at home. 


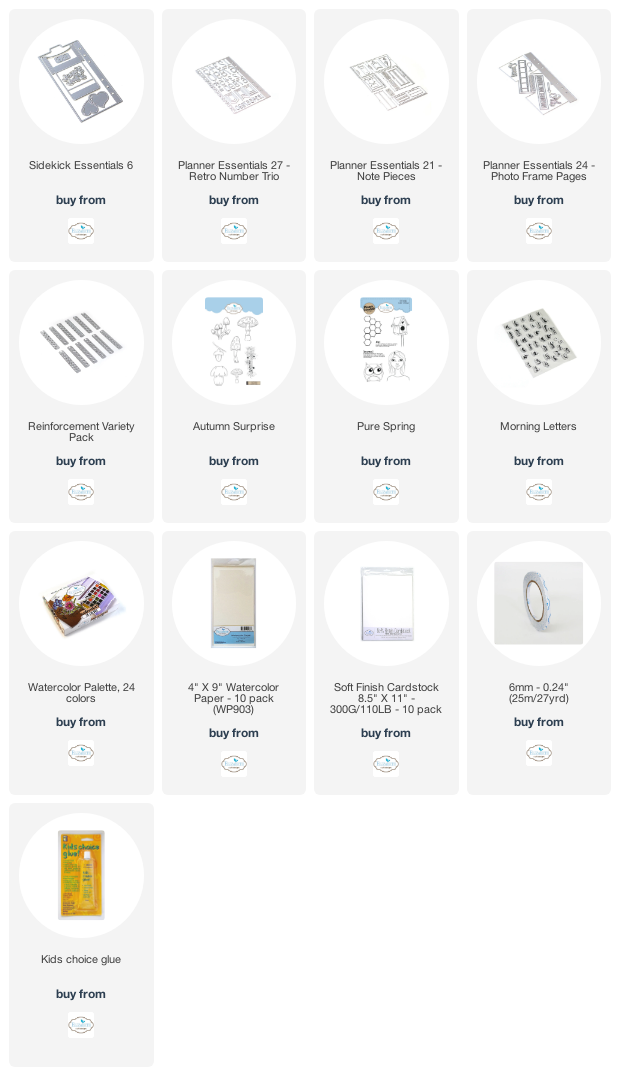
To start, die cut the page from the Sidekick Essentials 6 die out of White Soft Finish Cardstock. Sprinkle Magenta Nuance in Jade, Olive and Orange on the page as desired. Spritz the powder with water. Once the powder has dried, apply Jet Black Archival Ink to the hexagon stamp from the Pure Spring stamp and stamp randomly on the page. Reapply ink to the stamp as needed. You'll need to stamp the stamp on the page a total of seven times. Distress the edges of the page. Ink the edges of the page using Walnut Stain Distress Ink and a blending tool with foam.


Choose one of the reinforcements from the Reinforcement Variety Pack. Die cut the reinforcements out of kraft cardstock. You'll need a total of six reinforcements. Ink the edges of the reinforcements using Walnut Stain Distress Ink and a blending tool with foam.


From the Planner Essentials 24 - Photo Frame Pages you'll need the filmstrip and arrow die. Die cut the arrow die out of a piece of vellum. Die cut the filmstrip die out of a piece of kraft cardstock.


Choose one of the medium sized banners from the Planner Essentials 27 - Retro Number Trio. Choose two pieces of fall themed patterned paper and die cut the medium sized banner once out of each of the patterned papers. Ink the edges of both banners using Walnut Stain Distress Ink and a blending tool with foam.


Choose two more coordinating fall themed patterned papers. You will also need one of the papers you just used to die cut the banners out. From the Planner Essentials 21 - Note Pieces die, you'll need the 2 7/8" note piece, the 1 1/2" note piece and the 2" note piece. Die cut the 2 7/8" note piece out of the first patterned paper. Die cut the 1 1/2" note piece out of the second piece of patterned paper. Die cut the 2" note piece out of the third patterned paper. Distress the edges of all of the note pieces. Ink the edges of all the note pieces using Walnut Stain Distress Ink and a blending tool with foam.


Choose three of the mushrooms from the Autumn Surprise stamp set. Apply Jet Black Archival Ink to each of the mushrooms and stamp onto a piece of watercolour cardstock. Colour the mushrooms in using the Watercolor Palette. Once the mushrooms have dried, fussy cut them out. Ink the edges of the mushrooms using Walnut Stain Distress Ink and a blending tool with foam.


Using the Morning Letters stamp set, spell out the word Thankful. Apply Jet Black Archival Ink to each letter that spells out Thankful and stamp onto a piece of White Soft Finish Cardstock. Fussy cut around the word. Ink the edges of the word using Walnut Stain Distress Ink and a blending tool with foam.


Adhere the reinforcements over each of the circles on the page.


Adhere the 1 1/2" note piece 5/8" from the right and 1/4" from the top of the 2 7/8" note piece. Adhere the 2" note piece 1/2" from the right and 3/4" from the top of the 2 7/8" note piece.


Staple the filmstrip and arrow as desired on the left hand side of the 2" note piece.


Foam square the 2 7/8" note piece 1 1/8" from the bottom and have the note piece hang over the right hand side by a 1/4".


Use adhesive and foam squares to adhere the mushrooms as desired on the note pieces. Adhere the thankful word to the right hand side of the 2" note piece.


To finish the page, staple the two banners at the top right corner of the page as desired.


Here are a few closeup photos of the page.


Here is the finished Thankful Sidekick Essentials Page.


Elizabeth Craft Designs Supplies Used:

 
 Other Supplies Used:

- Tim Holtz for Ranger Ink: Distress Ink - Walnut Stain and Blending Tool with Foam
- Ranger Ink: Jet Black Archival Ink
- Magenta Nuance: Olive, Jade and Orange
- Creative Memories: Painted Harvest Paper Pack
- Misc: Vellum, Kraft Cardstock and Mini Stapler

Thanks so much for joining me today and I hope that I have inspired you to recreate your own version of my Thankful Sidekick Essentials Page.

- Katelyn


Wednesday, May 13, 2020

For You Card

Happy Wednesday!

 For today's project I'm sharing with you my For You Card which features dies and stencils from Charlene & Ilse's Art Journal Specials Collection from Elizabeth Craft Designs, stamps from Charlene van der Vorst as well as dies from the Planner Essentials Collection and Els van de Burgt Studio. You'll want to read below as I share with you how I created my For You Card.


To add some interest to white stitched square, I used the Story Telling stencil to add a stenciled image to the middle of the square. I layered the white stitched square on top of a patterned paper stitched square.   


For some dimension overtop of the stenciled area, I layered the mandala, heart branch, filmstrip, arrow, cheesecloth and the bud as desired on top of one another.  


I stamped and watercoloured two mushrooms and layered them on top of the bud. To finish the card, I layered the For You sentiment to one of the labels from the Planner Label. I foam squared the label to the right of the mushrooms as desired. 


Elizabeth Craft Designs Supplies Used:

- 6mm

Other Supplies Used:

- Tim Holtz for Ranger Ink: Distress Ink- Walnut Stain and Blending Tool with Foam
- Ranger Ink: Texture Paste Opaque Matte
- Creative Memories: Painted Harvest Paper Pack
- Misc: Book Page, Black Cardstock and Cheese cloth

I hope that my For You Card has inspired you to recreate your own version at home.

- Katelyn


Friday, September 6, 2019

September Planner Post #1 - Week #1

Happy Friday! 
I'm excited to be sharing Week #1 in my planner today that was featured in Creative Scrapbooker Magazine - Fall Issue on page 74. To create my week planner spread, I've used a variety of the dies from the Planner Essentials line. You'll want to read below to learn how I created my Week #1 planner spread.


For the left hand page and the right hand page of the planner spread, they were die cut out of the pages from Planner Essentials die 1 & 3 out of White Soft Finish Cardstock. Once the pages were die cut, sprinkle Magenta Nuance Orange, Olive and Cerulean Blue over the pages. Spritz the pages with water and dry with a heat tool. To finish off the pages, add stamping using the Patterns 1 & 2 stamp sets using Jet Black Archival Ink and Potting Soil Archival Ink. On the tabs, using Potting Soil Archival Ink to stamp September from the Months stamp.


To add some interest in behind each day I stamped hexagons from the Months stamp set onto patterned paper from Creative Memories - Painted Harvest paper pack. Fussy cut the hexagons out. To add some interest at the bottom of each day, die cut the scallop from the Planner Labels die out of another patterned paper piece from the Painted Harvest Paper Pack.


In the top right corner of each page, stamp banners from the My Life stamp set onto patterned paper from Creative Memories - Painted Harvest paper pack. Fussy cut the banners out.  


The area for writing in each days activities is from the My Life stamp set, stamped onto a piece of White Soft Finish Cardstock. Cut each day of the week out.


With all of the elements put together on the pages, here is the finished Week #1 Planner Spread.


Elizabeth Craft Designs Product Used:


Other Supplies Used:

- Ranger Ink: Potting Soil Archival Ink, Jet Black Archival Ink and a Blending Tool with foam
- Magenta Nuance: Orange, Olive and Cerulean Blue
- Creative Memories: Painted Harvest Paper Pack
- Creative Scrapbooker Magazine: Superstock Cardstock
- Scrapbook Adhesives by 3L: EZ Runner and 3D Foam Squares
- Misc: Black Gel Pen

- Katelyn


Monday, January 28, 2019

Leave A Little Sparkle Wherever You Go Frame

Happy Monday! I'm up on Creative Scrapbooker Magazine's Blog as a monthly blogger sharing my Leave A Little Sparkle Wherever You Go Frame. My frame features the Mermaid Cove Collection from Creative Memories, dies from Elizabeth Craft Designs as well as ink from Ranger Ink and adhesive from Scrapbook Adhesives by 3L.


You'll want to make sure to stop by the Creative Scrapbooker Blog to learn all about how I created my Leave A Little Sparkle Wherever You Go Frame.

Thank for stopping by!
- Katelyn

Monday, August 27, 2018

Galiano Scrapbook Layout

Happy Monday! I'm up on Creative Scrapbooker Magazine's Blog as a monthly blogger sharing my Galiano Scrapbook Layout. My layout features the Maritime Collection from Creative Memories, the Blackboard Alphabet Die Set from Elizabeth Craft Designs, Ink from Ranger Ink and adhesive from Scrapbook Adhesives by 3L.


Make sure to stop by the Creative Scrapbooker Blog to learn how to recreate my Galiano Scrapbook Layout at home.

Thank for stopping by!
- Katelyn

Monday, November 27, 2017

Sugar Plum Christmas Cards

Happy Monday! I'm up on Creative Scrapbooker Magazine's Blog today as a monthly blogger sharing my December 25th & Peace, Love, Joy Christmas Cards that feature Creative Memories, Elizabeth Craft DesignsRanger Ink and Scrapbook Adhesives by 3L products. 


You'll want to make sure to stop by the Creative Scrapbooker Blog to read about  my December.25th & Peace, Love, Joy Christmas Cards so that you can recreate them at home.

- Katelyn