Showing posts with label Tim Holtz for Sizzix. Show all posts

Thursday, August 10, 2023

1st Birthday Card

 Today, I'm sharing this adorable 1st Birthday Card that features the Pirate Party Collection from Simply Stated Design.

To start, we are going to cut all of the patterned paper from the Pirate Party 12x12 Paper Pack.

From the cream paper, cut the following pieces: 4" x 5 1/4" and 1/2" x 4". From a scrap piece of the paper, take the Happy Birthday Stamp from the Crazy Talk stamp set and apply Lumberjack Plaid Distress Ink to the birthday word and stamp onto the scrap piece of cream paper. Cut the birthday word into a word strip. Sand the edges of all of the papers. 


Cut two pieces from the shark paper that measure 3 3/4" x 5" and 1" x 4 1/4". Sand the edges of both papers. 


Cut two pieces from the blue paper that measure 3 1/2" x 4 3/4" and 1 1/8" x 3 1/2". Sand the edges of both papers. 


From the fish paper cut a piece that measure 3 1/4" x 4 1/2". Sand the edges of the paper. 


From the burlap paper, cut a piece that measure 1 1/4" x 4 1/2". Sand the edges of the paper. 


Out of the Pirate Party Scene Ephemera, you'll need the ship with balloons.


Out of the Pirate Party Ephemera, you'll need the two star looking pieces in black and yellow. Fussy cut around each one. Sand the edges of each one.


From a scrap piece of blue paper, die the cut 1 from the Countdown dies. Sand the edges of the one.


Adhere the shark paper to the cream paper. Adhere the blue paper to the shark paper. Adhere the fish paper to the blue paper. 


Adhere the burlap paper 1/2" from the left and all the way to the top of the fish paper. Adhere the blue paper 2 1/8" from the left and 1/2" from the top of the fish paper. Staple the cream paper 3/4" from the left and 1/4" from the top of the fish paper. Staple the shark paper 1 1/8" from the left and 1/8" from the top of the fish paper. 


Adhere the yellow star to the top left side of the shark paper as desired. Adhere the black star to the bottom right of the fish paper as desired. Foam square the pirate ship so that it sits slightly overtop of each star.


Use adhesive and foam squares to adhere the 1 to the left of the pirate ship. Adhere the birthday to the right of the 1 as desired. 


To finish the card, cut a cardbase out of white cardstock that measures 4 1/4" x 11", score at 5 1/2". Adhere the cardfront to the cardbase.


Here are a few closeup photos of the finished card.


Here is the finished 1st Birthday Card.


Supplies Used:

- Simply Stated Design: Pirate Party 12x12 Paper Pack, Pirate Party Ephemera and Pirate Party Scene Ephemera 
- Tim Holtz for Ranger Ink: Distress Ink - Lumberjack Plaid
- Tim Holtz for Sizzix: Countdown
- Tim Holtz for Stampers Anonymous: Crazy Talk
Misc: White Cardstock 

I hope that my 1st Birthday Card have inspired you to recreate your own at home!

- Katelyn


Friday, August 19, 2022

Little Moments Big Memories File Folder

   Happy Friday!

 I'm up on Wild Whisper's blog today, where I'm sharing my Little Moments Big Memories File Folder perfect for adding photos to for a gift or adding the file folder onto a layout for more photos. My file folder features the BRAND NEW Chaos & Love Collection as well as the Ledger 6x8 Stamp Set from Nicole Wright Designs.


For all the details and a tutorial for my Little Moments Big Memories File Folder, you'll want to stop by the Wild Whisper blog. You'll want to make sure to keep checking out Wild Whisper's blog as the design team will be sharing lots of inspiration.

Don't forget to use DTKATELYNG to receive 10% off your order on Wild Whisper's Website.

- Katelyn


Friday, August 5, 2022

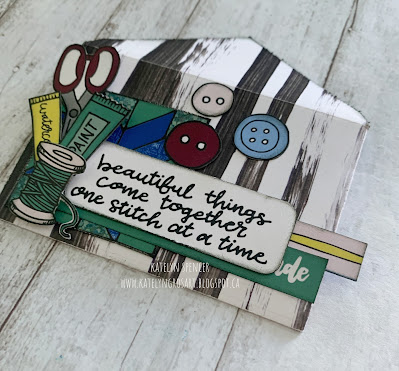
Beautiful Things Gift Envelope

   Happy Friday!

 I'm up on Wild Whisper's blog today, where I'm sharing my Beautiful Things Gift Envelope perfect for adding a gift card into for your crafty friend. My gift envelope features the BRAND NEW Handmade Collection.


For all the details and a tutorial for my Beautiful Things Gift Envelope, you'll want to stop by the Wild Whisper blog. You'll want to make sure to keep checking out Wild Whisper's blog as the design team will be sharing lots of inspiration.

Don't forget to use DTKATELYNG to receive 10% off your order on Wild Whisper's Website.

- Katelyn


Friday, April 22, 2022

73 Mini Album

   Happy Friday!

 I'm up on Wild Whisper's blog today, where I'm sharing my 73 Mini Album. My mini album features the Ledger & Script Collection by Nicole Wright Designs.


For all the details and a full tutorial on my 73 Mini Album, you'll want to stop by the Wild Whisper blog. You'll want to make sure to keep checking out Wild Whisper's blog as the design team will be sharing lots of inspiration.

Don't forget to use DTKATELYNG to receive 10% off your order on Wild Whisper's Website.

- Katelyn


Thursday, February 3, 2022

Love You To The Moon & Back Houses

 Happy Thursday!

Valentines is only 12 days away and I thought it would be fun to add a little decor to my Valentine's Day Decor. To create these cute little houses, I used the Tim Holtz Tiny Houses die and the Happy Hearts Creative Kit from Jennifer Edwardson Creative Inc. Grab a cup of your favourite beverage and learn how to recreate these cute little houses at home.


To start, die cut the small house twice at the roof once out of a piece of Mat Board. Choose two pieces of patterned paper from the Happy Hearts Creative Kit or any love themed patterned paper. The pattern that you want to use make sure it faces up when die cutting the house and the roof. You will need two house pieces. Ink the edges of the mat board houses and roof as well as the patterned papers using Walnut Stain Distress Ink and a blending tool with foam.


Adhere the patterned paper to each of the houses. Adhere the patterned paper roof to the roof.


Adhere the house together. Adhere the roof to the top of the house using a hot glue gun.


From the ephemera package from the kit, you'll need the typewriter and the Love You To The Moon & Back Quote. Cut the quote into four strips. I fussy cut three hearts from patterned paper. Ink the edges of all of the pieces. Foam square the typewriter to the bottom right side of the house front. Adhere the moon & back strips to the typewriter as desired. Adhere the three hearts as desired around the typewriter. 


Die cut the large house twice at the roof once out of a piece of Mat Board. Choose two pieces of patterned paper from the Happy Hearts Creative Kit or any love themed patterned paper. The pattern that you want to use make sure it faces up when die cutting the house and the roof. You will need two house pieces. Ink the edges of the mat board houses and roof as well as the patterned papers using Walnut Stain Distress Ink and a blending tool with foam.


From the ephemera package from the kit, you'll need the two roses, four hearts and the Love You To The strips. I fussy cut one heart from patterned paper. Fussy cut one of the labels from the patterned paper. Ink the edges of all of the pieces. 


Adhere the patterned paper to each of the houses. Adhere the patterned paper roof to the roof.


Adhere the house together. 


Foam square the two roses, one in the top right and one in the bottom left corner of the front of the house. Use adhesive and foam squares to adhere the label in between the two roses. Adhere the Love You To The word strips to the label as desired. 


Adhere the five hearts as desired on the front of the house.


Adhere the roof to the top of the house using a hot glue gun.


Here are a few closeups of the finished houses.


Here is the finished Love You To The Moon & Back Houses.


Supplies Used:

- Jennifer Edwardson Creative Inc.: Happy Hearts Creative Kit
- Tim Holtz for Sizzix: Tiny Houses
- Sizzix: Mat Board - White
- Tim Holtz for Ranger Ink: Distress Ink - Walnut Stain and Blending Tool with foam
Misc: Hot Glue Gun

I hope that my tutorial to create these Love You To The Moon & Back Houses has inspired you to recreate your own at home!

- Katelyn


Friday, December 18, 2020

Merry Gift Box

 Happy Friday!

I'm up on Wild Whisper's blog today, where I'm sharing this quick an easy Merry Gift Box perfect for wrapping a small gift in. The gift box features Pam Bray's Winter and Christmas Paper Collection.


For all the details and a full tutorial on my gift box, you'll want to stop by the Wild Whisper blog. You'll want to make sure to keep checking out Wild Whisper's blog as the design team will be sharing lots of inspiration.

- Katelyn