Sunday, November 29, 2015

"There is Beauty in Simplicity"

I wanted to share my second round submission with you for the Imagine Crafts Artist in Residence tryout. I created a tutorial on a card I created using the product they sent me. Unfortunately I didn't make the Imagine Crafts Artist in Residence Design Team but I wanted to share my tutorial anyways. Enjoy!

For the Imagine Crafts Artist in Residence Design Team second round submission, I was sent a variety of products from the company to create a project and a tutorial. The products I received are fun and vibrant.  When I paired them with a large butterfly stamp I have, inspiration hit! The fun, hand created background finishes the card off perfectly.


Difficulty: Intermediate
Time: 30 minutes 


Required supplies:

Imagine Crafts featuring Tsukienko:
Other Supplies:
  • Stampers Anonymous Stamp: Perspective
  • 4 7/8" x 6 and  3" x 4" clear stamp blocks
  • Spritzer filled with water
  • Black cardstock
  • Crafter's Companion: Watercolour and Ultra Smooth cardstock
  • Miscellaneous: Foam squares, paper trimmer, heat tool and scissors

Directions:


Step 1: Cut the watercolour paper 5" x 6".

Step 2: Supplies required are the Kaleidacolor Fresh Greens ink pad and the 4 7/8" x 6" clear stamp block.

HINT:  When you have finished using a Kaleidacolor ink pad, pull the notched tab so the individual ink colours are not touching.  When the ink pad is stored with the ink colours touching, the colours will bleed together.

Step 3: Push the notched tab so the individual colours are touching and form a solid ink pad.

Step 4: Ink the entire surface of the clear stamp block with the Kaleidacolor ink pad.  Continue inking the clear stamp block until the desired coverage has been attained.  (Once the clear stamp block has been inked, pull the notched tab so the individual ink pads are separated.)

The clear stamp block will look similar to this once it has been covered in ink.

Step 5: With the water filled spritzer, lightly spritz the inked clear stamp block. This will help the ink move on the block.

This is what the clear stamp block will look like with the water on it.
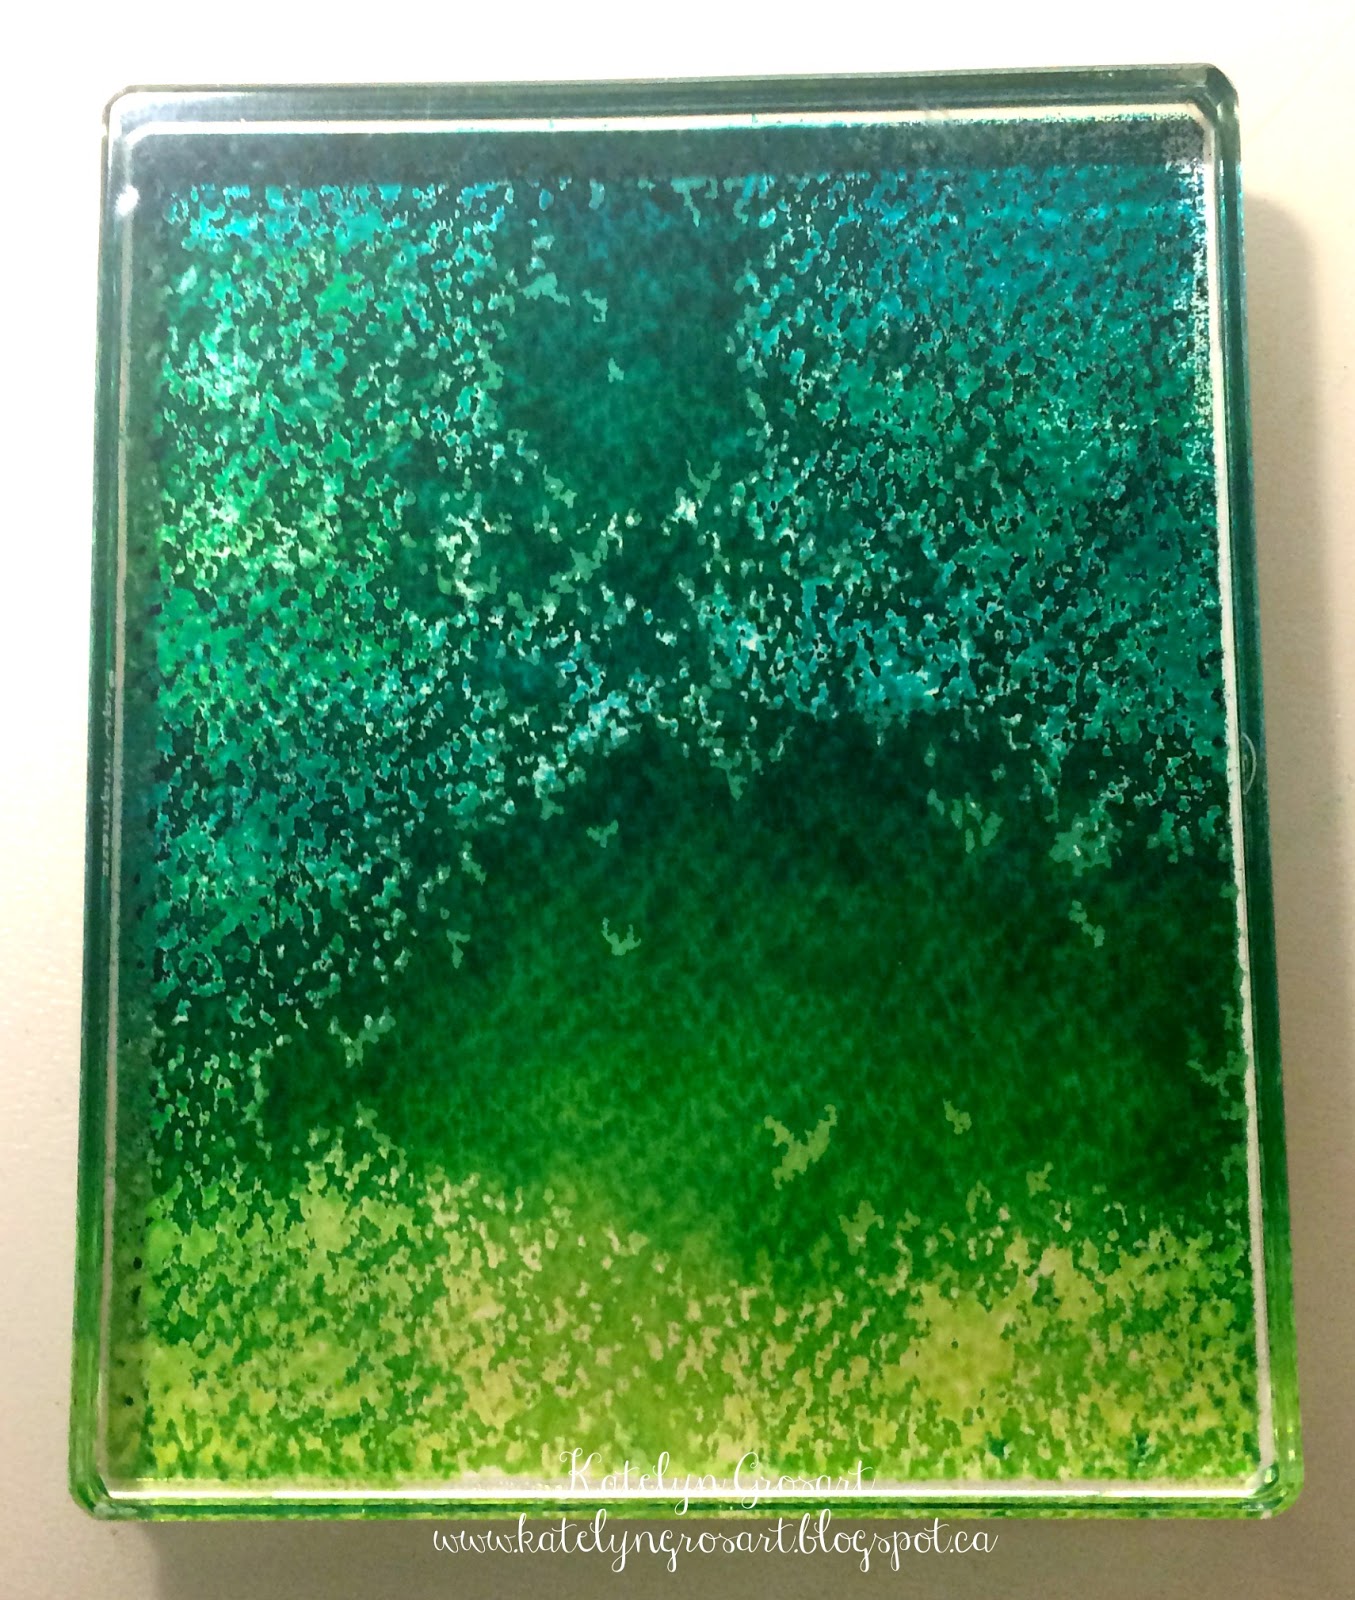
Step 6: Place the watercolour paper on a craft mat and  stamp the inked clear stamp block onto the watercolour paper.  Once the stamping has been completed, clean the clear stamp block using Imagine Crafts/Tsukineko StazOn Stamp Cleaner.

This is an example of what the watercolour paper may look like based on how the clear stamp block was inked and spritzed with water.  This technique is designed to create a unique background.

Step 7: Dry the custom background using the heat tool, making sure there are no wet ink patches.

Step 8: Trim the custom background to 4" x 5 1/4".

Step 9: Supplies required to stamp the butterfly are the Radiant Neon Warm ink palette, the butterfly stamp, the 4 7/8" x 6" clear stamp block and a sheet of Ultra Smooth white cardstock.

Step 10: Ink the butterfly stamp using all colours on the Radiant Neon Warm ink palette.

 
The above photo is a sample of the inked butterfly stamp.  Randomly applying the ink will create a custom stamped butterfly image.

Step 11: Stamp the butterfly stamp onto the piece of Ultra Smooth white cardstock.  Once the stamping has been completed, clean the clear stamp block using Imagine Crafts/Tsukineko StazOn Stamp Cleaner.

This is an example of what the stamped butterfly may look like based on how the stamp was inked.  This technique is designed to create a unique image.

Step 12: Dry the butterfly image with the heat tool.

Step 13: Precision cut around the stamped butterfly image.

The butterfly image will look like the above photo once it is precision cut.

Step 14: Fold up both sides of the butterfly to give dimension to the wings.

Step 15: Place the butterfly image onto a piece of paper towel.  Spritz the entire butterfly image with the Sheer Shimmer Spritz in Sparkle.

Step 16: Once the butterfly is spritzed, dry with the heat tool.

Step 17:  Adhere the saying "There is Beauty in Simplicity" stamp onto the 3" x 4" clear stamp block.

Step 18: Apply the StazOn Jet Black ink onto the saying stamp.

Step 19: Stamp saying on the same piece of Ultra Smooth white cardstock that the butterfly was stamped onto.

Step 20: Trim the stamped saying to 1" x 2 3/8".

Step 21: Colour the word "Beauty" with desired colours of the Neon Amplify! colours.  Once the colouring has been completed, wipe off the tip of each colour tube.

This is what the letters looked like once I finished colouring them. Based on colour choices, this sample may look different from yours which is okay.  This is an opportunity to make your project unique!

Step 22: Dry the Neon Amplify! with the heat tool. This will allow the Neon Amplify! product to expand while drying. 

Once the beauty word is completely dry, the letters will no longer be shiny. 

Step 23: Cut the following cardstock pieces: 
  • Black cardstock - 1 1/8" x 2 1/2" (mat for saying)
  • Black cardstock - 4 1/8" x 5 3/8" (mat for custom background)
  • White cardstock - 4 1/4" x 10 1/2"; score at 5 1/4" (card base)

Step 24: Ink the edges of the custom background using StazOn Jet Black ink.

Step 25: Ink the edges of the saying using StazOn Jet Black ink.

Step 26: Apply Imagine Crafts Tear It Tape! to the back of the custom background. Peel off the backing on the tape and adhere to the large piece of black cardstock.

Step 27: The custom background that is attached to the black cardstock will look like the above photo. Apply Imagine Crafts Tear It Tape! to the back of the black cardstock. Peel off the backing on the tape and adhere to the card base.

Step 28: Apply Imagine Crafts Tear It Tape! to the back of the stamped saying image. Peel off the backing on the tape and adhere to the small piece of black cardstock.

Step 29: Apply a single foam square to the middle of the butterfly image. 

Step 30: Peel off the backing on the foam square and adhere the butterfly image to the custom background.

Step 31: Adhere three foam squares to the matted saying. Peel off the backing on the foam squares and adhere the saying to the lower portion of the custom background.

Here is the finished card.

Thank you for taking the time to view my tutorial. I hope you have learned something to add to your stamping library.

Thanks to Imagine Crafts/Tsukineko for the product to create my second submission for their design team call. 

Until Next Time!
-Katelyn 


Thursday, November 26, 2015

Winter Wishes - Emerald Creek Dares Challenge

It's my first official post as a Design Team member with Emerald Creek  and if working with this amazing team and company couldn't get any better, I found out that the next Emerald Creek Dares Challenge is all about Christmas.  With knowing the challenge is all about Christmas, I knew it was going to be right up my alley.  Christmas is one of my most favourite times of the year as you are able to spend time with family and friends and create new traditions. So sit back with a cup of coffee and enjoy learning how I created.

To get my embossed snowflakes, I ran two snowflakes out of black cardstock, using the paper snowflakes die set and then ran them through my Big Shot. Once they were run through, I took my Tim Holtz Distress Embossing ink and covered the entire surface of both snowflakes.


Once the snowflakes were covered with embossing ink, I used the Soft Fallen Snow Embossing Powder and sprinkled it over top of each of the snowflakes. Make sure that the entire surface of both  snowflake die-cuts are covered in embossing powder. 


Once the snowflakes are covered in embossing powder, emboss both snowflakes with a heat tool.  Once the snowflakes are embossed, adhere the two snowflakes together in the middle using a glue dot. Once the paper snowflakes are adhered together, add a glue dot to the Victorian Snowflake and adhere to the middle of the top paper snowflake. Set the snowflakes aside once they are together. 


To add the Soft Fallen Snow Embossing Powder  to the edges of the white and black cardstock, ink around your edges using the Tim Holtz Distress Embossing Powder.  


Once the edges are marked with the Tim Holtz Distress Embossing Ink, sprinkle Soft Fallen Snow Embossing Powder around the edges. Tap off the extra. If there is more embossing powder on one side of the paper then the other, that is what gives the edges a unique look. Repeat this for both black cardstock pieces.
Once the embossing powder has been tapped off, emboss the edges with a heat tool. Repeat this for both black cardstock pieces. 


To finish off the card I needed a sentiment, so I inked up the Warmest Wishes stamp with the Tim Holtz Distress Embossing Ink. Once inked, stamp the Warmest Wishes stamp onto the vellum piece. 


Sprinkle the Onyx Frost Embossing Powder  over top of the Winter Wishes stamped image. Tap off the excess and then emboss with a heat tool. 


To finish the sentiment off, on the right side of the vellum piece I turned it into a banner to give the saying a bit more detail as well as adding a Mini Victorian Snowflake charm to the left hand side of the saying.  Once I was done with the sentiment, I attached all of my layers together on the cardbase. To give the snowflake die cuts some dimension, I foam squared them. The best way the adhere the vellum banner is to use glue dots. 

Here is my Warmest Wishes Card finished

Supplies Used: Emerald Creek - Soft Fallen Snow Embossing Powder, Onyx Embossing Powder, Victorian Snowflake Charms & Mini Victorian Snowflake Charms, Bazzill Cardstock - White, Black & Vellum, American Crafts - Silver Glitter Paper, Ranger/Tim Holtz - Distress Embossing Ink, Sizzix/Tim Holtz Die - Paper Snowflakes.


Make sure that you go and check out the rest of the Emerald Creek Dares Design Team:


Don't forget to enter your project into our Emerald Creek Dares Challenge for your chance to win a $25.00 gift certificate for the Emerald Creek Store!


Thanks for stopping by and checking out my project!

Until Next Time!
-Katelyn


Sunday, November 22, 2015

"Peace" Christmas Card on the Southern Ridge Trading Company Blog

It's my turn back on the Southern Ridge Trading Company blog today with a vintage "Peace" Christmas card.  Just a reminder that there are still 8 days to participate in our Monthly Challenge. Head here to see all of the details on how to enter and add your project. 


Supplies Used: SRTC - Small Primitive Stars, Words of Christmas #2, 10mm Cream Flowers & 10mm Brown Flowers. Emerald Creek - Soft Fallen Snow & Iridescent Shimmer Embossing Powder. Glue Dots. Ranger/Tim Holtz - Ground Espresso Distress Ink. Maja Designs - Home for the Holidays 6x6 pad & Home for the Holidays 12x12 Die-cut paper. Bazzill Cardstock - Brown. Tsukineko/Imagine Crafts - Silver Delicata & VersaMark.


On the small primitive stars and Words of Christmas #2 featuring the "Peace" word, I covered the entire surface of all three pieces using Silver Delicata. Before the Silver Delicata dried on all three pieces, I sprinkled Iridescent Shimmer embossing powder from Emerald Creek over top and embossed them. I love how each piece turned out a bit differently but all three pieces have even more sparkle on now.


To finish my card I covered the edges of each of my patterned papers with VersaMark and sprinkled Soft Fallen Snow embossing powder from Emerald Creek around the edges. Once embossed, it gives the edges some more detail. I also added the matching flowers around the two corners to pull my card together.


Thanks for stopping by and taking a look at my card.  To see other projects from the Southern Ridge Trading Company Design Team, head over to the blog. Stay tuned for some more Christmas themed projects on my blog this week.

Until Next Time!
-Katelyn

Saturday, November 14, 2015

Noel Christmas Tag on the Southern Ridge Trading Company Blog

Happy Saturday! I'am back on the Southern Ridge Trading Company Blog with a fun Christmas tag. Our challenge this month is all about Christmas so make sure that you participate as it is an easy one and you have a chance to win $20.00 in product of your choosing. To find out all of the details on the Challenge and how to participate, head HERE.  Without making you wait any longer, here is my fun Christmas tag:

Supplies Used: SRTC - Snowflakes 713 & Words of Christmas 2, Ranger - Bridal Tinsel Embossing Powder, Tim Holtz Distress Stain - Brushed Pewter, Tim Holtz Distress Ink - Walnut Stain, Dylusions Paint - Postbox Red, Emerald Creek - Large Snowflake and Small Snowflake charms, KaiserCraft Holly Jolly Collection - Joyous & Hearty, KaiserCraft Home for Christmas Collection - Laurel, Graphic 45 Staples - Large Black Tag, White Cardstock,  Tsukineko/Imagine Crafts - VersaMark, Wink of Stella Pen - Silver, Sakura Gel Pen - Clear, May Arts Ribbon - White Seam Binding Ribbon & Kraft Twine.

For the snowflakes I used Snowflakes 713, which are chipboard and covered them first with a layer of VersaMark and then sprinkled the Bridal Tinsel Embossing Powder overtop of them. I then used my heat tool to set the embossing powder. Once they were embossed, I added a layer of Tim Holtz Distress Stain in Brushed Pewter. To make sure the snowflakes were dry from the stain, I ran the heat tool over top of them.  Below is a photo of how they turned out.


The "Noel" word can be found on the Christmas Words 2 set.  I painted the "Noel" word using Dylusions Paint in Postbox Red. What is cool with this word, is you don't have to cover the word in Gesso before painting it because it is made out of wood. I went overtop of the word with my heat tool to make sure that the paint was dry. Below is how the noel word turned out.


Here is my card with all of the elements together. I added some fun snowflake charms from Emerald Creek. I felt my Christmas Trees were bare, so I added some sparkle to them using my Wink of Stella pen as well as my Sakura Clear Gel Pen.


Thanks for taking the time to stop by and check out my blogpost. Make sure you stop by the Southern Ridge Trading Company blog to see the other amazing projects from the rest of the design team at: http://southernchipboard.blogspot.ca/. You can also follow me on Instagram at: a_creative_journey_1.

Until Next Time!
-Katelyn 

Tuesday, November 10, 2015

Exciting News!!

I have exciting news to share with you! I'am the newest design team member on the Emerald Creek Design Team. I'am honoured to be apart of this amazing group of designers. 

The products are amazing and to view them all, you can head over to our website: http://www.emeraldcreek.ca/. I'am sure that you will want to order a few things while you're there. 

Take the time to check out the Emerald Creek Blog at: http://blog.emeraldcreek.ca/ and see all of the other amazing designers that I will be creating with!

Until Next Time!
-Katelyn

Friday, November 6, 2015

Sympathy Card

I'am so excited that I can finally tell you that I will be guest designing for Emerald Creek for three months. I absolutely love their charms and stamps, what I find that is even cooler is that they're a Canadian company.  You have to go and check out their website and see all of the awesome things they carry. While you're there, head over to their blog and participate in their Tricks Treat Challenge. Here is where you can find all of the details on how to participate: http://blog.emeraldcreek.ca/2015/10/tricks-treats-for-this-dare.html.  There are only 4 days left to participate and you have a chance to win a $25.00 gift certificate to use in the store. 

Sympathy cards aren't something that you see a lot of online as many people don't enjoy making them. When I saw the poppy stamp and "You are in our Thoughts" stamp  from Emerald Creek,  I knew they would make the perfect sympathy card.  So for my first project with them, I decided to do a sympathy card: 
Supplies Used: Emerald Creek - Poppy stamp & In our thoughts stamp, Tsukineko - Black Staz On, Tim Holtz Distress Ink - Gathered Twigs, Tim Holtz Distress Markers: Black Soot, Barn Door, Peeled Paint, Mowed Lawn, Sizzix/Tim Holtz Thinlits - Tiny Tattered Floral, Graphic 45 "Home Sweet Home" - Garden Fresh & Bazzill Cardstock - White & Cream.

The poppy stamp and "You're in our Thoughts" stamp I used are available on the Emerald Creek Website. For the poppy stamp I used Black Staz On to stamp with and then coloured in the poppy image using Tim Holtz Distress Markers in: Black Soot, Barn Door, Peeled Paint, and Mowed Lawn. I also stamped the "You are in our Thoughts" stamp with Black Staz On to create the banner.  To create my rolled flowers, I used the Tim Holtz Thinlits die - Tiny Tattered Floral. Here is an up close view at how great the stamps are.


I love how all of the elements turned out on the card and I love how beautiful the stamped images are. Here's my card one last time:

Thanks for taking the time to stop by and check out my card. I hope you take the time to head over to the Emerald Creek Blog and check out all of the other amazing designers as well as participate in their Tricks and Treat challenge. 

Until Next Time!
-Katelyn


Sunday, November 1, 2015

Skull Card for the Trick and Treat Challenge at Emerald Creek Dares

Happy November! I know that Halloween was yesterday but I couldn't resist making one more card as Emerald Creek is having a Tricks and Treat challenge over on their blog. There are still 9 days to participate in this fun challenge. To participate and add your submission, head over here to read all of the details. For the challenge, I submitted a fun skull card featuring all things Tim Holtz. Follow below to read how I created this fun card.

Here is my card I created:

Supplies Used: May Arts Ribbon - Cream Seam Binding Ribbon. Emerald Creek - Brass Skull charms. Tim Holtz Distress Ink - Black Soot, Twisted Citron, Carved Pumpkin, Wilted Violet. Tim Holtz Distress Markers - Wilted Violet, Carved Pumpkin, Scattered Straw, Antique Linen. Tim Holtz Distress Stain - Wilted Violet, Carved Pumpkin. Tsukineko - Versamark, Clear Embossing Powder, Black Staz On . Memory Box - Delicate Web. Tim Holtz Stamp - Undertaker. Tim Holtz Stencil - Shattering. Bazzill - Black Cardstock. Pebbles "Boo" - Hocus Pocus. 

To create the background behind my skull, I first blended Twisted Citron, Carved Pumpkin and Wilted Violet on white cardstock with a blending tool. I then took my shattered stencil and laid it over top of the custom background and stamped Versamark over top. Once the versamark and stencil  had covered the entire card, I sprinkled clear embossing powder over top of the versamark, tapped off the excess and used a heat tool to set the clear embossing powder. Once the embossing powder had cooled down a little bit, I blended black soot distress ink overtop where it stayed in between the shattered embossed parts. To finish the card I added the fun skull image and labels from the Tim Holtz Undertaker stamp set. I stained my cream ribbon using Wilted Violet and Carved Pumpkin Distress stains. Once the ribbon was dry, I wanted to add some extra detail to my ribbon, the perfect embellishments was a  fabulous brass skull charm from Emerald Creek. Here is my card again with all of the elements I just talked about:


Thanks for stopping by and checking out my card. Make sure you head over to Emerald Creek's Blog and see all of the fabulous creations from their design team members.

Until Next Time!
-Katelyn