Thursday, January 30, 2020

Bloom Wall Hanging

Happy Thursday!

I've been dreaming of Spring arriving here on the West Coast of Canada as it has been raining and dreary the last week and a half. So, for today's project, I created this Bloom Wall Hanging. To create my wall hanging, I've used a variety of stamps from Charlene as well as dies from Els van de Burgt Studio. You'll want to read below as I have a full tutorial on how to recreate my Bloom Wall Hanging at home.

To start, die cut a 3 1/2" Stitched Fishtail out of White Soft Finish Cardstock. Sprinkle Raspberry, Coral and Rosebud Magenta Nuance randomly on the banner. Spritz the banner wth water. Dry the banner with a heat tool.


Next, you'll need the grid stamp from the Make a Wish stamp set. Apply Emboss It Ink to the stamp and stamp randomly on the banner. Reapply ink to the stamp as needed and stamp four more times. Sprinkle Molten Dimensions - Black Magic Embossing Powder over the stamped areas. Tap off the excess powder and emboss with a heat tool. Distress the edges of the banner. Ink the edges of the banner using Black Soot Distress Ink and a blending tool with foam.


Die cut a 4" Stitched Fishtail out of a book page. Distress the edges of the banner. Ink the edges of the banner using Black Soot Distress Ink and a blending tool with foam.


Die cut a 3/4" Stitched Fishtail out of White Soft Finish Cardstock. Cut the fishtail down to 3". Apply Jet Black Archival Ink to the Bloom sentiment from the A Field of Flowers stamp set and stamp onto the fishtail. Distress the edges of the fishtail. Ink the edges of the fishtail using Black Soot Distress Ink and a blending tool with foam.


From the Garden Flowers stamp set, you'll need the seven leaf leaf. Apply Jet Black Archival Ink to the stamp and stamp onto a piece of watercolour cardstock. Reapply the ink to the stamp and stamp on the same piece of cardstock. Colour the two leafs in using Scribble Sticks 1 & 2 and a waterbrush. Dry the leafs. Fussy cut the leafs out. Ink the edges of the leafs using Black Soot Distress Ink and a blending tool with foam.


Choose a large flower from the Garden Flowers stamp set and choose one of the other flowers from the A Field of Flowers stamp set. Apply Jet Black Archival Ink to the large flower and stamp onto a piece of watercolour cardstock. Apply Jet Black Archival Ink to the other flower and stamp onto a piece of watercolour cardstock. Reapply Jet Black Archival Ink to the other flower and stamp onto the same piece of watercolour cardstock. Colour the flowers in using Scribble Sticks 1 & 2 and a waterbrush. Dry the flowers. Fussy cut the flowers out. Ink the edges of the flowers using Black Soot Distress Ink and a blending tool with foam.


Adhere the 3 1/2" banner to the 4" banner.


Adhere the bloom fishtail 2" from the bottom and 1 1/4" from the left of the 4" banner. Adhere one of the leaves in the top left corner of the 3 1/2" banner. Adhere the other leaf in the bottom middle of the 3 1/2" banner. 


Use foam squares to adhere the flowers as desired in amongst the leaves and fishtail.


To finish the wall hanging, punch two holes at the top of the banner and tie a piece of twine through the holes, to create the hanging portion of the wall hanging.


Here are a few closeup photos of the finished Wall Hanging.


Here is the finished Bloom Wall Hanging.


Elizabeth Craft Designs Supplies Used:

- Stitched Fishtail Banners

Other Supplies Used:

- Tim Holtz for Ranger Ink: Distress Ink - Black Soot and Blending Tool with foam
- Dina Wakley for Ranger Ink: Scribble Sticks 1 & 2
- Ranger Ink: Emboss It Dabber, Jet Black Archival Ink and Mister
- Emerald Creek Craft Supplies: Molten Dimensions - Black Magic Embossing Powder
- Magenta Nuance: Rosebud, Raspberry and Coral
- Misc: Book Page, Twine, Watercolour Cardstock and Waterbrush

I hope that my wall hanging has inspired you to recreate your own version of my Bloom Wall Hanging.

- Katelyn


Wednesday, January 29, 2020

Wishing You Oceans of Joy Card

Happy Wednesday! 

I've been busy creating with the brand new release from Joset Designs dies this past week and created this cute Wishing You Oceans of Joy Card. Joset's new release is available now at your local scrapbook store or the Elizabeth Craft Designs Website. You'll want to read below as I have a full tutorial on how to recreate my card at home. 


Choose a beachy piece of patterned paper and die cut a 3 3/4" Stitched Indented Square out of the patterned paper. Die cut a 3 1/4" Stitched Indented Square out of White Soft Finish Cardstock. Ink the edges of both squares using Black Soot Distress Ink and a blending tool with foam.


From the Octopus die, die cut the eyes and two hats out of White Soft Finish Cardstock. Using a blending tool with foam, blend Spiced Marmalade Distress Ink over the entire surface of the octopus. sing a blending tool with foam, blend Black Soot Distress Ink over the entire surface of the small eyes. sing a blending tool with foam, blend Faded Jeans Distress Ink over the entire surface of the middle hat on one of the hats. Cut the coloured strip off of the hat and adhere it to the plain white hat. Adhere the hat to the top of the octopus as desired. Adhere the eyes to the octopus. 


From the Ocean Edges die, choose one of the water styles and die cut it out of White Soft Finish Cardstock. Make sure the die sits 7/8" from the bottom of the White Soft Finish Cardstock piece. Using a blending tool with foam, blend Broken China Distress Ink over the entire surface of the ocean. Place the ocean piece at the bottom of the 3 1/4" square and cut out the indented portion on the ocean piece. 


Die cut a 3/4" Stitched Fishtail Banner out of White Soft Finish Cardstock. Cut the fishtail down to 2 1/2". From the Splish Splash Sentiment stamp, you'll need the "Wishing You Oceans of Joy" sentiment. Apply Faded Jeans Distress Ink to the stamp and stamp onto the banner. Ink the edges of the banner using Black Soot Distress Ink and a blending tool with foam.


Adhere the 3 1/4" square to the 3 3/4" square. Foam square the octopus to the middle of the 3 1/4" square. Foam square the ocean piece to the bottom of the 3 1/4" square. 


Use adhesive and foam squares to adhere the fishtail to the bottom left hand side of the card.


To finish the card, cut a cardbase out of White Soft Finish Cardstock that measures 3 3/4" x 7 1/2", score at 3 3/4". Adhere the cardfront to the cardbase.


Here are a few closeup photos of the finished card.


Here is the finished Wishing You Oceans of Joy Card.


Elizabeth Craft Designs Supplies Used:


Other Supplies Used:

- Tim Holtz for Ranger Ink: Distress Ink - Black Soot, Broken China, Faded Jeans & Spiced Marmalade and Blending Tool with Foam
- Stamperia: Patterned Paper

Thanks so much for joining me today and I hope that I have inspired you to recreate my card at home.

- Katelyn


Monday, January 27, 2020

Create the Things Tag

I'm thrilled to be back on the Elizabeth Craft Designs blog today, sharing my Create the Things Tag. My tag features a variety of stamps from Charlene and dies from the Planner Essentials Collection.


For a full tutorial on my tag, you'll want to head over to the Elizabeth Craft Designs blog for all the details. 

- Katelyn

The Journey is the Start Card

I'm excited to be back on Creative Scrapbooker Magazine's Blog as a monthly blogger sharing my The Journey is the Start Card. My project features a variety of products from Ranger Ink, Superstock from Creative Scrapbooker Magazine, dies from Elizabeth Craft Designs, embossing powder from Emerald Creek Craft Supplies and adhesive from Scrapbook Adhesives by 3L.


You'll want to make sure to stop by the Creative Scrapbooker Blog to learn how I created my The Journey is the Start Card.

Thanks for stopping by!
- Katelyn

Love Wall Hanging

I'm up on Southern Ridge Trading Company's blog sharing my Love Wall Hanging. I hope that my wall hanging inspire you to recreate your own version at home.


You'll want to stop by Southern Ridge Trading Company's blog so that you can learn how I created my Love Wall Hanging at home.

- Katelyn

Rosemary & Sage Notecard

Happy Monday!
I'm up on the Quietfire Design blog today, where I'm sharing my Rosemary & Sage Notecard. My notecard features a variety of Quietfire stamps, dies and the Modern Gilding Powder.


For a full tutorial and a few more photos of my project, you'll want to head over to Quietfire Design blog for all the details. 

- Katelyn

Friday, January 24, 2020

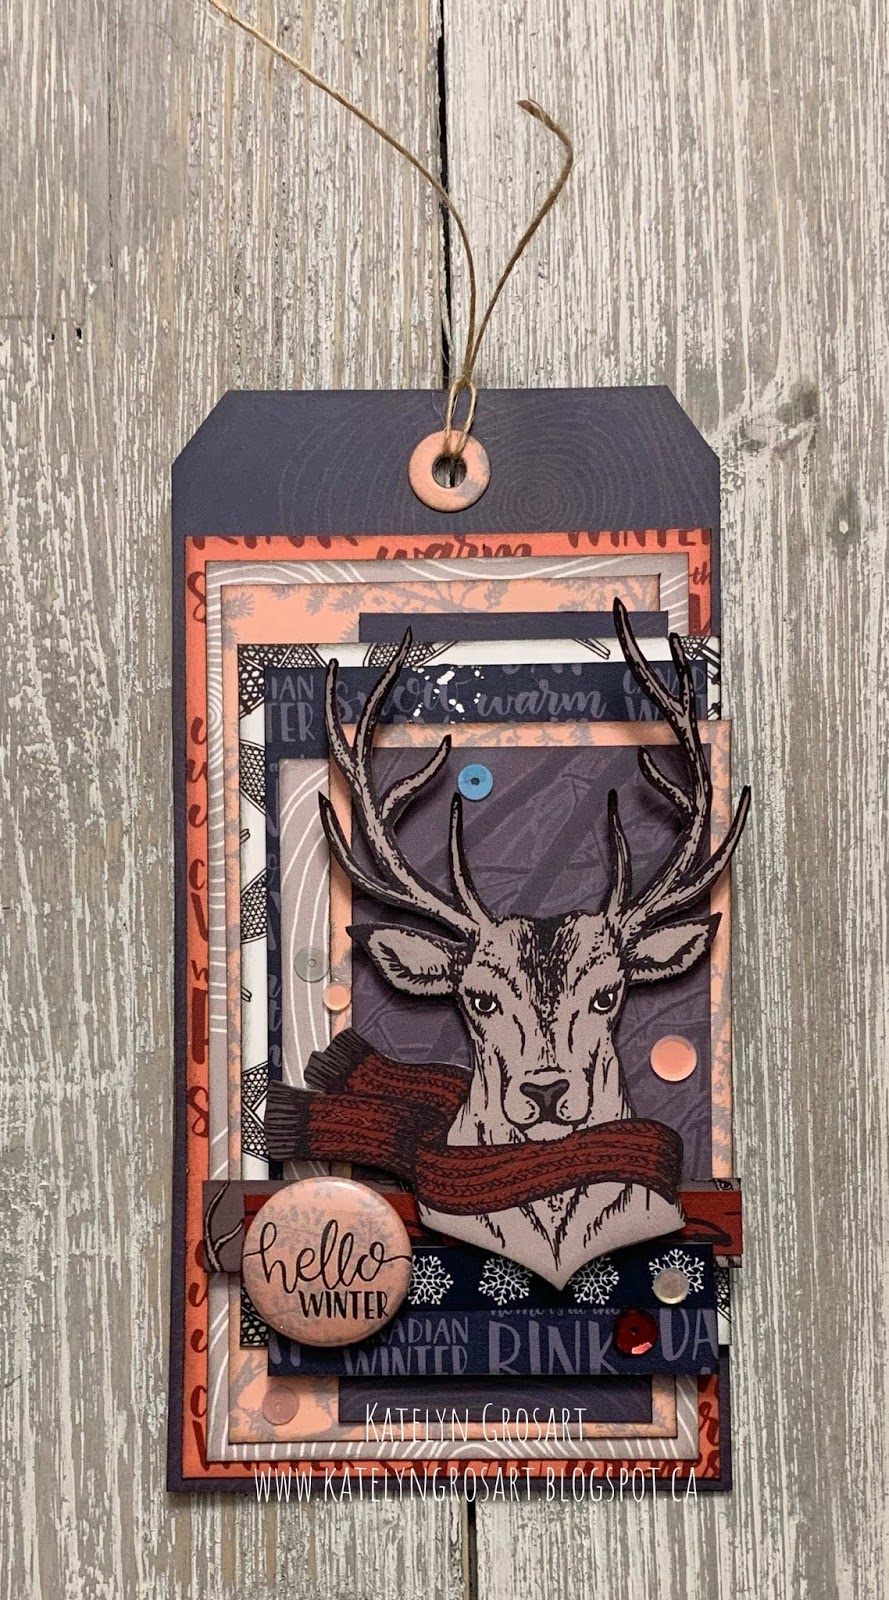
Hello Winter Tag

Happy Friday!
I have a new project over on Wild Whisper's blog, where I'm sharing my Hello Winter Tag which features the Canadian Winter Collection.


For all the details, more photos and a full tutorial on my tag you'll want to stop by the Wild Whisper blog. You'll want to make sure to keep checking out Wild Whisper's blog as the design team will be sharing lots of inspiration.

- Katelyn