Showing posts with label PaperArtsy. Show all posts

Thursday, March 26, 2020

Dream Art Journal Page

Happy Thursday!

 For today's project I get to share with you a project that uses some of the new dies, stencils and stamps from Charlene & Ilse's new Art Journal Specials Collection from Elizabeth Craft Designs. So for today's project, I created a Dream Art Journal Page. You'll want to read below as I have a full tutorial on how to recreate my Dream Art Journal Page at home.


Start by die cutting the ticket page from the Planner Essentials - 11 die out of White Soft Finish Cardstock. Using a brayer, start by brayering on PaperArtsy - Fresco Chalk Acrylic paint - Jade on the page. Continue to layer the PaperArtsy - Fresco Chalk Acrylic paint - Glacier Ice, Blue Lagoon and Coral on the page using a brayer. 


Place the X & 's portion of the stencil from Make Your Mark stencil, on the page as desired. Using a palette knife, put Texture Paste Opaque Matte through the stencil. Move the stencil around and place texture paste through the stencil. You'll want to have five stenciled areas on the page. 

Once the texture paste has dried, choose one of the leaves from the Spring Fling Stamp Set. Apply Jet Black Archival Ink to the leaf and stamp onto the page as desired. Reapply ink to the stamp and stamp seven more times as desired. Reapply ink to the stamp as needed. Distress the edges of the page. Ink the edges of the page using Black Soot Distress Ink and a blending tool with foam.


Choose one of the reinforcements from the Reinforcement Variety Pack. Die cut the reinforcements out of black cardstock. You'll need a total of four.


Apply Jet Black Archival Ink to one of the girls from the Floral Girls Stamp Set and stamp onto a piece of watercolour cardstock. Use a waterbrush and Scribble Sticks 1&2 to colour the girl in. Once the girl has dried, fussy cut her out. Ink the edges of the girl using Black Soot Distress Ink and a blending tool with foam.


Using the Morning Letters, spell out the word dream and apply Jet Black Archival Ink to the word. Stamp the word onto a piece of White Soft Finish Cardstock. Fussy cut the word out. Ink the edges of the word using Black Soot Distress Ink and a blending tool with foam.


Die cut the floral leaf branch from the Blooming Branches die out of book page.


From the Blooming Branches die, die cut the heart branch once out of black cardstock and a second time out of kraft cardstock.


From the Budding Florals die, die cut the bulb out of black cardstock.


Die cut one 1 1/2" Diagonal Stitched Fishtail out of White Soft Finish Cardstock. Die cut one 1" Diagonal Stitched Fishtail out of book page. From the top of the white fishtail, tear off enough so that the fishtail ends up being 4" long. From the top of the book page fishtail, tear off enough so that the fishtail ends up being 3 3/4" long. Distress the edges of the fishtails. Ink the edges of the fishtails using Black Soot Distress Ink and a blending tool with foam.


Die cut the Bubbles die out of black cardstock. Cut the bubbles down to fit the page as desired.


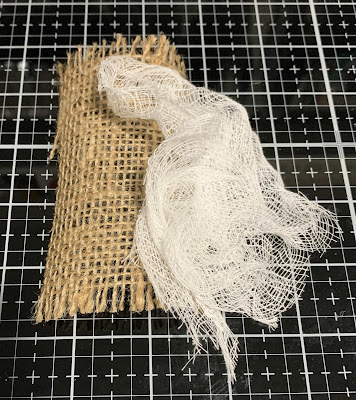
Die cut a 2 1/2" x 4 1/4" piece of burlap. Cut a piece of cheesecloth that's big enough to look good bunched up.


Adhere the reinforcement circles over top of each circle on the page. Adhere the burlap piece 1" from the top and all the way to the right hand side of the page. Adhere the bubble piece 3/8" from the top of the page and all the way to the right hand side of the page. 


Foam square the white fishtail 1 1/4" from the top and 1/4" from the right of the page. Adhere the book page fishtail 1 1/8" from the top and 1 3/8" from the left of the page. Adhere the bunched cheese cloth overtop of the fishtails as desired.


Adhere the black bulb to the middle of the cheese cloth. Adhere the two heart leaves and floral leaf branch as desired over top of the black bulb.


Use foam squares to adhere the girl partially overtop of the heart leaves and floral leaf bunch. Use adhesive and foam squares to adhere the dream sentiment to the bottom left hand side of the girl as desired.


To finish the page, use a paint brush to splatter Brushed Pewter Distress Spray Stain over the page as desired. 


Here are a few closeup photos of the finished art journal page.


Here is the finished Dream Art Journal Page.


Elizabeth Craft Designs Supplies Used:

- 6mm

Other Supplies Used:

- Tim Holtz for Ranger Ink: Distress Ink - Black Soot, Distress Spray Stain - Brushed Pewter and Blending Tool with Foam
- Dina Wakley for Ranger Ink: Scribble Sticks 1 & 2
- Ranger Ink: Jet Black Archival Ink and Texture Paste Opaque Matte
- PaperArtsy - Fresco Finish Chalk Acrylics: Glacier Ice, Coral, Jade and Blue Lagoon
- Misc: Burlap, Cheesecloth, Black Cardstock, Kraft Cardstock, Watercolour Cardstock and Book page

I hope that my wall hanging has inspired you to recreate your own version of my Dream Art Journal Page.

- Katelyn


Monday, March 16, 2020

The Real Voyage of Discovery Art Journal Page

Happy Monday!
I'm up on the Quietfire Design blog today, where I'm sharing my The Real Voyage of Discovery Art Journal Page. My art journal page features a variety of Quietfire stamps, dies and the Modern Gilding Powder.


For a full tutorial and a few more photos of my project, you'll want to head over to Quietfire Design blog for all the details. 

- Katelyn

Monday, January 27, 2020

Love Wall Hanging

I'm up on Southern Ridge Trading Company's blog sharing my Love Wall Hanging. I hope that my wall hanging inspire you to recreate your own version at home.


You'll want to stop by Southern Ridge Trading Company's blog so that you can learn how I created my Love Wall Hanging at home.

- Katelyn

Wednesday, August 7, 2019

Seaside Ship Wheel

Happy Wednesday! Today's project is a Seaside Ship Wheel for Southern Ridge Trading Company's blog. I hope that my Ship Wheel inspires you to want tp recreate your own version at home.


You'll want to stop by Southern Ridge Trading Company's blog so that you can learn how I created my Seaside Ship Wheel at home.

- Katelyn

Thursday, April 11, 2019

The Real Voyage of Discovery Wall Hanging

Happy Thursday!
I have a new post over on Quietfire Design blog today, where I'm sharing my The Real Voyage of Discovery Wall Hanging which features a variety of Quietfire stamps and A Way With Words Dies.


For a full tutorial and a few more photos of my project, you'll want to head over to Quietfire Design blog for all the details. 

- Katelyn

Monday, April 8, 2019

Happy Easter Card

Happy Monday!  Easter is only 13 days away and I have been busy creating some Easter cards perfect to give to that special someone in your life. Today's project is a Happy Easter Card for Southern Ridge Trading Company's blog. I hope that my card inspires you to recreate your own version at home.


You'll want to stop by Southern Ridge Trading Company's blog so that you can learn how I created my Happy Easter Card at home.

- Katelyn


Saturday, March 16, 2019

March Week #1 - Planner Post

Happy Saturday! I'm excited to be sharing with you Week 1 of my planner spread. I've been playing with the different stamps and dies in the planner collection from Elizabeth Craft Designs to my pages. You'll want to grab a cup of your favourite beverage and read below as I have a tutorial for you on how to recreate my planner spread. 


To start, you'll need to die cut the left hand planner page from the Planner Essentials 4 die out of White Soft Finish Cardstock. Next, you'll need to die cut the right hand planner page from the Planner Essentials 2 die out of White Soft Finish Cardstock. On a gel press plate, you'll need to put three large dots of Jade, Butter and Spanish Mulberry PaperArtsy Fresco Finish Chalk Acrylics. Using a brayer, mix the colours together by covering the plate with all of the paint. Press in a stencil and bubble wrap randomly on the plate. Press one of the pages into the plate, peel off and set aside. Repeat the previous steps for the other page.  Apply Jet Black Archival Ink to the March month out of the Calendar stamp set and stamp onto the tab of the right hand side page.


Apply Jet Black Archival Ink to the zigzag stamp from the Schedule stamp set and stamp randomly on the left hand side of the page. Apply ink to the stamp as many times as needed and stamp as many times as desired. Repeat the previous step for the right hand side of the page. Apply Jet Black Archival Ink to the bubbles stamp from the Patterns 2 stamp set and stamp randomly on the left hand side of the page. Apply ink to the stamp as many times as needed and stamp as many times as desired. Repeat the previous step for the right hand side of the page. Ink the edges of each page using Black Soot Distress Oxide Ink and a blending tool with foam.


From the Planner Essentials 3 die, die cut five banners out of black cardstock.


From the Planner Essentials 2 die, die cut the date and two arrows die out of black cardstock. Write the week date on the date tag.


From the Planner Essentials 1 die, die cut 12 reinforcement circles out of White Soft Finish Cardstock. Ink the edges of each circle using Black Soot Distress Oxide Ink and a blending tool with foam.


From the Planner Essentials 2 die, die cut six small tags out of White Soft Finish Cardstock. Apply Jet Black Archival Ink to each of the day stamps from the Calendar stamp set and stamp on each of the tags. Note that the weekend shares one tag. Write on your tags whatever you desire.  Ink the edges of each tag using Black Soot Distress Oxide Ink and a blending tool with foam.


Adhere the reinforcement circles over each circle on each page.


Now we'll work on the left hand page. Adhere a banner to the right hand side of the Monday and Wednesday tags. Adhere the date tag 3/8" from the left and 2 1/2" from the bottom of the page. Adhere the Monday to Wednesday tags to the page as desired. Adhere one of the arrows to the top right hand side of the Monday tag.


Next we'll work on the right hand page. Adhere a banner to the right hand side of the Thursday, Friday and Weekend tags. Adhere the Thursday to Weekend tags to the page as desired. Adhere one of the arrows to the bottom left hand side of the weekend tag.


Here are a few closeup photos of the finished March Week#1 planner spread.


Here's the finished March Week #1 Planner Spread.


Elizabeth Craft Designs Supplies Used:

Months

Other Supplies Used:

- Ranger Ink: Jet Black Archival Ink 
- Tim Holtz for Ranger Ink: Black Soot Distress Ink and Blending Tool with Foam
- PaperArtsy: Fresco Finish Chalk Acrylics - Jade, Butter and Spanish Mulberry
- Gel Press: 8x10 Gel Plate
- Misc: Black Cardstock, Black Gel Pen and White Gel Pen

Thanks for joining me! I hope that I've inspired you to recreate my planner spreads.

- Katelyn