Showing posts with label Emerald Creek Craft Supplies. Show all posts

Sunday, January 10, 2021

Remember the Now Planner Page

  Happy Sunday!

I'm up on the Elizabeth Craft Designs blog today, where I'm sharing my Remember the Now Planner Page. My planner page features dies from the Planner Essentials and Joset Designs.


For a full tutorial on my Remember the Now Planner Page, you'll want to head over to the Elizabeth Craft Designs blog for all the details. 

- Katelyn


Monday, December 21, 2020

Christmas Wishes Junk Journal Page

  Happy Tuesday!

For today's post, I've created this Christmas Wishes Junk Journal Page perfect to add into your junk journal. To create this page, I've used stamps, dies and stencils from the Art Journal Special Collection. You'll want to read below as I have a full tutorial on how to recreate my junk journal page at home. 


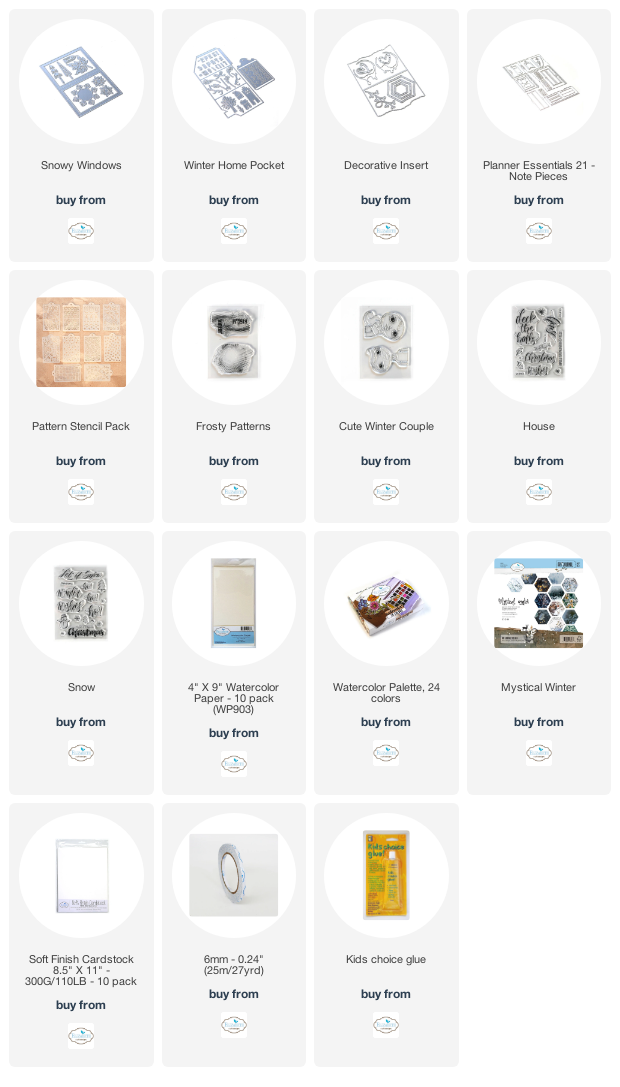
To start, choose a piece of patterned paper out of the Mystical Winter Paper Pack. Die cut the page from the Decorative Insert die out of the patterned paper. Choose one of the stencils out of the Pattern Stencil Pack. Place the stencil on the right hand side of the page and put Texture Paste Opaque Matte through the stencil with a palette knife. Move the stencil to the left hand side of the page and put Texture Paste Opaque Matte through the stencil with a palette knife. Move the stencil to the top of the page and put Texture Paste Opaque Matte through the stencil with a palette knife. 


Once the texture paste has dried, apply Emboss It Ink to the circle stamp from the Frosty Patterns stamp set and stamp as desired on the right hand side of the page. I place mine in amongst the stenciled area. Sprinkle Arctic Daybreak Embossing Powder over the stamped image. Tap off the excess powder and emboss with a heat tool. Reapply Emboss It Ink to the circle stamp and stamp as desired on the left hand side of the page. I place mine in amongst the stenciled area. Sprinkle Arctic Daybreak Embossing Powder over the stamped image. Tap off the excess powder and emboss with a heat tool. Ink the edges of the page using Walnut Stain Distress Ink and a blending tool with foam.


Choose a piece of patterned paper out of the Mystical Winter Paper Pack. Choose two of the note pieces out of the Planner Essentials 21 - Note Pieces Die. Die cut the two note pieces out of the patterned paper. Ink the edges of the note pieces using Walnut Stain Distress Ink and a blending tool with foam.


From the Snowy Windows Die, die cut the large snowflake, one of the small snowflakes once and the other small snowflake twice out of White Soft Finish Cardstock.


Die cut the small house from the Winter Home Pocket die out of a piece of watercolour cardstock. Using a waterbrush and the Watercolour Palette, colour the house. Once the house has dried, ink the edges of the house using Walnut Stain Distress Ink and a blending tool with foam.


From the Winter Home Pocket die, die cut the hearts out of watercolour cardstock. From the Snowy Wishes die, die cut the two trees out of watercolour cardstock. Using a waterbrush and the Watercolour Palette, colour the hearts and trees. Once the hearts and trees have dried, ink the edges using Walnut Stain Distress Ink and a blending tool with foam.


Apply Jet Black Archival Ink to the girl stamp from the Cute Winter Couple Stamp Set and stamp onto a piece of watercolour cardstock. Using a waterbrush and the Watercolour Palette, colour the girl in. Once the girl has dried, fussy cut her out.  Ink the edges of the girl using Walnut Stain Distress Ink and a blending tool with foam.


Apply Emboss It Ink to the Christmas word from the Snow stamp set and stamp onto a piece of White Soft Finish Cardstock. Sprinkle Brazen Belle Embossing Powder over the stamped word. Tap off the excess powder and emboss with a heat tool. Apply Emboss It Ink to the Wishes word from the House stamp set and stamp onto a piece of White Soft Finish Cardstock. Sprinkle Brazen Belle Embossing Powder over the stamped word. Tap off the excess powder and emboss with a heat tool. Once the words have cooled, cut them into two word strips. Ink the edges of both word strips using Walnut Stain Distress Ink and a blending tool with foam.


Cut two pieces of cheesecloth.

Adhere one of the note pieces 1 1/2" from the left on the left page. Staple one of the cheesecloth pieces as desired on the left hand page. I had my cheesecloth lay partially on the note piece.


Adhere the large snowflake overtop of the cheesecloth as desired. Foam square the girl and adhere her overtop of the large snowflake and partially over the note piece. Adhere the hearts above her heard as desired.


Adhere the other note piece 1/2" from the right on the right hand page. Staple the cheesecloth piece overtop of the note piece.


Staple the two trees as desired on the cheesecloth. Foam square the house to the bottom portion of the trees as desired.


Foam square the small snowflakes above the trees. To finish the page, use adhesive and foam squares to adhere the Christmas Wishes word strip to the left of the house and trees.


Here are a few closeup photos of the finished junk journal page.


Here is the finished Christmas Wishes Junk Journal Page.


Elizabeth Craft Designs Supplies Used:
 

Other Supplies Used:

- Tim Holtz for Ranger Ink: Distress Ink - Walnut Stain and Blending Tool with Foam
- Ranger Ink: Emboss It Ink, Texture Paste Opaque Matte and Jet Black Archival Ink
- Emerald Creek Craft Supplies: Arctic Daybreak Embossing Powder and Brazen Belle Embossing Powder
- Misc: Mini Stapler and Cheesecloth

I hope that my junk journal page has inspired you to recreate your own version at home.

- Katelyn


Saturday, December 19, 2020

Warm Hugs Gift Tag

Happy Saturday!

Christmas is only 5 days away and I'm starting to get my Christmas presents wrapped. For today's project I've created this quick and easy Warm Hugs Gift Tag perfect for adding to your gifts. To create my gift tag, I've used a variety of dies from the Paper Flower Collection and stamps from Sue Smith. You'll want to read below as I have a full tutorial on how to recreate my gift tag at home. 


To start, you'll need to die cut the large tag from the Planner Essentials - 2 die out of White Soft Finish Cardstock.


From the Strawberries die, die cut the two swirls twice out of a gold coloured cardstock. 


The next two steps use the Stamen Flowers Die. 

Die cut the two swirls once out of a gold coloured cardstock.


Die cut all the flowers twice out of a piece of red cardstock. Die cut all of the the flowers once out of a piece of green cardstock. Die cut the flower centres once out of a piece of gold coloured cardstock. You'll only need three centres.


From the Hugs stamp set, you'll need the Warm Hugs stamp. Apply Emboss It Ink to the stamp and stamp onto a piece of White Soft Finish Cardstock. Sprinkle Kells Gold Modern Gilding Powders over the stamped sentiment. Tap off the excess powder and emboss with a heat tool. Once the embossed words have cooled, fussy cut around the hugs word and cut the warm word into a strip.


Choose one of the reinforcements from the Reinforcement Variety Pack. Die cut one reinforcement out of green cardstock.


Adhere the reinforcement to the hole at the top of the tag.


Adhere one of each of the different sized flowers together of the same colour. Repeat the previous step for the other two flowers. Adhere a centre to each of the flowers. Shape each flower as desired.


Adhere the swirls as desired to the left hand tag.


Use foam squares to adhere the green flower to the middle of the left hand side of the tag. Adhere one of the red flowers to the top and bottom of the green flower.


Use foam squares to adhere the Warm Hugs words to the left of the flowers as desired on the tag. To finish the tag, tie a piece of twine through the hole at the top of the tag.


Here are a few closeup photos of the finished gift tag.


Here is the finished Warm Hugs Gift Tag.


Elizabeth Craft Designs Supplies Used:

 
Other Supplies Used:

- Ranger Ink: Emboss It Dabber
- Emerald Creek Craft Supplies: Kells Gold Modern Gilding Powders
- Graphic 45: Christmas Time - 12x12 Patterns & Solids
- Misc: Twine

I hope that my gift tag has inspired you to recreate your own version of my Warm Hugs Gift Tag.

- Katelyn


Wednesday, December 16, 2020

It's Christmas Time Planner Page

 Happy Wednesday! 

For today's post, I've created this fun It's Christmas Time Planner Page which features a variety of dies from the Planner Essentials Collection and stamps from Sue Smith. You'll want to grab a cup of your favourite Christmas time beverage and learn how to recreate my planner page at home. 


To start, choose a piece of Christmas patterned paper, I used Graphic 45's Christmas Time Paper Pack. Die cut the large tag from the Planner Essentials - 7 die out of the patterned paper. Ink the edges of the tag using Black Soot Distress Ink and a blending tool with foam.


From the Christmas Time 12x12 Patterns and Solids Paper Pack, you'll need a red, black and holly. From the Christmas Time Paper Pack, you'll need the gold/deer patterned paper.
The next four pieces are die cut out of the Planner Essentials 21 - Note Pieces Die. Die cut the 2 5/8" note piece out of the red paper. Die cut the black and the gold deer paper out of the 2 3/4" note piece. Die cut the holly paper out of the 1 1/2" note piece. Ink the edges of all four note pieces using Black Soot Distress Ink and a blending tool with foam.


From the Planner Essentials 15 - Bookmark 2 die, die cut the tree reinforcements out of a piece of green paper from the Patterns and Solids paper pack. You'll need a total of five reinforcements. Ink the edges of the reinforcements using Black Soot Distress Ink and a blending tool with foam.


Next, you'll need the green, gold and red holly paper from the Christmas Time Patterns & Solids Paper Pack. From the Planner Essentials 12 - Arrow Page & Trees, you'll need the plain tree, the dotted tree, the zig zag tree and the three stars. Die cut two plain trees out of the green paper. Die cut the dotted tree out of the red holly paper. Die cut the zig zag tree out of the gold paper. Die cut a total of five stars out of the gold paper. Ink the edges of all the trees and stars using Black Soot Distress Ink and a blending tool with foam.


From the Planner Essentials 16 - Christmas Tree Page, you'll need the two truck pieces, the large tires and the half tree. From the Christmas Time Pattern & Solids Paper Pack, you'll need a piece of red, green and black paper. Die cut the two trucks out of the red paper. Die cut the half tree out of the green paper. Die cut the two tires out of black paper. Ink the edges of the two trucks, half tree and two tires using Black Soot Distress Ink and a blending tool with foam.


Now, you'll need a piece of gold paper from the Christmas Time Patterns & Solids Paper Pack. From the House Stamp Set, you'll need the It's Christmas Time. Apply Emboss It Ink to the stamp and stamp onto the gold paper. Sprinkle Gothic Black Modern Gilding Powders over the stamped words. Tap off the excess powder and emboss with a heat tool. Cut the three words into three strips. Ink the edge of the word strips using Black Soot Distress Ink and a blending tool with foam.


Adhere the reinforcement trees over top of the holes on the planner page.


Foam square the red note piece to the middle of the page. Use adhesive and foam squares to adhere the black note piece 1/2" from the left and 1" from the bottom of the page. Use adhesive to adhere the holly note piece 5/8" from the right and 1/2" from the bottom of the page. Use adhesive and foam squares to adhere the gold/deer note piece all the way to the right edge and 1 1/2" from the top of the page. 


Adhere the zig zag tree to a plain tree. Adhere the dotted tree to the other plain tree. Use foam squares to adhere the zig zag tree 1" from the left and 1 1/2" from the top of the page. Use adhesive and foam squares to adhere the dotted tree 5/8" from the right and 1 7/8" from the top of the page.


Adhere your truck together. Adhere the truck 7/8" from the bottom and 3/4" from the left of the page.


Use adhesive to adhere the It's Christmas Time Word Strips to the top portion of the trees as desired. To finish the page, adhere the five stars as desired on the page.


Here are a few closeup photos of the planner page.


Here is the finished It's Christmas Time Planner Page.


Elizabeth Craft Designs Supplies Used:

Other Supplies Used:

- Tim Holtz for Ranger Ink: Distress Ink -  Black Soot and Blending Tool with Foam
- Ranger Ink: Emboss It Dabber
- Emerald Creek Craft Supplies: Gothic Black Modern Gilding Powders
- Graphic 45: Christmas Time Paper Pack and Christmas Time - 12x12 Patterns & Solids

Thanks so much for joining me today and I hope that I have inspired you to recreate your own version of my It's Christmas Time Planner Page.

- Katelyn