Happy Wednesday! I've been busy playing with Joset Designs new fabulous collection. With the new Easter themed dies in hand, I set off and created my fun Happy Easter Card. To create my card, I used dies from Joset Designs, ModaScrap and Els van de Burgt Studio. You'll want to read below as I share with you how to recreate my Happy Easter Card at home.

To start, you'll need the Elegant Easter Eggs Small Die.
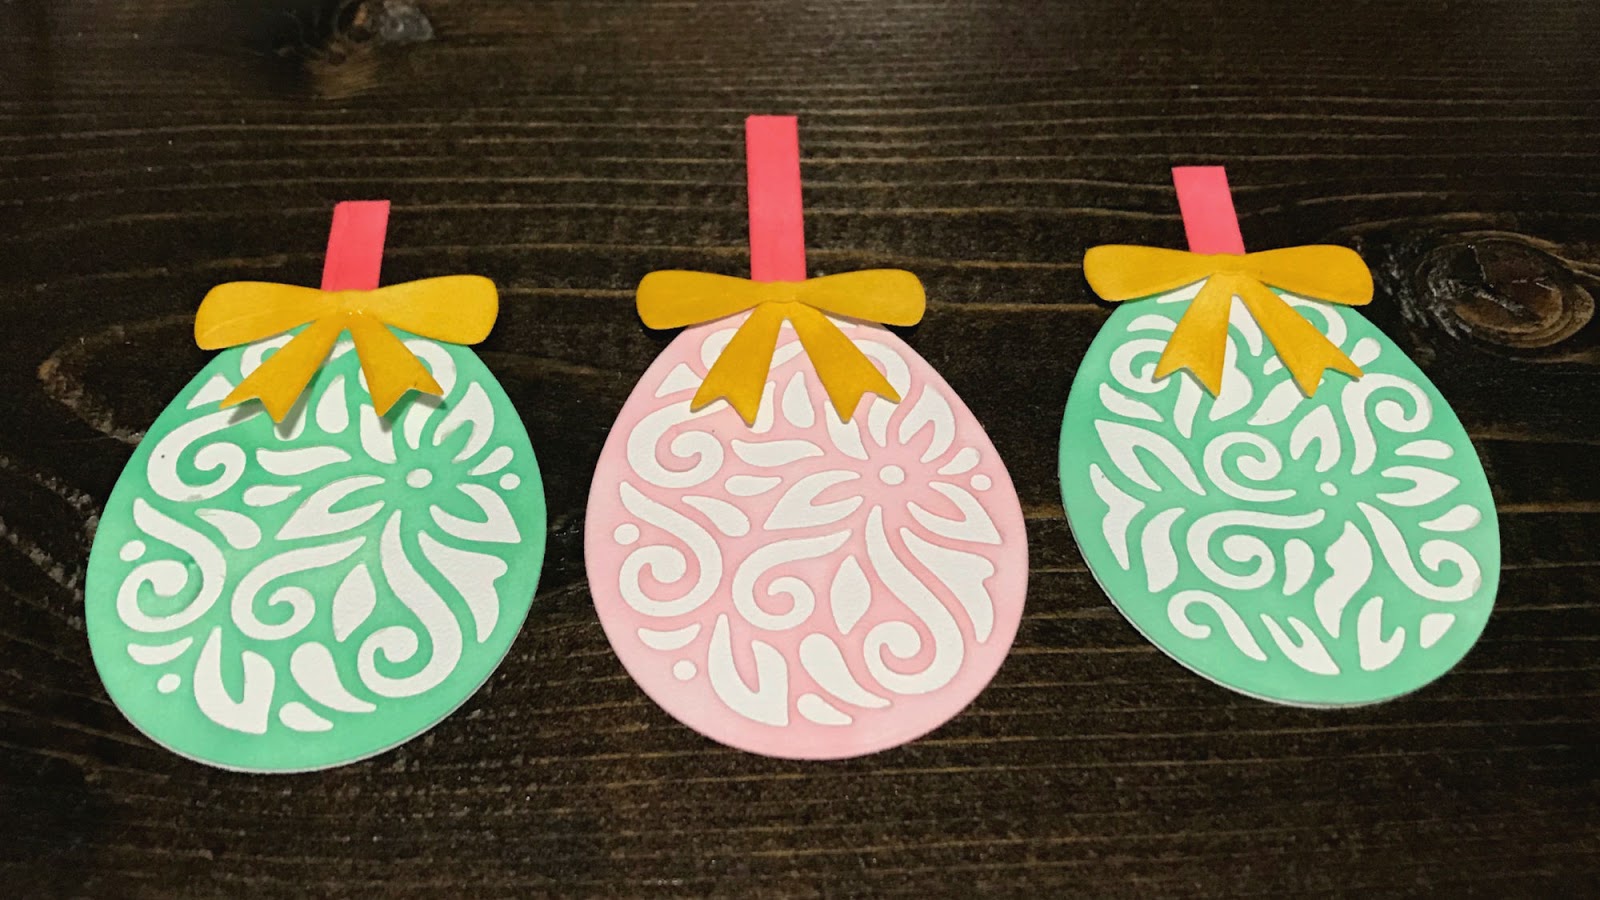
Die cut the bow dies three times out of White Soft Finish Cardstock. Using a blending tool with foam, blend Fossilized Amber Distress Ink over the entire surface of each bow.

Die cut the one of the decorative easter eggs twice and the plain easter egg twice out of White Soft Finish Cardstock. Using a blending tool with foam, blend Cracked Pistachio Distress Ink over the entire surface of the two decorative easter eggs.

Die cut the other decorative easter egg once and the plain easter egg once out of White Soft Finish Cardstock. Using a blending tool with foam, blend Spun Sugar Distress Ink over the entire surface of the decorative easter eggs.

Die cut the hanger die three times out of White Soft Finish Cardstock. Using a blending tool with foam, blend Worn Lipstick Distress Ink over the entire surface of the hangers.

From the Adventure Edges die, die cut the flowers out of White Soft Finish Cardstock. You'll only need three of them. Using a blending tool with foam, blend Spun Sugar Distress Ink over the entire surface of the flowers.

Die cut the 1 1/8" Stitched Fishtail Banner out of White Soft Finish Cardstock. Cut the banner down to 3 1/8". Apply Jet Black Archival Ink to the Happy Easter stamp and stamp onto the banner. Ink the edges of the banner using Ground Espresso Distress Ink and a blending tool with foam.

Choose a patterned paper piece out of the Beautiful Season Paper Pack. Die cut the 4 1/2" Dashing Rectangle out of the patterned paper. Ink the edges of the rectangle using Ground Espresso Distress Ink and a blending tool with foam.

From the Stitched Rectangles Die, die cut the 4" stitched rectangle out of White Soft Finish Cardstock. Ink the edges of the rectangle using Ground Espresso Distress Ink and a blending tool with foam.

Adhere the 4" Stitched Rectangle to the 4 1/2" Dashing Rectangle.

Adhere the decorative easter eggs to the back of each plain easter egg. Adhere the bows and hanger to each egg. Trim the hangers to the desired length.
Adhere the Happy Easter banner to the bottom left hand corner of the card front. Use foam squares to adhere one cracked pistachio egg 1/8" from the left and all the way to the top 4" stitched rectangle piece. Adhere the pink easter egg 5/8" from the bottom and all the way to the top of the 4" stitched rectangle. Adhere the cracked pistachio easter egg 1 1/8" from the bottom and all the way to the top of the 4" stitched rectangle. Make sure that all the hangers are at the top of the card front.

Cut a card base that measures 5 3/4" x 9", score at 4 1/2". Adhere the card front to the card base. Adhere the three flowers to the Happy Easter banner. To finish off the card, adhere Transp. Glitter/Gold Dots to the decorative easter eggs and the flowers on the banners.

Here are a few closeups of the finished card.


Here's the finished Happy Easter Card.

Elizabeth Craft Designs Supplies Used:
- ModaScrap: The Beautiful Season Paper Pack
Other Supplies Used:
- Tim Holtz for Ranger Ink: Distress Ink- Spun Sugar, Worn Lipstick, Cracked Pistachio & Fossilized Amber and Blending tool with Foam
- Ranger Ink: Jet Black Archival Ink
Thanks for stopping by and checking out my card. I hope that I've inspired you to recreate my Happy Easter Card at home.
- Katelyn
No comments:
Post a Comment