Monday, September 30, 2019

Thankful For You Tag

I have one more post to share with you today!

I'm thrilled to be back on Creative Scrapbooker Magazine's Blog as a monthly blogger sharing my Thankful For You Tag. My tag features ink from Ranger Ink, Chipboard Tag from Stampers Anonymous, a variety of products from Prima Marketing Inc and adhesive from Scrapbook Adhesives by 3L.


You'll want to make sure to stop by the Creative Scrapbooker Blog to learn how I created my Thankful For You Tag.

Thanks for stopping by!
- Katelyn

Blessed Wall Hanging with Katelyn Grosart

Happy Monday! 
Today's project is a Blessed Wall Hanging for Southern Ridge Trading Company's blog. I hope that my wall hanging inspires you to want to recreate your own version at home.


You'll want to stop by Southern Ridge Trading Company's blog so that you can learn how I created my Blessed Wall Hanging at home.

- Katelyn


Friday, September 27, 2019

Life was meant... Card

Happy Friday! 
I have a new project over on Wild Whisper's blog, where I'm sharing my Life was meant... card which features the Just Because Collection. 


For all the details, more photos and a full tutorial on my card you'll want to stop by the Wild Whisper blog. You'll want to make sure to keep checking out Wild Whisper's blog as the design team will be sharing lots of inspiration using the new collections.

- Katelyn

Wednesday, September 25, 2019

Beautiful Fall Altered Home Decor Frame

Fall is definitely in the air here on the west coast of Canada and to be honest, I'm really not upset that Fall has finally arrived. Don't get me wrong, I do love Summer, but there is something about Fall when you can consume tea all the time as well as wear scarves and not have people giving you crazy looks. 

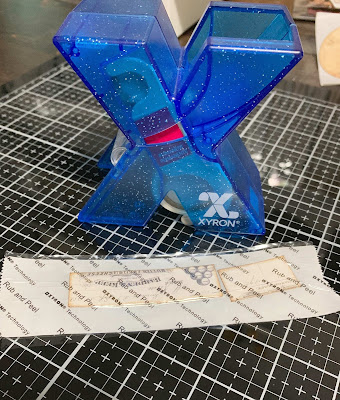
So to kick off the start of fall, I created this vintage Beautiful Fall Altered Home Decor Frame for my first project for Xyron's Maker Team. I'm thrilled to be apart of this talented team and have been loving using some of the Xyron products in my projects. So grab your favourite Fall beverage and learn how to recreate my Beautiful Fall Altered Home Decor Frame at home.


To start, you'll need to cut a an oval out of one of the patterned papers from the Autumn Sunset Collection from Prima Marketing. Use Xyron Tape Runner and run the adhesive along the edges of the oval.


Adhere the oval to the inside of the frame.


Die cut a 3 3/4" Stitched Oval out of the same collection of patterned papers. Distress the edges of the stitched oval. Ink the edges of the stitched oval using Walnut Stain Distress Ink and a blending tool with foam.  Run the 3 3/4" stitched oval through Xyron Creative Station Lite.


Adhere the stitched oval to the middle of the oval that is adhered to the frame.


Die cut the 1 1/2" and 1 1/4" Diagonal Stitched Fishtails out of the same collection of patterned papers. Distress the edges of the fishtails. Ink the edges of the fishtails using Walnut Stain Distress Ink and a blending tool with foam.  Run both fishtails through Xyron Creative Station Lite.


Adhere the 1 1/4" fishtail to the 1 1/2" fishtail. Adhere the 1 1/2" fishtail to the middle of the 3 3/4" stitched oval.


Cut a piece of the Ephemera from the Autumn Sunset Collection into three pieces. Distress the edges of the two pieces. Ink the edges of the two pieces using Walnut Stain Distress Ink and a blending tool with foam. Run two of the pieces through Xyron 1.5" Sticker Maker. 


Adhere the larger of the two pieces of ephemera to the left hand side of the 3 3/4" stitched oval. Adhere the smaller piece of the ephemera 1/4" from the top of the fishtails.


From the cut apart card paper from the Autumn Sunset Collection, fussy cut one of the cards out and die cut a 2 1/2" Stitched Oval out of another card. Distress the edges of the stitched oval and fussy cut card. Ink the edges of the stitched oval and fussy cut card using Walnut Stain Distress Ink and a blending tool with foam. Run the stitched oval and fussy cut card through Xyron Creative Station Lite.


Adhere the fussy cut card to the middle of the fishtails. Adhere the 2 1/2" stitched oval to the middle of the fussy cut card.


Fussy cut the wreath from the same card cut apart paper. Ink the edges of the wreath using Walnut Stain Distress Ink and a blending tool with foam. Use Xyron Tape Runner to adhere the wreath to the middle of the 2 1/2" stitched oval. 


From the Autumn Sunset Ephemera pack, cut the Beautiful Fall sentiment in half. Distress the edges of the words. Ink the edges of the words using Walnut Stain Distress Ink and a blending tool with foam. Run the two words through Xyron 1.5" Sticker Maker.


Adhere the Beautiful Fall words to the middle of the wreath.


From the Autumn Sunset ephemera and patterned papers, fussy cut two flower bunches and one small butterfly out. Ink the edges of the flowers and butterfly using Walnut Stain Distress Ink and a blending tool with foam. Run the flower bunches and butterfly through Xyron 1.5" Sticker Maker.


Adhere the two flowers in the top left corner of the 3 3/4" stitched oval. Make sure to fold the wings up on the butterfly and adhere in amongst the flower bunches.


From the Autumn Sunset ephemera and patterned papers, fussy cut a two pumpkin bunch, a single pumpkin, one small butterfly, two single leaves and a barrel full of pumpkins. Ink the edges of the iamges using Walnut Stain Distress Ink and a blending tool with foam. Run the two pumpkin bunch, the single pumpkin, small butterfly and two single leaves through Xyron 1.5" Sticker Maker.


Run Xyron Tape Runner to the back of the barrel of pumpkins. 


Adhere the two leaves, barrel of pumpkins, two pumpkin bunch and single pumpkin to the right hand side of the 3 3/4" stitched oval. Make sure to fold up the wings on the butterfly and then adhere it in amongst the leaves.


Here are a few closeups of the finish Altered Frame.


Here is the finished Beautiful Fall Altered Home Decor Frame.


Xyron Supplies Used:


Other Supplies Used:

- Prima Marketing: Autumn Sunset Collection
- Tim Holtz for Ranger Ink: Walnut Stain Distress Ink and a Blending Tool with Foam
- Elizabeth Craft Designs: Stitched Ovals and Diagonal Stitched Fishtails
- Misc: Frame

Thanks so much for joining me today and I hope that I've inspired you to recreate your own version at home. 

This post has been sponsored by Xyron. All thoughts and opinions are my own.

- Katelyn


Tuesday, September 24, 2019

Step-by-Step: September Week #3 Planner Spread

Happy Tuesday! 
I'm up on the Elizabeth Craft Designs blog today sharing my Step-by-Step: September Week #3 Planner Spread, which features dies from the Planner Essentials Collection and Joset Designs.


I would love for you to go and check out the full tutorial on how to create my September Week #3 Planner Spread over on the Elizabeth Crafts Designs Blog

- Katelyn

Boo Treat Box

Happy Tuesday!
I'm excited to have a be over on Quietfire Design blog today, where I'm sharing my Boo Treat Box. My treat box features a variety of Quietfire stamps as well as A Way With Words Dies.


For a full tutorial and a few more photos of my project, you'll want to head over to Quietfire Design blog for all the details. 

- Katelyn


Sunday, September 22, 2019

Boo! Planner Insert

I've been creating with Charlene van der Vorst new stamp sets this past week. For my project today, I created this Fall themed planner insert - Boo! to add in amongst my planner pages for September and October.  To create my insert, I've used a variety of stamps from Charlene as well as dies from Joset Designs and the Planner Essentials Collection. You'll want to read below as I have a full tutorial on how to recreate my planner insert at home. 


To start, die cut the planner insert from the Planner Essentials - 5 die out of White Soft Finish Cardstock. Sprinkle Magenta Nuance - Olive, Chartreuse and Orange over the insert. Spritz the powder with water. Allow the insert to dry.


Once the insert has dried, apply Potting Soil Archival Ink to the Autumn background stamp from the Autumn Surprise stamp set and randomly stamp on the planner insert as desired. Reapply ink when needed. Distress the edges of the page insert. Ink the edges of the page insert using Walnut Stain Distress Ink and a blending tool with foam.


Apply Potting Soil Archival Ink to the Boo! stamp from the Halloween Party stamp set and stamp onto a piece of White Soft Finish Cardstock. Cut the Boo! word out. Distress the edges. Ink the edges of the word using Walnut Stain Distress Ink and a blending tool with foam.


Apply Potting Soil Archival Ink to the pumpkin stamp from the Halloween Party stamp set and stamp onto a piece of White Soft Finish Cardstock. Watercolour the pumpkins with a waterbrush using Tombow Markers 177 & 933. Allow the pumpkins to dry. Fussy cut the pumpkins out. Ink the edges of the pumpkins using Walnut Stain Distress Ink and a blending tool with foam.


Choose three feathers from the Make a Wish stamp set. Apply Emboss It Ink to each of the feathers and  stamp onto a piece of White Soft Finish Cardstock. Sprinkle Burnt Copper Leaves Embossing Powder over each feather. Tap off the excess powder and emboss with a heat tool. Watercolour the feathers with a waterbrush using Tombow Markers 977 & 969. Allow the feathers to dry. Fussy cut the feathers out. Ink the edges of the feathers using Walnut Stain Distress Ink and a blending tool with foam. To finish off the feathers, use a white gel pen to highlight some of the areas on each feather.


Choose two patterned papers from the Autumn Sunset collection by Prima. Die cut the 1 1/2" Diagonal Stitched Fishtail out of one of the patterned papers. Cut the fishtail down to 3 3/4". Die cut the 1" Diagonal Stitched Fishtail out of the other patterned paper. Cut the fishtail down to 3 3/8". Distress the edges of each fishtail. Ink the edges of each fishtail using Walnut Stain Distress Ink and a blending tool with foam.


Adhere the 1" fishtail to the 1 1/2" fishtail. Foam square the 1 1/2" fishtail to the middle top of the planner insert.


Adhere the three feathers to the middle of the 1" fishtail. Use foam squares and adhesive to adhere the pumpkins to the bottom right side of the feathers.


To finish the planner insert, foam square the Boo! sentiment 1/4" from the left and 3/4" from the top of the planner insert. 


Here are a few closeup photos of the finished planner insert.


Here is the finished Boo! Planner Insert.


Elizabeth Craft Designs Supplies Used:


Other Supplies Used:

- Ranger Ink: Potting Soil Archival Ink, Emboss It Ink and Mister
- Tim Holtz for Ranger Ink: Distress Ink - Walnut Stain and a Blending tool with Foam
- Prima Marketing: Autumn Sunset Collection
- Magenta Nuance: Olive, Orange and Chartreuse
- Emerald Creek Craft Supplies: Burnt Copper Leaves Embossing Powder
- Tombow Markers: 177, 977, 969 & 933
- Misc: White Gel Pen and Waterbrush

- Katelyn