Showing posts with label Tombow. Show all posts

Thursday, December 5, 2019

Seasons Greeting Card

            Happy Thursday!
I'm over on the Elizabeth Craft Designs blog today, where I'm sharing my Seasons Greeting Card.  My card features a variety of stamps from Krista Schneider and dies from Joset Designs.


For a full tutorial on my card, you'll want to head over to the Elizabeth Craft Designs blog for all the details. 

- Katelyn


Monday, November 4, 2019

November Week #1 Planner Spread

Happy Monday! 
I've been busy setting up my planner this past weekend and I managed to get Week #1 of November done. To create my week #1 planner spread, I've used a variety of the dies from the Planner Essentials line as well as stamps from Charlene van der Vorst. You'll want to read below to learn how I created my November Week #1 planner spread.


To start, choose a patterned paper piece from the Fall Break paper pack. Die cut the page from the Planner Essential - 12 page twice out of the patterned paper. Ink the edges of the page using Walnut Stain Distress Ink and a blending tool with foam.


From another piece of patterned paper from the same collection, die cut the reinforcement hexagons from the Planner Essentials - 5 die twice. Ink the edges of the reinforcements using Walnut Stain Distress Ink and a blending tool with foam.


From the Planner Elements die, die cut the square pieces twice out of kraft cardstock. Ink the edges of the square pieces using Walnut Stain Distress Ink and a blending tool with foam.


Choose two more patterned papers. From the Planner Essentials - 11 die, die cut the strip twice out of one of the patterned papers. Cut one strip down to 5 3/4" and cut the other strip down to 6 1/4". From the Planner Essentials - 11 die, die cut the strip twice out of the other patterned paper. Cut one strip down to 5 7/8" and cut the other strip down to 5 7/8". Ink the edges of all four strips using Walnut Stain Distress Ink and a blending tool with foam.


Apply Potting Soil Archival Ink to the pumpkin stamp from the Halloween Party Stamp Set and stamp onto a piece of White Soft Finish Cardstock. Repeat the previous step. Colour in each pumpkin using Tombow Markers 177 & 933. Fussy cut each pumpkin out. Ink the edges of each pumpkin using Walnut Stain Distress Ink and a blending tool with foam.


Choose two more patterned papers. From the Planner Essentials - 6 die, die cut the large rectangle twice out of one of the patterned papers. From the Planner Essentials - 6 die, die cut the small rectangle twice out of the other patterned paper. Ink the edges of all the rectangles using Walnut Stain Distress Ink and a blending tool with foam.


Choose two labels from the Planner Labels. Die cut one of the labels four times out of White Soft Finish Cardstock. Die cut the other label three times out of White Soft Finish Cardstock. Apply Fire Brick Distress Ink to the Mon, Wed, Fri and Sun stamps from the Schedule stamp set and stamp one of the words on each of the labels. Apply Carved Pumpkin Distress Ink to the Tues, Thurs and Sat stamps from the Schedule stamp set and stamp one of the words on each of the remaining labels. Write in whatever you desire on each label. Ink the edges of the labels using Walnut Stain Distress Ink and a blending tool with foam.


Adhere the reinforcement circles over each circle on the pages. 


Adhere one of the square strips to the middle of the left page. Adhere the other square strip to the middle of the right page.


Use thin foam squares to adhere the 5 3/4" strip 1/2" from the bottom and 2 1/4" from the left of the left hand page. Use foam squares and adhesive to adhere the 5 7/8" strip 1/4" from the bottom and 1 1/2" from the left of the left hand page.
Use thin foam squares to adhere the 6 1/4" strip 1/4" from the bottom and 1 1/2" from the right of the right hand page. Use adhesive and foam squares to adhere the 5 7/8" strip 1/2" from the bottom and 2 1/8" from the right of the right hand page. 


Use foam squares to adhere the large rectangle 1/2" from the left and 1 1/2" from the top of the left hand page. Use adhesive and foam squares to adhere the small rectangle 1 5/8" from the left and 3 1/4" from the top of the left hand page. 
Use foam squares to adhere the large rectangle 5/8" from the right and 1 5/8" from the top of the right hand page. Use adhesive and foam squares to adhere the small rectangle 5/8" from the left and 3/4" from the bottom of the right hand page. 


On the left hand page, adhere the Monday to Thursday labels as desired. Use foam squares and adhesive to adhere the pumpkins to the bottom left side of the left hand page.
On the right hand page, adhere the Friday to Sunday labels as desired. Use foam squares and adhesive to adhere the pumpkins to the bottom right side of the right hand page.


Here are a few closeup photos of the finished pages.


Here is the finished November Week #1 Planner Spread.


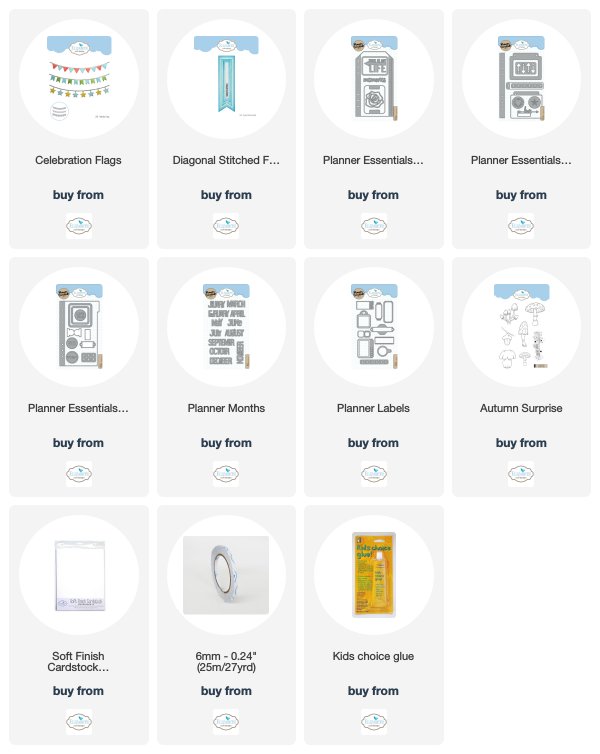
Elizabeth Craft Designs Supplies Used:


Other Supplies Used:

- Carta Bella: Fall Break - Autumn Trees, Border Strips, Harvest Town and Gourd Variety
- Tombow Markers: 177 & 933
- Tim Holtz for Ranger Ink: Distress Ink - Walnut Stain, Fired Brick & Carved Pumpkin and Blending Tool with Foam
- Ranger Ink: Potting Soil Archival Ink
- Misc: Kraft Cardstock and Black Journaling Pen

Thanks so much for joining me today and I hope that I have inspired you to recreate your own version of my November Week #1 Planner Spread.

- Katelyn


Saturday, October 19, 2019

Hello Mixed Media Notecard

Happy Saturday!
I have been in the Fall crafting mood lately and I've been busy creating Fall themed projects. For today's project, I created this Hello Mixed Media Notecard. To create my notecard, I've used a variety of stamps from Charlene as well as dies from Joset Designs. You'll want to read below as I have a full tutorial on how to recreate my notecard at home. 


To start, die cut the 3 3/4" Stitched Indented Square out of Kraft Cardstock. In the bottom left corner of the square, lightly blend Vintage Photo, Ground Espresso and Walnut Stain Distress Oxide Ink with a blending tool and foam. Spritz the inked area with water. Apply Potting Soil Archival Ink to the dot stamp from the Patterns 2 stamp set and stamp randomly onto the square. Reapply ink to the stamp as needed. Apply Potting Soil Archival Ink to the letters stamp from the Patterns 2 stamp set and stamp randomly onto the square. Reapply ink to the stamp as needed. 


Apply Jet Black Archival Ink to one of the flowers and the leaf from the Garden Flowers stamp set and stamp onto a piece of White Soft Finish Cardstock. Colour the leaf using a waterbrush and Tombow Markers 969 and 177. Colour the flower using a waterbrush and Tombow Markers N25 and 026. Fussy cut the leaf and flower out. Ink the edges of the leaf and flower using Walnut Stain Distress Oxide Ink and a blending tool with foam.


From the Words 2 - Thinking of You die, die cut the hello word out of White Soft Finish Cardstock.


Choose a piece of patterned paper from the Autumn Sunset Collection from Prima Marketing Inc. Die cut the 4 1/4" Stitched Indented Square out of the patterned paper. Distress the edges of both squares. Ink the edges of both squares using Walnut Stain Distress Oxide Ink and a blending tool with foam.


Foam square the 3 3/4" square to the 4 1/4" square.


Adhere the leaf to the left hand side of the flower. Foam square the flower to the bottom left hand side of the 3 3/4" square.


Adhere the Hello sentiment to the middle right side of the 3 3/4" square. To finish the card, cut a cardbase out of White Soft Finish Cardstock that measures 4 1/4" x 8 1/2", score at 4 1/4". Adhere the cardfront to the cardbase.


Here are a few closeup photos of the finished notecard.


Here is the finished Hello Mixed Media Notecard.


Elizabeth Craft Designs Supplies Used:


Other Supplies Used:

- Prima Marketing Inc.: Autumn Sunset Collection
- Tim Holtz for Ranger Ink: Distress Oxide Ink - Walnut Stain, Vintage Photo, Ground Espresso, Distress Sprayer and Blending Tool with Foam
- Ranger Ink: Jet Black Archival Ink and Potting Soil Archival Ink
- Tombow Markers: N25, 026, 969 and 177
- Misc: Waterbrush and Kraft Cardstock

- Katelyn


Sunday, September 22, 2019

Boo! Planner Insert

I've been creating with Charlene van der Vorst new stamp sets this past week. For my project today, I created this Fall themed planner insert - Boo! to add in amongst my planner pages for September and October.  To create my insert, I've used a variety of stamps from Charlene as well as dies from Joset Designs and the Planner Essentials Collection. You'll want to read below as I have a full tutorial on how to recreate my planner insert at home. 


To start, die cut the planner insert from the Planner Essentials - 5 die out of White Soft Finish Cardstock. Sprinkle Magenta Nuance - Olive, Chartreuse and Orange over the insert. Spritz the powder with water. Allow the insert to dry.


Once the insert has dried, apply Potting Soil Archival Ink to the Autumn background stamp from the Autumn Surprise stamp set and randomly stamp on the planner insert as desired. Reapply ink when needed. Distress the edges of the page insert. Ink the edges of the page insert using Walnut Stain Distress Ink and a blending tool with foam.


Apply Potting Soil Archival Ink to the Boo! stamp from the Halloween Party stamp set and stamp onto a piece of White Soft Finish Cardstock. Cut the Boo! word out. Distress the edges. Ink the edges of the word using Walnut Stain Distress Ink and a blending tool with foam.


Apply Potting Soil Archival Ink to the pumpkin stamp from the Halloween Party stamp set and stamp onto a piece of White Soft Finish Cardstock. Watercolour the pumpkins with a waterbrush using Tombow Markers 177 & 933. Allow the pumpkins to dry. Fussy cut the pumpkins out. Ink the edges of the pumpkins using Walnut Stain Distress Ink and a blending tool with foam.


Choose three feathers from the Make a Wish stamp set. Apply Emboss It Ink to each of the feathers and  stamp onto a piece of White Soft Finish Cardstock. Sprinkle Burnt Copper Leaves Embossing Powder over each feather. Tap off the excess powder and emboss with a heat tool. Watercolour the feathers with a waterbrush using Tombow Markers 977 & 969. Allow the feathers to dry. Fussy cut the feathers out. Ink the edges of the feathers using Walnut Stain Distress Ink and a blending tool with foam. To finish off the feathers, use a white gel pen to highlight some of the areas on each feather.


Choose two patterned papers from the Autumn Sunset collection by Prima. Die cut the 1 1/2" Diagonal Stitched Fishtail out of one of the patterned papers. Cut the fishtail down to 3 3/4". Die cut the 1" Diagonal Stitched Fishtail out of the other patterned paper. Cut the fishtail down to 3 3/8". Distress the edges of each fishtail. Ink the edges of each fishtail using Walnut Stain Distress Ink and a blending tool with foam.


Adhere the 1" fishtail to the 1 1/2" fishtail. Foam square the 1 1/2" fishtail to the middle top of the planner insert.


Adhere the three feathers to the middle of the 1" fishtail. Use foam squares and adhesive to adhere the pumpkins to the bottom right side of the feathers.


To finish the planner insert, foam square the Boo! sentiment 1/4" from the left and 3/4" from the top of the planner insert. 


Here are a few closeup photos of the finished planner insert.


Here is the finished Boo! Planner Insert.


Elizabeth Craft Designs Supplies Used:


Other Supplies Used:

- Ranger Ink: Potting Soil Archival Ink, Emboss It Ink and Mister
- Tim Holtz for Ranger Ink: Distress Ink - Walnut Stain and a Blending tool with Foam
- Prima Marketing: Autumn Sunset Collection
- Magenta Nuance: Olive, Orange and Chartreuse
- Emerald Creek Craft Supplies: Burnt Copper Leaves Embossing Powder
- Tombow Markers: 177, 977, 969 & 933
- Misc: White Gel Pen and Waterbrush

- Katelyn


Tuesday, September 17, 2019

September Planner Post #2 - September Title Page

I've been a little behind getting my planner set up for September. So while I was working in my planner, I created this September Title Page as a marker for the start of the month. To create my page, I've used a variety of the dies from the Planner Essentials line and Joset Designs. You'll want to read below to learn how to recreate my September Title Page at home.


From the Cozy Evening patterned paper, I used the blue woodgrain paper. Die cut the page from the Planner Essentials - 1 die out of the woodgrain paper. Flip the left over paper over and die cut a 1 1/2" Diagonal Stitched Fishtail and one of the Celebration Flags. Cut the celebration flag down to 4". Distress the edges of the page and fishtail. Ink the edges of all of the elements using Walnut Stain Distress Ink and a blending tool with foam.


Die cut the 1 7/8" Diagonal Stitched Fishtail out of a piece of kraft cardstock. Distress the edges of the fishtail. Ink the edges of the fishtail using Walnut Stain Distress Ink and a blending tool with foam.


From the patterned paper with the cut aparts, cut one of the 3" x 4" frame as well as fussy cut two of the frames. Distress the edges of the two frames and the 3" x 4" frame. Ink the edges of all of the pieces using Walnut Stain Distress Ink and a blending tool with foam.


From the leaf paper, cut a piece that measures 3 1/4" x 4 1/4". Die cut the reinforcement circles from the Planner Essentials - 5 die out of the paper. Die cut the celebration flags out of the same paper. Cut the flags down to 3 1/2". From the Planner Essentials - 6 die, die cut the small rectangle out of the patterned paper. 
Flip the remaining patterned over. From the Planner Months die, die cut the September month from the paper. Die cut a label from the Planner Labels die out of the paper. Cut the label in half. From the Planner Essentials - 6 die, die cut the large rectangle out of the paper. Distress the edges of the 3 1/4" rectangle and both smaller rectangles. Ink the edges of the reinforcement circles, label, flags, September word and rectangle pieces using Walnut Stain Distress Ink and a blending tool with foam.


Apply Emboss It Ink to two of the mushrooms from the Autumn Surprise stamp set and stamp onto a piece of White Soft Finish Cardstock. Sprinkle Burnt Copper Leaves embossing powder over the mushrooms. Tap off the excess powder and emboss with a heat tool. Use a waterbrush and Tombow Markers 912, 296 & 990 to colour the mushrooms in. Fussy cut the mushrooms out. Ink the edges of the mushrooms using Walnut Stain Distress Ink and a blending tool with foam.


Adhere the patterned paper reinforcement circles over top of the circles on the page. Adhere the 1 1/2" fishtail to the 1 7/8" fishtail. Foam square the 1 7/8" fishtail to the middle of the page.


Use adhesive and foam squares to adhere the 3 1/4" rectangle to the middle of the fishtails. Adhere the 3" rectangle to the 3 1/4" rectangle. Adhere a half label to the top right portion of the 3" rectangle. Adhere the other half label to the bottom left portion of the 3" rectangle.


Adhere the small rectangle to the large rectangle. Use foam squares to adhere the large rectangle to the middle of the 3" rectangle. Adhere one of the frames on an angle. Adhere the other frame straight on overtop of the first frame. Use foam squares and adhesive to adhere the two mushrooms to the middle of the frame. Adhere the September word to the middle of the mushrooms.


To finish off the page, in the top right corner of the page, adhere the two celebration flags as desired.


Here are a few closeup photos of the finished page.


Here is the finished September Title Page.


Elizabeth Craft Designs Supplies Used:


Other Supplies Used:

- Tim Holtz for Ranger Ink: Distress Ink - Walnut Stain and a Blending tool with foam
- Ranger Ink: Emboss It Ink
- Emerald Creek Craft Supplies: Burnt Copper Leaves Embossing Powder
- Tombow Markers: 912, 296 & 990
- Mintay: Cozy Evening Paper Pack
- Misc: Kraft Cardstock and Waterbrush

- Katelyn