Friday, January 17, 2020

Week No. 2 Planner Spread

Happy Friday! 

I have been busy setting up my planner spread for this week. To create my planner spread, I've combined some of the new dies and stamps from the Planner Essentials Collection along with some of the older dies and stamps. You'll want to grab a cup of your favourite wintertime beverage and learn how to recreate my Week No.2 Planner Spread.


From the Planner Essentials - 9 die, you'll need the page die. Choose a piece of patterned paper from the Serendipity Paper pack. Die cut the page out of the paper. From the Background Stamps 1 stamp set, you'll need the number stamp. Apply Walnut Stain Distress Ink to the number stamp and stamp on the bottom of the page, starting at the bottom left hand side. Reapply ink to the stamp and continue stamping at the bottom of the page. From the Pieces of Life 2 - Numbers & Labels stamp, you'll need the Week, No. and 2, arrange on the page and then put on your stamp blog. Apply Walnut Stain Distress Ink to the stamps and stamp on the top left side of the page. Ink the edges of the page using Walnut Stain Distress Ink and a blending tool with foam.


Choose one of the coordinating papers from the paper pack and die cut the page from the Planner Essentials - 4 die out of it. Ink the edges of the page using Walnut Stain Distress Ink and a blending tool with foam.


Next, you'll need the reinforcement hexagons from the Planner Essentials - 5 die out of the two papers you've used for the pages. Ink the edges of all twelve reinforcement hexagons using Walnut Stain Distress Ink and a blending tool with foam.


You'll need the paper you've used for the pages as well as three other patterned papers from the paper pack. Choose four of the note pieces from the Planner Essentials - 21 Note Pieces die. From the right page paper, die cut one note piece out of one of the note pieces die. From the left page paper, die cut two note pieces out of two of the note pieces die. From the third patterned paper, die cut two note pieces out of two of the note pieces die. From the fourth patterned paper, die cut one note piece out of one of the note pieces die. From the fifth patterned paper, die cut one note piece out of one of the note pieces die. Ink the edges of all of the pieces using Walnut Stain Distress Ink and a blending tool with foam. 


From the Planner Essentials - 27 Retro Number Trio die, you'll need to choose two banner styles. You'll also need the patterned paper you used on the right hand page. From the front side of the paper, die cut two of the same size banners. From the back side of the paper, die cut one small and one medium sized banners. Ink the edges of all four banners using Walnut Stain Distress Ink and a blending tool with foam.


From the Piece of Life 2 - Numbers & Labels stamp set, you'll need the two lined with box stamps. Place each one on a block. Start with the first one and apply Jet Black Archival Ink to the stamp and stamp onto a piece of White Soft Finish Cardstock. Reapply ink to the stamp and stamp two more times on the same White Soft Finish Cardstock piece. Next, you'll need the second stamp, apply Jet Black Archival Ink to the stamp and stamp onto a piece of White Soft Finish Cardstock. Reapply ink to the stamp and stamp three more times on the same White Soft Finish Cardstock piece. From the Calendar stamp, you'll need the days of the week abbreviations. Apply Blueprint Sketch Distress Ink to each day and stamp one day in each of the boxes. Cut out all seven boxes. Ink the edges of all seven boxes using Walnut Stain Distress Ink and a blending tool with foam. Fill in each box using a black gel pen.


Now, we will assemble the left hand page. 
Adhere the blue reinforcement hexagons over each circle on the left hand page. Adhere the two blue banners to the top right side of the page.


Adhere three of the note pieces as desired on the page. Adhere Monday to Wednesday on top of the note pieces.


Now, we will assemble the right hand page. 
Adhere the cream reinforcement hexagons over each circle on the right hand page. Adhere the two leafy banners to the top right side of the page.


Adhere the remaining note pieces as desired to the page, making sure that they are layered.


To finish the page, adhere the Thursday to Sunday boxes on top of the note pieces.


Here are a few closeup photos of the Week No. 2 Planner Spread.


Here is the finished Week No. 2 Planner Spread.


Elizabeth Craft Designs Supplies Used:

- 6mm

Other Supplies Used:

- Bo Bunny: Serendipity Paper Pack
- Tim Holtz for Ranger Ink: Distress Ink - Walnut Stain and Blueprint Sketch and Blending Tool with Foam
- Ranger Ink: Jet Black Archival Ink
- Misc: Black Journaling Pen

Thanks so much for joining me today and I hope that I have inspired you to recreate your own version of my Week No. 2 Planner Spread.

- Katelyn


Wednesday, January 15, 2020

Elizabeth Craft Designs January Group Post - New Year Means New Planner Ideas

Happy Wednesday!

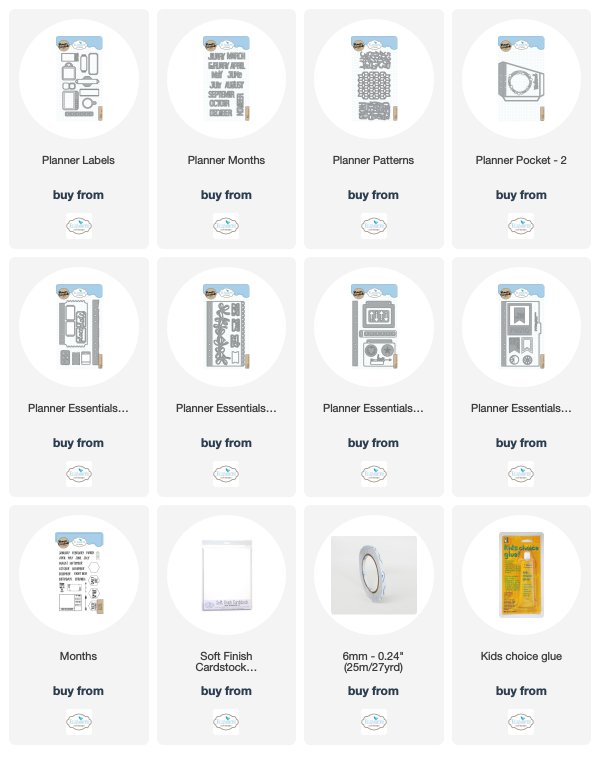
For January's Group Post it's all about A New Year Means New Planner Ideas. For this month's group post, I'm sharing my January Title Page. To create my planner spread, I've used dies and stamps from the Planner Essentials Collection. Grab your favourite Winter beverage and read below as I have a tutorial for you so that you can re-create my January Month Marker at home. You'll also want to make sure to stop by the Elizabeth Craft Designs Blog to check out the rest of the projects. 


To start, die cut the January word from the Planner Months die out of White Soft Finish Cardstock.


Choose a winter paper collection you'd like to use. From one of the patterned papers, die cut one of the labels from the Planner Labels die out of it.


Choose another piece of patterned paper and die cut two of the dotted circle frames from the Planner Pocket - 2.


Choose another piece of patterned paper from the collection, die cut the 3d looking square pattern from the Planner Patterns out of it.


Die cut the torn strips twice out of two of the previously used patterned papers. Cut one of the torn strips down to 6 3/4". Cut the other torn strip down to 6 3/8".  


Choose another piece of patterned paper and one that you have already used. Apply Jet Black Archival Ink to the hexagon stamp from the Months stamp set and stamp a total of seven hexagons on the patterned paper. Reapply ink to the hexagon stamp as needed.  Fussy cut the seven hexagons out.


Die cut the small and medium sized banner from the Planner Essentials - 3 die out of two of the patterned papers already used.


From one of the previous used patterned papers, die cut the hexagon reinforcements from the Planner Essentials - 5 die out of the paper.


The last element you need is the page from the Planner Essentials - 9 die out of one of the patterned papers from the collection.


Adhere the reinforcement hexagons over each circle on the page. Adhere three of the hexagons to the bottom right side of the page. Adhere the other four hexagons to the top left side of the page.


Adhere the 6 3/4" torn strip 1 3/4" from the left and 7/8" from the bottom of the page. Adhere the 6 3/8" torn strip 1 5/8" from the right and 1/2" from the bottom of the page. Adhere the 3d square pattern to the middle of the torn strips.


Adhere the first dotted circle frame to the middle of the 3d square pattern. Adhere the other dotted circle frame slightly off from the previously adhere dotted circle frame. You'll want to make sure that the dotted circle frames don't line up. Foam square the label to the middle of the dotted circle frames.


Adhere the January word to the middle of the label. Adhere the two banners to the top right of the page. 


To finish the dotted circle frame, add white craft drops to each of the circles. 


Here are a few closeup photos of the month marker page.


Here is the finished January Marker Page.


Elizabeth Craft Designs Supplies Used:


Other Supplies Used:

- Ranger Ink: Jet Black Archival Ink
- Misc: Winter Patterned Paper

Thanks so much for joining me today and I hope that I have inspired you to recreate your own version of my January Month Marker.

- Katelyn


Tuesday, January 14, 2020

Happy Anniversary Card

Happy Tuesday!
I'm up on the Quietfire Design blog today, where I'm sharing my Happy Anniversary Card. My card features a variety of Quietfire stamps and the Modern Gilding Powder.


For a full tutorial and a few more photos of my project, you'll want to head over to Quietfire Design blog for all the details. 

- Katelyn


Friday, January 10, 2020

Treasure the Moment Art Journal Page

Happy Friday!
I have a new project over on Wild Whisper's blog, where I'm sharing my Treasure the Moment Art Journal Page which features the brand new stamp from Nicole Wright Designs as well as previously released stamps that compliment the page beautifully. 


For all the details, more photos and a full tutorial on my art journal page you'll want to stop by the Wild Whisper blog. You'll want to make sure to keep checking out Wild Whisper's blog as the design team will be sharing lots of inspiration.

- Katelyn


Tuesday, January 7, 2020

Life is a Collection of Moments Planner Insert

Happy Tuesday!
I'm thrilled to be back on Elizabeth Craft Designs Design Team for another term. So for today's post on their blog, I'm sharing my Life is a Collection of Moments Planner Insert. My insert features a variety of dies and stamps from the Planner Essentials Collection.


For a full tutorial on my insert, you'll want to head over to the Elizabeth Craft Designs blog for all the details. 

- Katelyn


Monday, January 6, 2020

Exhale, Breathe, Meditate Wall Hanging

Happy Monday! 
I'm excited to be back on Southern Ridge Trading Company's blog sharing my Exhale, Breathe, Meditate Wall Hanging. I hope that my wall hanging inspire you to recreate your own version at home.


You'll want to stop by Southern Ridge Trading Company's blog so that you can learn how I created my Exhale, Breathe, Meditate Wall Hanging at home.

- Katelyn


Saturday, January 4, 2020

Let Your Dream Soar Card

Happy Saturday!
I'm thrilled to have a be over on the Elizabeth Craft Designs blog today, where I'm sharing my Let Your Dream Soar Card. My card features a variety of dies and stamps from Suzanne Cannon as well as dies from Els van de Burgt Studio.


For a full tutorial on my card, you'll want to head over to the Elizabeth Craft Designs blog for all the details. 

- Katelyn