It's all about Summer on the Emerald Creek Dares blog for this weeks two week challenge. For this challenge I focused on the ocean aspect of summer. With growing up on the west coast of Canada I was spoiled to be able to go and relax by the ocean. So, for my project I decided that I would create a ocean inspired happy birthday card. Lets get started as I show you how you can create my ocean birthday card at home.

To start you will need to cut a 4" x 5 1/4" piece out of 100lb white cardstock. Once the cardstock is cut, apply Distress Embossing Ink to the Mayflower stamp. Stamp the ship starting at the top of the white piece of cardstock. Continue applying ink to the ship and stamping it onto the white cardstock piece until the entire piece is covered in ships. After the white cardstock is covered in ships, sprinkle Fine Clear Embossing powder over top of the entire piece, tap off the excess and then emboss with a heat tool.

After the ships have been embossed, it's time to blend Broken China, Tumbled Glass, Mermaid Lagoon and Faded Jeans Distress Ink over top of the entire ship embossed piece of paper. If the background turns out to blue for you, blend a bit of Vintage Photo Distress Ink over top to tone it down. To finish the custom background, edge distress the edges and then ink them with Vintage Photo Distress Ink.

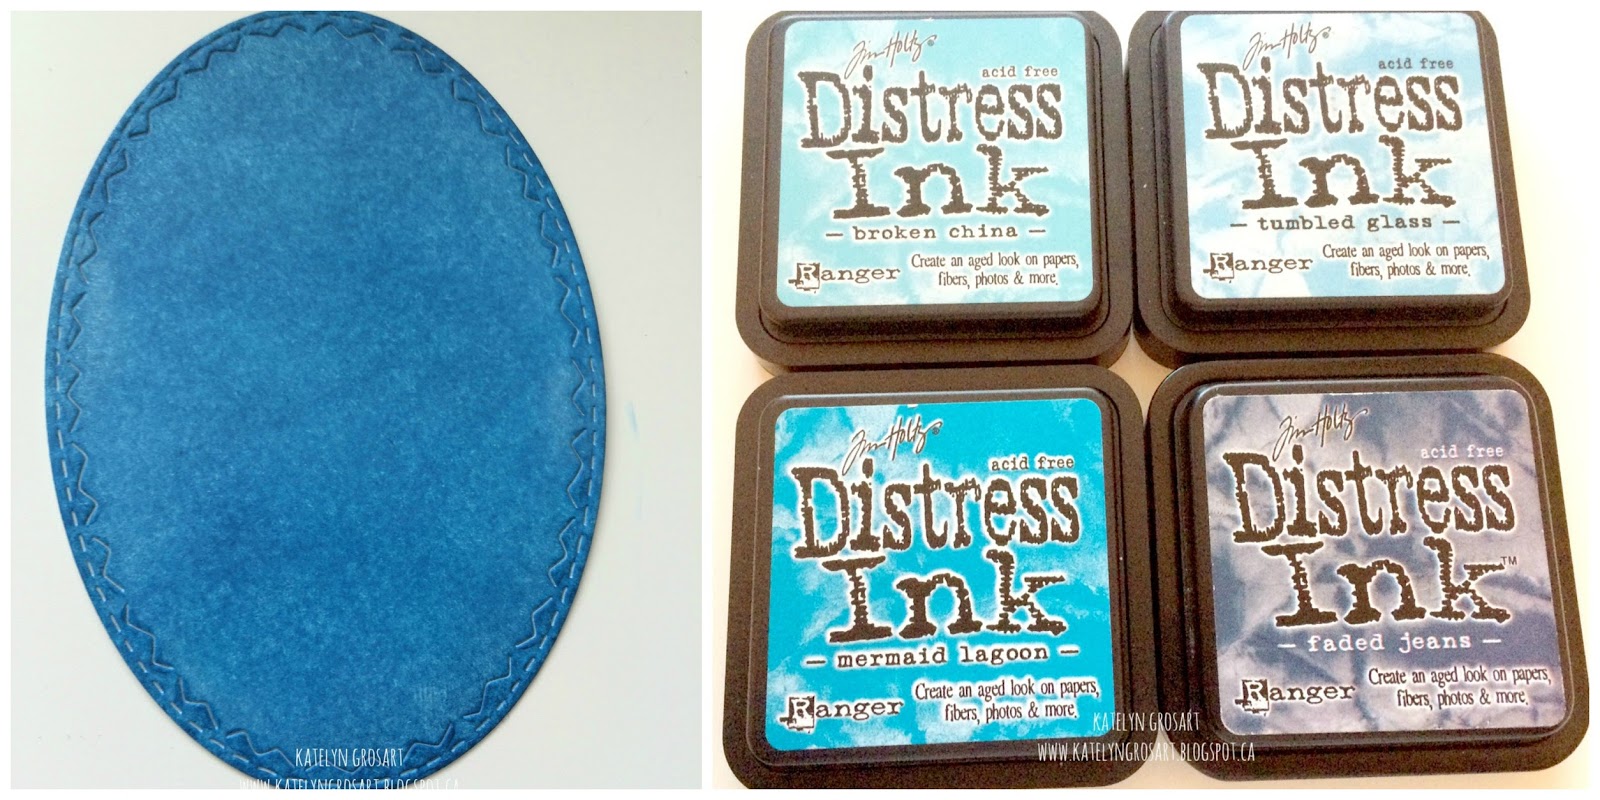
Now that the custom ship background piece is done, it's time to move on to the oval piece. For the oval you will need to use the Tim Holtz Stitched Ovals Dies from Sizzix and a small piece of 100lb white cardstock. Once the oval has been cut, blend Broken China, Tumbled Glass, Mermaid Lagoon and Faded Jeans Distress Ink over the entire oval. To finish the oval, edge distress the edges and then ink the edges with Vintage Photo Distress Ink.
After the oval is coloured with the Distress Ink, it's time to work on the sentiment. For the sentiment I used the Happy Birthday stamp and applied Vintage Photo Distress Ink to it. Once the stamp is inked, stamp onto a small piece of 100lb white cardstock. After it's been stamped, blend Broken China, Tumbled Glass, Mermaid Lagoon and Faded Jeans Distress Ink over the entire sentiment. When your happy with the coloured background on the sentiment, trim the Happy and the Birthday apart. To finish the sentiment, edge distress the edges and then ink the edges with Vintage Photo Distress Ink.

With the sentiment being done, it's time to move on to the Anchor Charm. To get rid of the bright silver on the anchor charm, apply a layer of Gold Alcohol Adirondack Ink to it. Once the gold layer is dry, apply a layer of Mushroom Alcohol Adirondack Ink randomly over top of the gold. Set aside to dry.

The next step is to work on the stamped images. The first stamped image is the Starfish. Apply Vintage Photo Distress Ink to the starfish and stamp on to the 100lb white cardstock. Once stamped, colour the starfish with the Candied Apple Distress Marker. Fussy cut out the starfish and then ink the edges with Vintage Photo Distress Ink.

After the starfish is done, the next image that you will stamp is the Octopus. Apply Vintage Photo Distress Ink to the octopus stamp and stamp on to the 100lb white cardstock. After the octopus has been stamped, colour the octopus with the Scattered Straw Distress Marker. Fussy cut out the octopus and then ink the edges with Vintage Photo Distress Ink.

The last stamped image is the Water Logged. Apply Vintage Photo Distress Ink to the water logged stamp and stamp on to the 100lb white cardstock, repeat this step two more times. Once the water logged images are stamped, colour them with Gathered Twigs, Candied Apple and Scattered Straw Distress Marker. Fussy cut the water logged images out and then ink the edges with Vintage Photo Distress Ink. Once all of the images are cut, adhere them along with the sentiment to the oval.

One of the finishing touches for my card, is wrapping linen twine around the middle of the boat custom background and then foam squaring the oval overtop in the middle of the background. The second finishing touch is adding glossy accents to the starfish and octopus stamped images. The last finishing touch is adding a piece of teal cardstock to behind the ship custom background that measures 4 1/8" x 5 3/8", make sure to edge distress the edges and ink them with Vintage Photo Distress Ink.

Products used from Emerald Creek:
Other Products Used:
- Ranger/Tim Holtz: Distress Markers: Gathered Twigs, Scattered Straw & Candied Apple, Distress Ink: Broken China, Tumbled Glass, Faded Jeans, Mermaid Lagoon, Embossing Ink & Vintage Photo and Adirondack Alcohol Ink: Mushroom & Gold
- Ranger Ink: Glossy Accents
- Tim Holtz/Sizzix: Stitched Ovals
- Bazzill: Blue Oasis Cardstock
- Misc: Linen Twine
Make sure that you go and check out the rest of the Emerald Creek Dares Design Team as they have all created fantastic pieces for this weeks challenge:
Thanks for stopping by and checking out my Ocean Happy Birthday Card. Don't forget to enter your project into our Emerald Creek Dares Challenge for your chance to win a $25.00 gift certificate for the Emerald Creek Store!

Until Next Time!
-Katelyn
As usual..love everything about this project. I love how you did the water logged image, they look so real.
ReplyDeleteThanks Cathy!
DeleteWhat a wonderful nautical inspired card Katelyn, thanks so much for sharing it! Deb xo
ReplyDeleteThanks Deb!
Delete