Monday, October 30, 2017

All Things with Love Grow Altered Jar

Happy Monday! I'm up on Creative Scrapbooker Magazine's Blog today as a monthly blogger sharing my "All Things with Love Grow" Altered Jar that features Carta BellaRanger Ink and Scrapbook Adhesives by 3L products. 


You'll want to make sure to stop by the Creative Scrapbooker Blog to read about  my "All Things with Love Grow" Altered Jar so that you can recreate it at home.

- Katelyn

Wednesday, October 25, 2017

Witch way to the Candy?

 Happy Wednesday! Halloween is only 6 days away, so I thought I would create a fun little Halloween card to give to that special little ghoul in your life. My Witch way to the Candy? card, feature a variety of dies from Joset Designs Halloween collection. Grab a cup of your favourite fall beverage and enjoy as I walk you through how to recreate my Witch way to the Candy? card at home.  


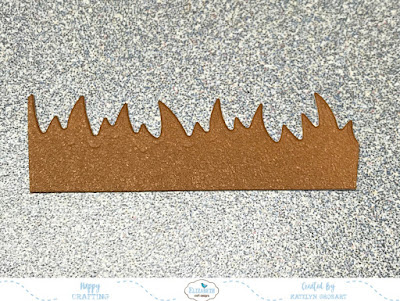
To start, grab the grass die from the Adventure Edges and die cut it out of Brown Soft Finish Cardstock. Trim the border down to 1" wide and 2 3/8" long.


From the Trick-or-Treat Bag die, die cut the treat bag out of White Soft Finish Cardstock. Blend Vintage Photo Distress Oxide Ink over the entire bag. Let the ink dry. Apply Jet Black Archival Ink to the Witch way to the Candy? sentiment from the Spooky Sentiments Clear Stamp Set. Stamp the sentiment onto the front of the treat bag. Ink the edges of the bag using Black Soot Distress Oxide Ink.


Using the same Trick-or-Treat Bag die, die cut the three different candies twice out of White Soft Finish Cardstock. Choose two of the candies and blend Seedless Preserves Distress Oxide Ink over the entire surface. Ink the edges of the candies using Black Soot Distress Oxide Ink.


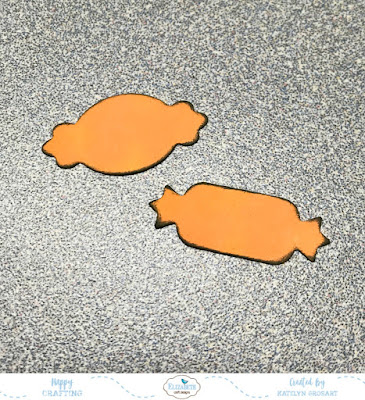
Next, you'll need the two die cut candy corns. Ink the entire surface of the candy corns with Fossilized Amber Distress Oxide Ink. Blend the Spiced Marmalade Distress Oxide Ink at the bottom of each candy corn. Ink the edges of the candy corns using Black Soot Distress Oxide Ink.


Take the last two candies and blend Spiced Marmalade Distress Oxide Ink over the entire surface. Ink the edges of the candies using Black Soot Distress Oxide Ink.


From the Halloween Scenery die, die cut the bats and spiders three times out of White Soft Finish Cardstock. With the bats and spiders cut out, blend Black Soot Distress Oxide Ink over each piece.


Cut a cardbase out of White Soft Finish Cardstock that measures 3 1/2" x 9 1/2". Score the cardbase at 4 3/4".


Cut a pice of diamond paper that measures 2 3/4" x 4". Distress the edges of the paper using an edge distressor. Ink the edges of the paper using Black Soot Distress Oxide Ink.


Use the 3" Stitched Rectangle die to die cut a stitched rectangle out of black patterned paper. Use the 3 1/2" Stitched Rectangle die to die cut a stitched rectangle out of orange patterned paper. Distress the edges of each paper using an edge distressor. Ink the edges of each paper using Black Soot Distress Oxide Ink.


Adhere the purple diamond patterned paper to the black word patterned paper. Adhere the black word patterned paper to the orange patterned paper. 


Adhere the brown grass die cut to the top and in behind the trick or treat bag. Adhere three of the candies in behind of the brown grass.


In the bottom right hand corner of the treat bag, adhere the other three candies as well as a spider.


Foam square the trick or treat bag to the middle of the diamond patterned paper.


With the bag adhered, adhere another spider as well as the three bats as desired on the card front.


To finish off you're card, adhere your card front to your cardbase.


Here are a few closeup shots of the finished card.


And here's the finished With way to the Candy? card.


Elizabeth Craft Designs Products Used:


Other Products Used:

- Tim Holtz for Ranger Ink: Distress Oxide Ink - Vintage Photo, Black Soot, Spiced Marmalade, Seedless Preserves and Fossilized Amber
- Ranger Ink: Jet Black Archival Ink
- Graphic 45: Eerie Tale - Grand Illusion, Unsolved Mystery and Captivating Characters

Thanks for stopping by and checking out my Witch way to the Candy? Card. I hope that I've inspired you to recreate it at home.  

- Katelyn


Saturday, October 21, 2017

Autumn Home Decor Tray

Happy Everyone! I was up on Graphic 45's blog yesterday sharing with you my Craft Room as well as my Autumn Home Decor Tray which features the new Seasons Collection along with a few Staples from the Staples Collection. I have a few photos to share with you on my blog, but if you haven't stopped by Graphic 45's blog yet, make sure you do so that you can check out the rest of the photos of my craft room and project as well as a tutorial for my Autumn Home Decor Tray.

My boyfriend and I are currently in the process of buying a house, which means that I get to use a small portion of my parent’s media room in the basement to store some of my scrapbook supplies that I use on a regular basis. My other scrapbook supplies are currently packed away in storage waiting for their new home. And although this is not the normal amount of space I usually have, I usually have a bedroom,  I wanted to share with you all my current studio space as I’m sure that many of you can relate to how much room I have to work with.


To hold my most used supplies, I have all the products either in bins or rubbermaid containers, which allows me to organize them on a metal pantry shelf with wheels. With having the things I use regularly out on the shelves, it gives me the ability to find what I’m looking for quickly. For example, in the bottom right and middle of the shelf, those two bins hold all of the current Graphic 45 collections. Although it looks organized right now, there is always stuff in the front of the shelving unit.  

For some more tips and to see more of my space, head over to Graphic 45's blog.

Now, I'll share with you some photos of my Autumn Home Decor Tray.

It’s hard to believe that Fall is here as it has definitely arrived here on the west coast of Canada. With the changing of the weather and the cooler weather here, it has me thinking of creating Fall projects, especially those that can be used as home decor. This month, I’ve been busy playing with the new collection Seasons and I ended up creating a beautiful Autumn Home Decor Tray, perfect to add to your current Fall home decor. You’ll want to make sure to grab a cup of your favourite fall beverage and enjoy the photos and tutorial of my Autumn Home Decor Tray.


Tip: Keep one of the ephemera cards the same as you would when you take it out of the package. With the first ephemera card out, take the matching ephemera card out and only cut the center of the card out. Once the center has been cut out, foam square the center to the center of the unaltered ephemera card.


Tip: For the top of the tray, layer images from the Autumn paper as well as the Autumn Collective paper to create a beautiful statement at the top of the tray.


For a full tutorial on how I created my Autumn Home Decor Tray, more photos of my project as well as my craft room, you'll want to make sure to stop by Graphic 45's blog


-Katelyn


Friday, October 20, 2017

Happy Holidays Fireplace Christmas Card

Happy Friday! Today, I'm up on the Elizabeth Craft Designs blog sharing my Happy Holidays Fireplace Christmas Card. I've created my Christmas Card using the new Hang The Christmas Stockings die from Elizabeth Craft Designs. To compliment the die cut images, I've used three of ModaScrap's new Christmas Paper Packs.


You'll want to make sure your way over to Elizabeth Crafts Designs Blog to read all about how I created my Happy Holidays Fireplace Christmas Card, so that you you're able to recreate it at home. 


- Katelyn

Enjoy the Simple Things

Happy Friday!! I'm back on Southern Ridge Trading Company's blog today sharing with you my Enjoy the Simple Things Card which features a variety of our wood and chipboard pieces. I hope that my Enjoy the Simple Things Card will inspire you to want to recreate it at home.


You'll want to make sure to head over to the Southern Ridge Trading Company Blog so that you can share with you how to recreate my Enjoy the Simple Things card at home.

- Katelyn


Tuesday, October 17, 2017

Merry Christmas Gift Box - Die Cut & Colouring Team Designer Challenge

We're have a new Die Cut and Colouring Team Designer Challenge on the Elizabeth Craft Designs Blog today.  For October it's all about Christmas and creating fabulous Christmas projects. With the challenge in mind, I set out to create a fabulous Merry Christmas Gift Box that's perfect to give to that special something to that special someone for Christmas. Make sure to read below as I have a tutorial for you so that you can re-create my Merry Christmas Gift Box at home. Read all the way down to the bottom as I have some information at the end of the post on how to get in on a fabulous giveaway from Elizabeth Craft Designs.


Die cut the Pillow Box die out of a piece of patterned paper from ModaScrap's Let It Snow Paper pack. Ink the edges of the pillow box with Black Soot Distress Ink and a blending tool with foam.


From the Entwined Circles die, die cut the small entwined circle out of White Soft Finish Cardstock. With a blending tool and foam, blend Chipped Sapphire Distress Ink over the entire surface of the circle. In the edges of the circle using Black Soot Distress Ink and a blending tool with foam.


Die cut the 2" Stitched Circle die out of White Soft Finish Cardstock. With a blending tool and foam, blend Chipped Sapphire Distress Ink over the entire surface of the circle. In the edges of the circle using Black Soot Distress Ink and a blending tool with foam.


From the Beaded Circle Frame die, die cut the small beaded circle out of White Soft Finish Cardstock. 


 Die cut the small snowflake out of White Soft Finish Cardstock. Add a large Transp. Glitter/Gold Dot to the centre of the snowflake.


 Die cut the medium snowflake out of White Soft Finish Cardstock. 


 Before die cutting the small snowflake again, you'll need a scrap piece of White Soft Finish Cardstock that the snowflake fits on. Cut a piece of adhesive sheet that will fit the piece of cardstock. With the piece cut, start by peeling off the back of the double sided adhesive piece and adhere it to the White Soft Finish cardstock piece. Run the piece of paper and the snowflake die through your cutting machine. With the adhesive on the snowflake, peel off the top paper of the adhesive and sprinkle Microfine White Glitter on the snowflake. Tap off the excess glitter. Burnish the glitter with your finger. Add a large Transp. Glitter/Gold Dot to the centre of the snowflake.


Before die cutting the extra small snowflakes out, you'll need a scrap piece of White Soft Finish Cardstock that will fit all the snowflakes on it. Cut a piece of adhesive sheet that will fit the piece of cardstock. With the piece cut, start by peeling off the back of the double sided adhesive piece and adhere it to the White Soft Finish cardstock piece. Run the piece of paper and the snowflake die through your cutting machine three times. With the adhesive on all three snowflakes, peel off the top paper of the adhesive and sprinkle Microfine White Glitter on each snowflake. Tap off the excess glitter. Burnish the glitter with your finger. Add a small Transp. Glitter/Gold Dot to the centre of the snowflake.


With a scrap piece of White Soft Finish cardstock, apply Chipped Sapphire Distress Ink to the Merry Christmas Sentiment. Stamp the sentiment onto the piece of cardstock. Fussy cut the sentiment out. Ink the edges of the sentiment using Black Soot Distress Ink and a blending tool with foam.


To assemble your pillow box, add adhesive to the left and right hand sides of the pillow box. Adhere the sides together. Add adhesive to the top of the box and adhere the two handles together.


Adhere the beaded circle frame to the middle of the box. Adhere the stitched circle slightly overtop of the beaded circle frame. Adhere the entwined circle overtop of the stitched circle.


Adhere the medium snowflake to the middle of the stitched circle. Adhere the small glitter snowflake to the centre of the medium snowflake.


Adhere the Merry Christmas sentiment to the bottom portion of the snowflakes. Foam square one of the extra small snowflakes to the bottom left hand corner of the box. Foam square the other two extra small snowflakes to the top right hand corner of the box.


To finish off the top of your gift box, adhere the other small snowflake to the top right hand side of the pillow box handle.


Here are a few close up photos of my Merry Christmas Gift Box.


And here's my finished Merry Christmas Gift Box.


****************

For today's challenge Elizabeth Craft Designs are giving away a $20 Gift Card to use on the Elizabeth Craft Designs website to 3 winners. 

To enter simply leave a comment on the Elizabeth Craft Designs Challenge post answering the question provided.

We will select 3 lucky winners in a random drawing 

The winners will be announced on Friday, October 20th, on the Elizabeth Craft Designs blog.

**************


Elizabeth Craft Designs Products Used:

- Beacon - Kids Choice Glue

Other Products Used:

- Tim Holtz for Ranger Ink: Distress Oxide Ink - Black Soot and Chipped Sapphire and Blending Tool & Foam

- Katelyn


Wednesday, October 11, 2017

Scrap Shotz October Kit Projects Part 2

Happy Wednesday!! 

Today, I'm sharing three more projects featuring Scrap Shotz's October Kit which features the fabulous Simple Stories "Beautiful" collection. I hope that my projects will inspire you to want to recreate them at home.


So pop by Scrap Shotz's Blog so that you can see the rest of my projects using the October kit.

- Katelyn

Friday, October 6, 2017

Joy Christmas Tree Ornament

Happy Friday!! I'm up on Southern Ridge Trading Company's blog today sharing with you my Joy Christmas Tree Ornament which features a variety of our Christmas wood and chipboard pieces. I hope that my Joy Christmas Tree Ornament will inspire you to want to recreate it at home.


You'll want to make sure to head over to the Southern Ridge Trading Company Blog so that you can share with you how I transformed my Christmas wood and chipboard pieces for my Joy Christmas Tree Ornament.

- Katelyn

Wednesday, October 4, 2017

#Simply G45 - Fall Banner

Happy Wednesday! I'm up on Graphic 45's blog sharing with you my #Simply G45 Fall Banner which features the ABC Primer and Place In Time Deluxe Collectors Edition along with the Alpha Banners from the Staples Collection. I have a few photos to share with you on my blog, but if you haven't stopped by Graphic 45's blog yet, make sure you do so that you can check out the rest of the photos of my project as well as Lena's beautiful project.


Tip: Make sure to ink the edges of the Alpha tags using a coordinating colour of ink.


Tip: To make some of the fussy cut images pop on the Alpha Tag, adhere some fall leaves behind the images.


For a full tutorial on how I created my Fall Banner, more photos and Lena's beautiful project, make sure to stop by Graphic 45's blog


-Katelyn