Showing posts with label Place In Time Deluxe Collectors Edition. Show all posts

Wednesday, March 28, 2018

Easter Treat Holder


Happy Wednesday! I'm excited to share with you my 60 second Easter Treat Holder that's on Graphic 45's blog today. Although it can be challenging to create a project within 60 second, Graphic 45's products are perfect for achieving these types of projects.  So, by using the Place In Time Deluxe Collectors Edition, and a ATC Black Policy Envelope, I was able to create this simple but quick and pretty treat holder, easy for anyone to recreate at home and perfect for your Easter Dinner Table.


Tip: You only need to use one sheet of paper to create this treat holder.

Here's the video tutorial on how I created my card:


Graphic 45 Supplies Used:


Other Supplies Used:

- Tim Holtz for Ranger Ink: Vintage Photo Distress Ink & Blending tool with Foam
- Scrapbook Adhesives by 3L: 3D Foam Squares & Ez Runner

Thanks for stopping by and checking out my project! You'll want to make sure to head over to Graphic 45's blog for a few other tips and tricks. 

-Katelyn


Wednesday, February 14, 2018

#Simply G45 - Love Banner

Happy Valentine's Day!

I'm up on Graphic 45's blog sharing with you my #Simply G45 Love Banner which features the Place In Time Deluxe Collectors Edition along with the Alpha Banners from the Staples Collection. I have a few photos to share with you on my blog, but if you haven't stopped by Graphic 45's blog yet, make sure you do so that you can check out the rest of the photos of my project as well as Aneta's beautiful project.


Tip: Don't be afraid to combine two different colours of ATC tags to create your banner.


For a full tutorial on how I created my Love Banner, more photos and Aneta's beautiful project, make sure to stop by Graphic 45's blog


-Katelyn


Wednesday, October 4, 2017

#Simply G45 - Fall Banner

Happy Wednesday! I'm up on Graphic 45's blog sharing with you my #Simply G45 Fall Banner which features the ABC Primer and Place In Time Deluxe Collectors Edition along with the Alpha Banners from the Staples Collection. I have a few photos to share with you on my blog, but if you haven't stopped by Graphic 45's blog yet, make sure you do so that you can check out the rest of the photos of my project as well as Lena's beautiful project.


Tip: Make sure to ink the edges of the Alpha tags using a coordinating colour of ink.


Tip: To make some of the fussy cut images pop on the Alpha Tag, adhere some fall leaves behind the images.


For a full tutorial on how I created my Fall Banner, more photos and Lena's beautiful project, make sure to stop by Graphic 45's blog


-Katelyn


Thursday, February 9, 2017

Winter Tags

Today I get to share with you my set of Winter Tags that's are up on the Graphic 45 blog using Ivory Regular Tags, Children's Hour and Place in Time Deluxe Collectors Edition.  Make sure to read all the way down in my post as I have a tutorial for you so that you can recreate my Winter Tags at home.  You'll want to make sure to head over to the Graphic 45 blog to check out the rest of the photos of my project as well as check out Joanne's fabulous project.


I love to create tags as they are a smaller canvas to create on and they use up scraps of patterned paper leftover from other projects.


Tip: Layer different cut aparts from the calendar paper to create dimension and interest on your tag.


Here's the tutorial on how to make my Winter Tags at home:


To see more pictures of my Winter Tags, you'll want to head over to the Graphic 45 blog.

Supplies Used:  

- Place in Time Deluxe Collectors Edition: January Cut Aparts
- Children’s Hour 12x12 Calendar Pad: January & February
- Children’s Hour 8x8 Pad: January Collective
- Children’s Hour 6x6 Patterns & Solids
- Staples: Regular Tag Album – Ivory
- Hug a Bug Seam Binding Ribbon: Cream
- ½” Circle Punch
- Corner Rounder
- Walnut Stain Distress Ink & Blending Tool
- Edge Distressor
- Scissors
- Paper Trimmer
- Sookwang Tape

Thanks for stopping by and make sure to head over to the Graphic 45 blog  to check out the rest of the photos of my project as well as Joanne's fabulous project!

-Katelyn

Wednesday, January 25, 2017

Love Mini Album

I'm back from the craziness of Creativation and I get to share with you my Love Mini Album that's up on the Graphic 45 blog today using Policy Envelopes, Alpha Banner, Café Parisian, Place in Time Deluxe Collectors Edition as well as a variety of staples.  Having this little mini album will allow me to add special photos and mementos from Valentine's Day. You'll want to make sure to head over to the Graphic 45 blog to check out the rest of the photos of my project.


Tip: Mix and match collections to create the perfect embellishments to add to the front of each envelope.


Tip: To add some extra interest to the Alpha Banner tags, add a piece of coordinating pattern paper in behind the letter.


These are just a few of the photos of the pages in my Love Mini Album. To see more pictures of my Love Mini Album, you'll want to head over to the Graphic 45 blog. 

Supplies Used:

- Café Parisian 12x12 Patterns & Solids
- Café Parisian 12x12 Paper: Floral Souffle & Café Parisian
- Place in Time Deluxe Collectors Edition: February Cut Aparts
- Children’s Hour 8x8 Paper Pad: February Collective & February Montage
- Staples: Shabby Chic Metal Keys, Shabby Chic Metal Clock Keys, Policy Envelopes – Regular Black, Alpha Banner – ATC Red and Ring from ATC Tags Album
- Doilies
- Petaloo: Crochet Lace Trim – Cream
- Hug a Bug Seam Binding Ribbon: Black & Cream
- Black Cardstock
- Crop-a-Dile
- Sookwang Tape
- Glue Dots
- Foam Squares
- Paper Trimmer
- Scissors
- Black Soot Distress Ink & Blending Tool
- Edge Distressor

- Katelyn


Saturday, January 7, 2017

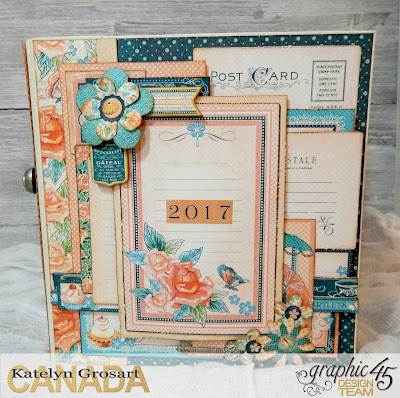
2017 Scrapbook Planner

2017 is here and that means it's time to start thinking about creating a new planner. Today I'm on the Graphic 45 blog sharing with you a 2017 Scrapbook Planner using Children’s Hour, Café Parisian as well as a variety of other collections from this year.  Having a planner that will allow me to document birthdays, important events or things and being able to scrapbook those special moments during the month is so important to me. You'll want to head over to the Graphic 45 blog to check out the rest of the photos of my project.


Tip: Add policy envelopes into your planner as a way to hold important receipts, ticket stubs or other important pieces of paper.


Tip: Add different size papers and fold outs into your planner to add some extra interest as well as give you more space to document your memories.


This is just a few of the photos of the inside of my planner. To see more pictures of my 2017 Scrapbook planner, you'll want to head over to the Graphic 45 blog. I'm warning you though, that you'll want to grab a cup of tea or coffee before reading the post as the post is top heavy with photos. 

Supplies Used:

- 12” x 12” Café Parisian: Confectionary
Café Parisian 12”x12: Patterns & Solids
- 12”x12” St. Nicholas: Sweet Tooth and Bells & Bows
- 12”x12” St. Nicholas: Patterns & Solids
- 12”x12” Off to the Races: Run for the Roses and Elegance Running
- Off to the Races 12”x12” Patterns & Solids
- Children’s Hour 12”x12” Pad
- Children’s Hour 12”x12” Calendar Pad
- Children’s Hour 8”x8” Calendar Pad
- Hallowe’en in Wonderland Deluxe Collectors Edition
- ABC Primer Deluxe Collectors Edition
- Secret Garden Deluxe Collectors Edition
- Café Parisian Chipboard 1 & 2
- Café Parisian Flowers
- Café Parisian 12”x12” Cardstock Stickers
- Café Parisian Ephemera Cards
- Children’s Hour Ephemera Cards
- Staples: Ivory Mixed Media Album, Shabby Chic Ornate Metal Keys, Square Black Policy Envelopes, Square Red Policy Envelopes & Shabby Chic Metal Door Plate & Knobs
- Vintage Photo Distress Ink & Blending Tool
- Mixed Media Cardstock
- Doilies
- Sookwang Tape
- Foam Squares
- Edge Distressor
- Scissors
- Crop a Dile
- Black Journaling Pen
- 1 3/8” Circle Punch


- Katelyn