It's time for a new Designer Challenge on the Elizabeth Craft Designs Blog today. For February it's all about Easter. With this month's challenge in mind, I set out to create a cute Easter Card that you could give to that special someone in your life. You'll want to make sure to read below as I have a tutorial for you so that you can re-create my Happy Easter Card at home. Make sure to read all the way down to the bottom of the post as I have some information on how to get in on a fabulous giveaway from Elizabeth Craft Designs.
To start, die cut three grass pieces from the Spring Basket Die Set out of White Soft Finish Cardstock. Blend Shabby Shutters Distress Ink over the entire surface of the grass pieces using a blending tool with foam. Use Vintage Photo Distress Ink and a blending tool with foam to ink the edges of each grass bush.
Die cut the bunny from the Bunny die out of White Soft Finish Cardstock. Using Hickory Smoke Distress Ink and a blending tool with foam, lightly go over the bunny and it's mouth. Using Spun Sugar Distress Ink and a blending tool with foam, lightly go over the ears and it's nose. Adhere the nose to the mouth and then adhere the mouth to the bunny. Adhere the two pink ear pieces to the ears.
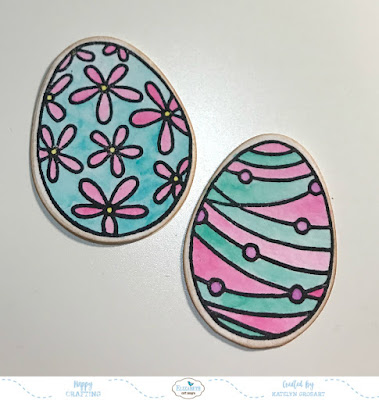
Choose two Easter eggs from the Colour My Easter Eggs. Apply Jet Black Archival Ink to each egg stamp and stamp onto a piece of watercolour cardstock. Colour the eggs using a watercolour brush and the following Tombow Markers - 373, 269, 743, 055 and 676. Once the eggs have been coloured, cut the eggs out using the Colour My Easter Eggs die set. Ink the edges of the eggs using Vintage Photo Distress Ink and a blending tool with foam.
Die cut the Entwined Egg twice out of patterned paper. Ink the edges of both entwined eggs using Vintage Photo Distress Ink and a blending tool with foam.
While the Entwined Egg die is still out, die cut the medium sized flower seven times out of patterned paper. Ink the edges of the flowers using Vintage Photo Distress Ink and a blending tool with foam.
From the Small Flower Set die, die cut the same flower out four times from White Soft Finish Cardstock. Blend Spun Sugar Distress Ink over the entire surface of two of the flowers. Blend Shabby Shutters Distress Ink over the entire surface of the other two flowers.
The last piece to die cut is the 4 1/2" Dashing Rectangles out of White Soft Finish Cardstock. Ink the edges of the rectangle using Vintage Photo Distress Ink and a blending tool with foam.
Cut a piece of patterned paper that measures 4 3/4" x 6". Ink the edges of the patterned paper piece using Vintage Photo Distress Ink and a blending tool with foam.
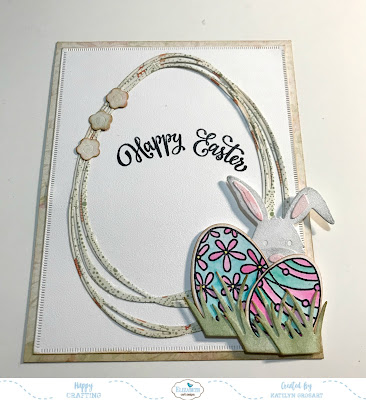
Adhere the dashing rectangle piece to the patterned paper piece. Adhere the entwined eggs to the middle of the dashing rectangle piece. Make sure that you can see both entwined eggs.
In the bottom right hand side of the egg, adhere the two easter eggs, the bunny and the grass pieces.
Adhere three of the flowers on the top left hand side of the egg. Apply Jet Black Archival Ink to the Happy Easter sentiment and stamp in the middle of the egg.
Adhere the other four flowers in amongst the eggs, bunny and grass.
Adhere one large flower above the bunny and adhere the other large flower to the left of the easter eggs. To finish off the flowers, add Transp.Glitter/Gold Dots to the centres. To finish the card, cut a cardbase that measures 4 3/4" x 12", score at 6". Adhere the cardfront to the cardbase.
Here are a few close up photos of the Happy Easter Card.
Here's the finished Happy Easter Card.
*******************
For today's challenge Elizabeth Craft Designs are giving away a $20 Gift Card to use on our website to 3 winners.
To enter simply leave a comment on the Elizabeth Craft Designs Challenge post and tell us "What Elizabeth Craft Designs dies or stamp sets would you use to create an Easter Card?”
We will select 3 lucky winners in a random drawing
The winners will be announced on Friday, March 2nd on the Elizabeth Craft Designs blog.
************************
Elizabeth Craft Designs Products Used:
- Bunny
Other Products Used:
- Tim Holtz for Ranger Ink: Distress Ink - Spun Sugar, Shabby Shutters & Vintage Photo & Blending Tool & Foam
- Ranger Ink: Jet Black Archival Ink
- Tombow Markers: 373, 269, 743, 055 & 676
- Authentique: Jubilee - Jubilee Two, Jubilee Five & Jubilee Six
- Katelyn


No comments:
Post a Comment