I'm back with a second project for you today. It's a new release day over on the Elizabeth Craft Designs blog, featuring Joset Designs new Christmas die and stamp release. You'll want to stop by the Elizabeth Craft Designs blog to see the rest of the designs team projects featuring her release.
For my project, I featured one of the new dies and stamp set to create my fun Happy Hot Chocolate Season Card. I also have a full tutorial on how to create my card, so grab your favourite Christmas beverage and enjoy!
To start, choose a piece of patterned paper from the Xmas Vintage Paper Pack. Die cut the 4 1/2" Dashing Rectangle die out of the patterned paper piece. Distress the edges of the rectangle. Ink the edges of the patterned paper piece using Ground Espresso Distress Ink and a blending tool with foam.
Next choose one piece of patterned paper. Die cut two 4" Stitched Rectangles out of the patterned paper piece. Die cut the 3 1/2" Stitched Rectangle out of the backside of the same patterned paper piece. Distress the edges of all three rectangles. Ink the edges of all three rectangles using Ground Espresso Distress Ink and a blending tool with foam.
Die cut the 1 1/8" Stitched Fishtail Banner out of a piece of scrap patterned paper. Cut the banner down to 3". Apply Potting Soil Archival Ink to the Happy Hot Chocolate sentiment and stamp onto the banner. Distress the edges of the banner. Ink the edges of the banner using Ground Espresso Distress Ink and a blending tool with foam.
The next steps will be using the Hot Chocolate Die. You'll want to die cut all of the pieces out of White Soft Finish Cardstock.
Using a blending tool with foam, blend Candied Apple Distress Ink over the entire surface of the cup and cut out candy cane.
Leave the snowflake and plain candy cane white.
Using a blending tool with foam, blend Vintage Photo Distress Ink over the drip marks.
Ink the edges of the marshmallows, the whip cream and steam marks using Antique Linen Distress Ink and a blending tool with foam.
Now it's time for assembly.
Adhere the 4" stitched rectangle patterned paper piece to the 4 1/4" dashing rectangle patterned paper piece.
Adhere the chocolate drip to the cup. Adhere the cut out candy cane to the white candy cane. Adhere the whip cream to the cup. Adhere the candy cane to the right of the whip cream. Adhere the three marshmallows onto the whip cream.
Foam square the hot chocolate cup 3/4" from the right and 5/8" from the bottom of the 4 1/4" dashing rectangle.
Use foam squares and adhesive to adhere the sentiment stitched banner 3/4" from the bottom and right against the left side of the 4 1/4" dashing rectangle patterned paper.
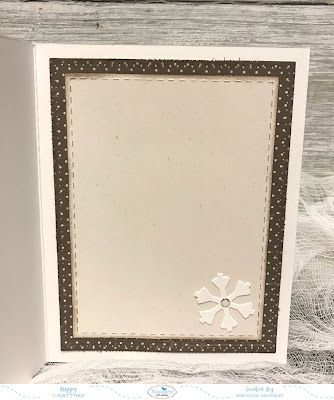
Adhere the 3 1/2" stitched rectangle to the 4" stitched rectangle. Adhere the snowflake in the bottom right hand corner of the 3 1/2" rectangle.
Cut a cardbase that measures 5 3/4" x 9", score at 4 1/2". Adhere the cardfront to the cardbase.
Adhere the 4" stitched rectangle to the cardbase. To finish off the snowflake, add a transp. glitter/gold dot.
Here's the finished Happy Hot Chocolate Season Card.
Elizabeth Craft Designs Supplies Used:
- ModaScrap: Xmas Vintage Paper Pack
Other Supplies Used:
- Tim Holtz for Ranger Ink: Distress Ink - Vintage Photo, Ground Espresso, Candied Apple and Antique Linen & Blending Tool with Foam
- Ranger Ink: Potting Soil Archival Ink
- Katelyn


No comments:
Post a Comment