Thursday, January 31, 2019

This Week Planner Spread

Happy Thursday! I'm up on the Elizabeth Craft Designs blog today sharing my This Week Planner Spread, which features dies from the Planner Essentials Collection and patterned paper from ModaScrap to create my planner spread.


I have a full tutorial on how I made my This Week Planner Spread over on the Elizabeth Crafts Designs Blog

- Katelyn

Wednesday, January 30, 2019

A Way With Words New Release - Shine Frame

We are celebrating the new releases from A Way With Words over on the Elizabeth Craft Designs blog. I designed this pretty Shine Frame which features a couple of the new releases. 


Cut a piece of kraft cardstock to measures 4 3/8" x 6 1/4". Ink the edges of the cardstock piece using Ground Espresso Distress Ink and a blending tool with foam.


Cut a piece of White Soft Finish Cardstock that measures 4" x 5 7/8". Ink the edges of the cardstock piece using Ground Espresso Distress Ink and a blending tool with foam.


From the Pink Cotton Candy Paper Pack, choose one of the patterned papers. Cut the piece of patterned paper down to 3 3/4" x 5 5/8". Ink the edges of the patterned paper using Ground Espresso Distress Ink and a blending tool with foam.


Choose another piece of patterned paper from the Pink Cotton Candy Paper Pack. Die cut the Flourished Frame die out of the patterned paper. Ink the edges of the frame using Ground Espresso Distress Ink and a blending tool with foam.


You'll need to choose another piece of patterned paper from the Pink Cotton Candy Paper Pack. Die cut the Butterflies Spray out of the patterned paper. You will also need to die cut the butterfly spray two more times, one from kraft cardstock and one from White Soft Finish Cardstock. From the die cut butterflies, you'll need seven patterned paper butterflies, five kraft cardstock butterflies and seven white soft finish cardstock butterflies. Ink the edges of the butterflies using Ground Espresso Distress Ink and a blending tool with foam. Fold the butterflies in half.


Die cut the Shine word out of Kraft cardstock and White Soft Finish Cardstock.


Adhere the patterned paper piece to the white soft finish cardstock piece. Adhere the white soft finish cardstock piece to the kraft cardstock piece.


Adhere the flourished frame to the patterned paper piece. Adhere the white shine word slightly to the right of the shine kraft word so that you see part of the kraft cardstock. Adhere the shine word to the middle of the patterned paper piece.


Adhere the butterflies around the shine word. 


To finish the frame, adhere the kraft cardstock piece to the frame.


Here are a few closeups of the finished frame.


Here's the finished Shine Frame.


A Way With Words Products Used:


Other Supplies Used:

- Elizabeth Craft Designs: White Soft Finish Cardstock and ModaScrap - Pink Cotton Candy Paper Pack
- Tim Holtz for Ranger Ink: Distress Ink - Ground Espresso and Blending Tool with Foam
- Misc: Kraft Cardstock and Frame

- Katelyn


Tuesday, January 29, 2019

Destiny Tag

Happy Tuesday!
I have a new post over on Quietfire Design blog today, where I'm sharing my Destiny Tag which features a variety of Quietfire stamps and A Way With Words Dies.


For a full tutorial and a few more photos of my project, you'll want to head over to Quietfire Design blog for all the details. 

- Katelyn


Monday, January 28, 2019

Leave A Little Sparkle Wherever You Go Frame

Happy Monday! I'm up on Creative Scrapbooker Magazine's Blog as a monthly blogger sharing my Leave A Little Sparkle Wherever You Go Frame. My frame features the Mermaid Cove Collection from Creative Memories, dies from Elizabeth Craft Designs as well as ink from Ranger Ink and adhesive from Scrapbook Adhesives by 3L.


You'll want to make sure to stop by the Creative Scrapbooker Blog to learn all about how I created my Leave A Little Sparkle Wherever You Go Frame.

Thank for stopping by!
- Katelyn

Saturday, January 26, 2019

January Planner Post #2

Happy Saturday! I'm excited to be sharing with you Week 2 of my planner spread. I've been playing with the different stamps and dies in the planner collection from Elizabeth Craft Designs to my pages. You'll want to grab a cup of your favourite winter beverage and read below as I have a tutorial for you on how to recreate my planner spread. 


To start, die cut the planner page from the Planner Essentials - 4 die out of White Soft Finish Cardstock. Die cut the planner page from the Planner Essentials - 1 die out of White Soft Finish Cardstock. Sprinkle Raspberry, Rosebud and Aquamarine Magenta Nuance over the two pages. Spritz the pages with water. Dry the pages with a heat tool. From the Planner Essentials - 1 die, die cut the reinforcements twice out of White Soft Finish Cardstock. Adhere the reinforcements over top of each circle.


Apply Jet Black Archival Ink to the Heaxagon stamps from the Months stamp and stamp randomly onto the pages. You'll end up with three bunches of hexagons on each page. Add highlights to the hexagons using a white gel pen. Apply Jet Black Archival Ink to the January stamp from the Months stamp set and stamp onto the tab. Ink the edges of the planner pages using Black Soot Distress Ink and a blending tool with foam.


Apply Jet Black Archival Ink to the Calendar stamp and stamp onto a piece of White Soft Finish Cardstock. Fussy cut the calendar out. Circle the January month and the days 14-20 along with the 2019. Ink the edges of the calendar using Black Soot Distress Ink and a blending tool with foam.


From the Planner Essential - 3 die, die cut the small banner twice out of White Soft Finish Cardstock. From the Planner Essentials - 2 die, die cut the arrow twice out of White Soft Finish Cardstock. Ink the edges of the banners and arrows using Black Soot Distress Ink and a blending tool with foam.


From the Planner Essentials - 1 die, die cut the small square seven times out of kraft cardstock. Apply Jet Black Archival Ink to the days of the week stamps and stamp one day onto each square. Write in each square. Ink the edges of the squares using Black Soot Distress Ink and a blending tool with foam.


For the left hand planner spread, adhere a banner to the Tuesday and Wednesday squares. Adhere the Monday, Tuesday, Wednesday and calendar rectangle onto the left hand planner spread.


On the right hand planner spread, adhere the Thursday, Friday, Saturday and Sunday square to the page. Adhere one arrow in between the Thursday and Friday squares. Adhere the other arrow in between the Saturday and Sunday.


Here are is the finished planner spread.


Here are a few closeups of the pages.


Here's the finished January Planner Post #2.


Elizabeth Craft Designs Supplies Used:

Months

Other Supplies Used:

- Ranger Ink: Jet Black Archival Ink and Mister
- Tim Holtz for Ranger Ink: Black Soot Distress Ink and Blending Tool with Foam
- Magenta: Nuance - Raspberry, Rosebud and Aquamarine
- Misc: Kraft Cardstock, Black Gel Pen and White Gel Pen

Thanks for joining me! I hope that I've inspired you to recreate my planner spreads.

- Katelyn


Wednesday, January 23, 2019

Adore Tag

Valentine's Day is right around the corner and I've started to create tags and cards for loved ones. I've created this Adore Tag which I'm sharing up on Southern Ridge Trading Company's blog. I hope that my tag inspires you to recreate your own version at home.


You'll want to stop by Southern Ridge Trading Company's blog so that you can learn how to recreate my Adore Tag at home.

- Katelyn

Friday, January 18, 2019

Hello Card

Happy Friday! With the buzz of Christmas done, I found myself wanting to design just a generic card that had no purpose and would be nice for anyone to receive in their mailbox. To create my card, I used dies from Joset Designs and Moda as well as patterned paper from ModaScrap. You'll want to read below as I share with you how to recreate my Hello Card at home.


To start, choose a piece of patterned paper from the ModaScrap - Pink Cotton Candy Paper Pack. Die cut the 4"Dashing Rectangle out of the patterned paper.


Die cut the Geometric Background out of White Soft Finish Cardstock.


From the Words 2 - Thinking of You die, die cut the Hello word out of White Soft Finish Cardstock.


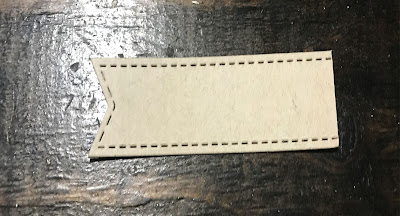
Die cut the 3/4" Stitched Fishtail Banner out of kraft cardstock. Cut the banner down to 3 3/8".


From the Trio of Leaves die, die cut one of the leaves twice out of White Soft Finish Cardstock.


From the Large Flower Set die, die cut one of the flowers twice out of White Soft Finish Cardstock. Die cut the centers once out of White Soft Finish Cardstock. Using a blending tool with foam, blend Worn Lipstick Distress Ink over the entire surface of the two flowers and one of the centers.


Adhere the geometric background to the 4" dashing rectangle.


Adhere the hello sentiment to the stitched fishtail banner. Foam square the stitched fishtail banner 1/2" from the bottom and right to the edge of the right hand side of the card front.


Adhere the two flowers together. Adhere the center to the flowers. Adhere the two leaves 1/8" in from the right hand side of the stitched fishtail banner. Adhere the flowers overtop of the leaves. Cut a cardbase out of White Soft Finish Cardstock that measures 5 1/2" x 8 1/2", score at 4 1/4". Foam square the cardfront to the cardbase.


Here are a couple of closeup photos of the finished card.


And here's the finished Hello Card.


Elizabeth Craft Designs Supplies Used:


Other Supplies Used:

- Tim Holtz for Ranger Ink: Distress Ink- Worn Lipstick and Blending tool with Foam
- Ranger Ink: Jet Black Archival Ink
- Misc: Kraft Cardstock

Thanks for stopping by and checking out my card. I hope that I've inspired you to recreate my Hello Card at home.

- Katelyn