Happy Saturday! I've been getting my planner set up for August and while I was creating, I created this August Title Page as a marker for the start of a new month. To create my page, I've used a variety of the dies from the Planner Essentials line and Joset Designs. You'll want to read below to learn how to recreate my August Title Page at home.

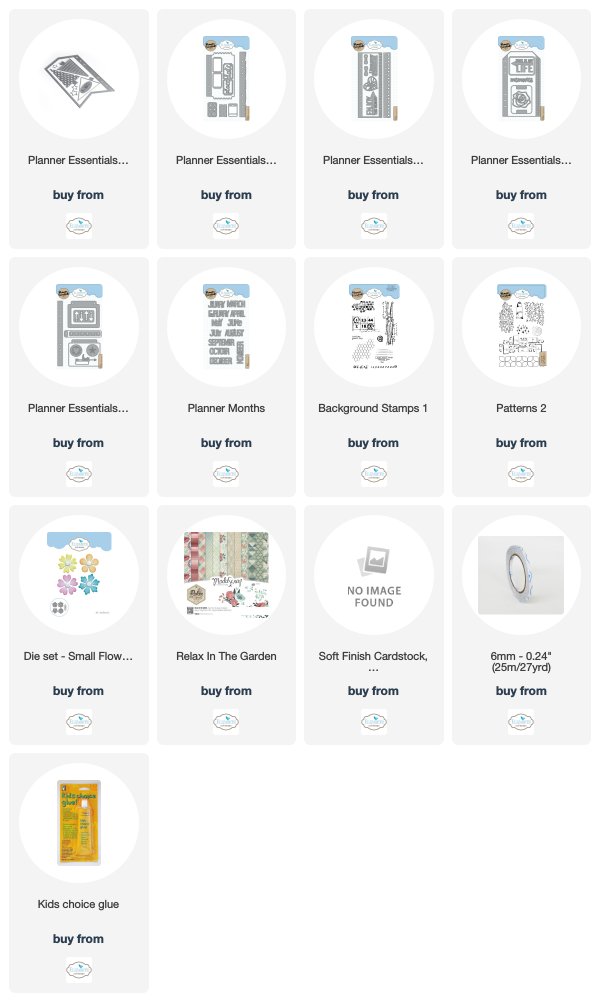
To start, die cut the fishtail page from the Planner Essentials - 12 die out of White Soft Finish Cardstock. Place your favourite stencil on the arrow as desired and use a blending tool with foam to blend Pick Raspberry Distress Ink over certain parts of the stencil. Apply Potting Soil Archival Ink to the dot stamp from the Background Stamps 1 and stamp as desired on the page. Reapply ink to the stamp as needed. I stamped the dot stamp eight times. Apply Jet Black Archival Ink to the diamond stamp from the Patterns 2 stamp set and stamp as desired on the page. Reapply ink to the stamp as needed. I stamped the diamond stamp five times. Distress the edges of the page. Ink the edges of the page using Walnut Stain Distress Oxide Ink and a blending tool with foam.

Choose two patterned paper pieces from the ModaScrap - Relax in the Garden Paper Pack. From one of the patterned papers, die cut the square edge from the Planner Essentials - 8 die. From the other patterned paper, die cut the torn edge from the Planner Essentials - 11 die. Distress the edges of each edge. Ink the edges of both edge pieces using Walnut Stain Distress Oxide Ink and a blending tool with foam.

Choose another piece of patterned paper from ModaScrap's - Relax in the Garden Paper Pack. Die cut the large rectangle from the Planner Essentials - 6 out of the patterned paper. Distress the edges of the rectangle. Ink the edges of the rectangle using Walnut Stain Distress Oxide Ink and a blending tool with foam.

From the Planner Months die, die cut the August month out of White Soft Finish Cardstock.

You'll need one of the patterned papers that you used to die cut an edge from. Die cut the rose from the Planner Essentials - 6 die out of the patterned paper. Ink the edges of the rose using Walnut Stain Distress Oxide Ink and a blending tool with foam.

From the Planner Essentials - 5 die, die cut the large rectangle with holes out of kraft cardstock. Distress the edges. Ink the edges of the rectangle using Walnut Stain Distress Oxide Ink and a blending tool with foam.

Choose two patterned paper pieces from the ModaScrap - Relax in the Garden Paper pack. Choose three flowers from the Small Flower set. Die cut the one of the flowers six times out of the one patterned paper along with a set of centers. Die cut the other two flowers four times out of the other patterned paper along with a set of centers. Ink the edges of the flowers and centers using Walnut Stain Distress Oxide Ink and a blending tool with foam.

Adhere the square edge piece to the middle of the page. Adhere a piece of Cherry Blossom washi tape to the righ of the square edge. Adhere the torn edge slightly overtop of the square edge.

Adhere the patterned paper rectangle to the kraft rectangle. Foam square the kraft rectangle to the middle of the page. Adhere the rose to the middle of the patterned paper rectangle. Adhere the August title overtop of the rose.

To finish off your page, shape and adhere the flowers and centers together. Adhere two of the same style flowers to the top left corner of the rectangles. Adhere the other three flowers to the bottom right corner of the rectangles.

Here are a few closeup photos of the finished page.


Here is the finished August Title Page.

Elizabeth Craft Designs Supplies Used:
Other Supplies Used:
- Tim Holtz for Ranger Ink: Distress Ink - Picked Raspberry, Distress Oxide Ink - Walnut Stain and a Blending tool with foam
- Tim Holtz for Stampers Anonymous: Stitched Layering Stencil
- Ranger Ink: Jet Black Archival Ink and Potting Soil Archival Ink
- Alexandre Renke: Cherry Blossom Washi Tape
- Misc: Kraft Cardstock
- Katelyn
No comments:
Post a Comment