Happy Tuesday!
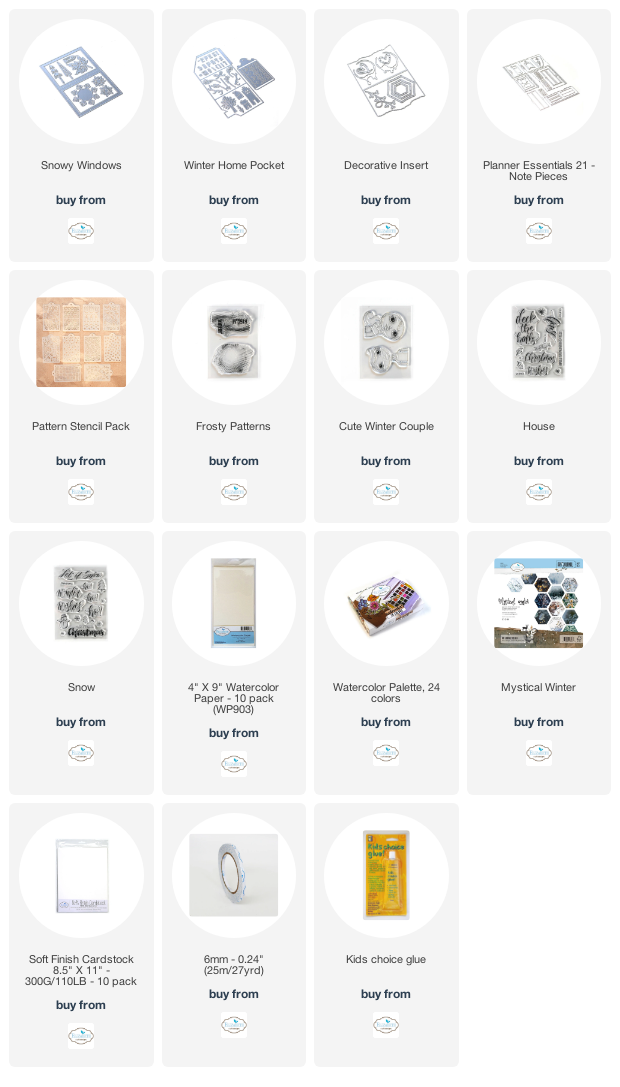
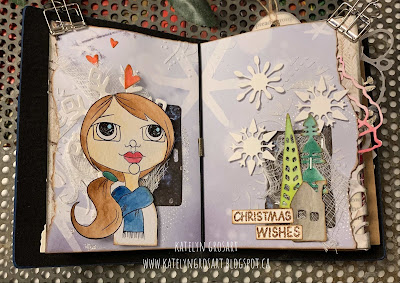
For today's post, I've created this Christmas Wishes Junk Journal Page perfect to add into your junk journal. To create this page, I've used stamps, dies and stencils from the Art Journal Special Collection. You'll want to read below as I have a full tutorial on how to recreate my junk journal page at home.
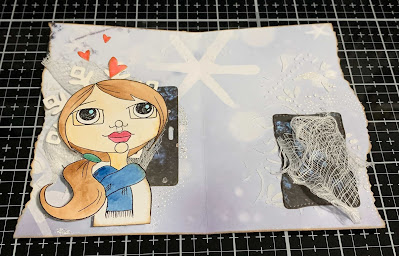
To start, choose a piece of patterned paper out of the Mystical Winter Paper Pack. Die cut the page from the Decorative Insert die out of the patterned paper. Choose one of the stencils out of the Pattern Stencil Pack. Place the stencil on the right hand side of the page and put Texture Paste Opaque Matte through the stencil with a palette knife. Move the stencil to the left hand side of the page and put Texture Paste Opaque Matte through the stencil with a palette knife. Move the stencil to the top of the page and put Texture Paste Opaque Matte through the stencil with a palette knife.
Once the texture paste has dried, apply Emboss It Ink to the circle stamp from the Frosty Patterns stamp set and stamp as desired on the right hand side of the page. I place mine in amongst the stenciled area. Sprinkle Arctic Daybreak Embossing Powder over the stamped image. Tap off the excess powder and emboss with a heat tool. Reapply Emboss It Ink to the circle stamp and stamp as desired on the left hand side of the page. I place mine in amongst the stenciled area. Sprinkle Arctic Daybreak Embossing Powder over the stamped image. Tap off the excess powder and emboss with a heat tool. Ink the edges of the page using Walnut Stain Distress Ink and a blending tool with foam.
Choose a piece of patterned paper out of the Mystical Winter Paper Pack. Choose two of the note pieces out of the Planner Essentials 21 - Note Pieces Die. Die cut the two note pieces out of the patterned paper. Ink the edges of the note pieces using Walnut Stain Distress Ink and a blending tool with foam.
From the Snowy Windows Die, die cut the large snowflake, one of the small snowflakes once and the other small snowflake twice out of White Soft Finish Cardstock.
Die cut the small house from the Winter Home Pocket die out of a piece of watercolour cardstock. Using a waterbrush and the Watercolour Palette, colour the house. Once the house has dried, ink the edges of the house using Walnut Stain Distress Ink and a blending tool with foam.
From the Winter Home Pocket die, die cut the hearts out of watercolour cardstock. From the Snowy Wishes die, die cut the two trees out of watercolour cardstock. Using a waterbrush and the Watercolour Palette, colour the hearts and trees. Once the hearts and trees have dried, ink the edges using Walnut Stain Distress Ink and a blending tool with foam.
Apply Jet Black Archival Ink to the girl stamp from the Cute Winter Couple Stamp Set and stamp onto a piece of watercolour cardstock. Using a waterbrush and the Watercolour Palette, colour the girl in. Once the girl has dried, fussy cut her out. Ink the edges of the girl using Walnut Stain Distress Ink and a blending tool with foam.
Apply Emboss It Ink to the Christmas word from the Snow stamp set and stamp onto a piece of White Soft Finish Cardstock. Sprinkle Brazen Belle Embossing Powder over the stamped word. Tap off the excess powder and emboss with a heat tool. Apply Emboss It Ink to the Wishes word from the House stamp set and stamp onto a piece of White Soft Finish Cardstock. Sprinkle Brazen Belle Embossing Powder over the stamped word. Tap off the excess powder and emboss with a heat tool. Once the words have cooled, cut them into two word strips. Ink the edges of both word strips using Walnut Stain Distress Ink and a blending tool with foam.
Cut two pieces of cheesecloth.
Adhere one of the note pieces 1 1/2" from the left on the left page. Staple one of the cheesecloth pieces as desired on the left hand page. I had my cheesecloth lay partially on the note piece.
Adhere the large snowflake overtop of the cheesecloth as desired. Foam square the girl and adhere her overtop of the large snowflake and partially over the note piece. Adhere the hearts above her heard as desired.
Adhere the other note piece 1/2" from the right on the right hand page. Staple the cheesecloth piece overtop of the note piece.
Staple the two trees as desired on the cheesecloth. Foam square the house to the bottom portion of the trees as desired.
Foam square the small snowflakes above the trees. To finish the page, use adhesive and foam squares to adhere the Christmas Wishes word strip to the left of the house and trees.
Here are a few closeup photos of the finished junk journal page.
Here is the finished Christmas Wishes Junk Journal Page.
Elizabeth Craft Designs Supplies Used:

Other Supplies Used:
- Tim Holtz for Ranger Ink: Distress Ink - Walnut Stain and Blending Tool with Foam
- Ranger Ink: Emboss It Ink, Texture Paste Opaque Matte and Jet Black Archival Ink
- Emerald Creek Craft Supplies: Arctic Daybreak Embossing Powder and Brazen Belle Embossing Powder
- Misc: Mini Stapler and Cheesecloth
I hope that my junk journal page has inspired you to recreate your own version at home.
- Katelyn


How wonderfully charming and fun! I've not ventured down the junk journaling path myself, but am starting to feel leanings towards doing so. Who knows, perhaps I'll give into them in 2021. 😄
ReplyDeleteAutumn Zenith 🧡 Witchcrafted Life
Thanks Autumn!
Delete