Happy Wednesday!
For today's post, I've created this fun It's Christmas Time Planner Page which features a variety of dies from the Planner Essentials Collection and stamps from Sue Smith. You'll want to grab a cup of your favourite Christmas time beverage and learn how to recreate my planner page at home.

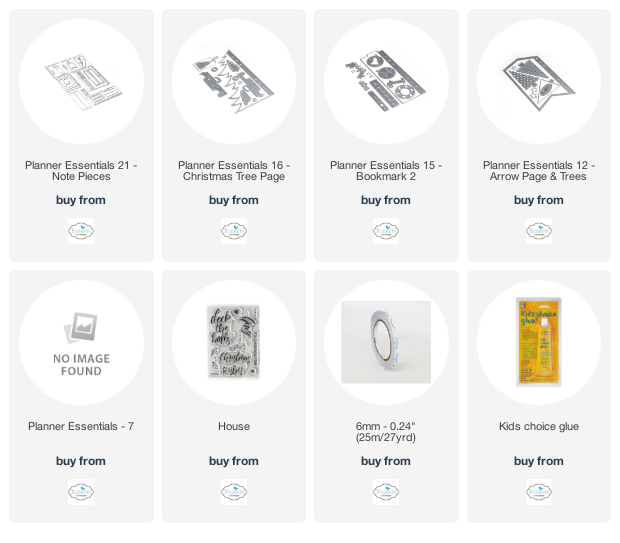
To start, choose a piece of Christmas patterned paper, I used Graphic 45's Christmas Time Paper Pack. Die cut the large tag from the Planner Essentials - 7 die out of the patterned paper. Ink the edges of the tag using Black Soot Distress Ink and a blending tool with foam.

From the Christmas Time 12x12 Patterns and Solids Paper Pack, you'll need a red, black and holly. From the Christmas Time Paper Pack, you'll need the gold/deer patterned paper.
The next four pieces are die cut out of the Planner Essentials 21 - Note Pieces Die. Die cut the 2 5/8" note piece out of the red paper. Die cut the black and the gold deer paper out of the 2 3/4" note piece. Die cut the holly paper out of the 1 1/2" note piece. Ink the edges of all four note pieces using Black Soot Distress Ink and a blending tool with foam.

From the Planner Essentials 15 - Bookmark 2 die, die cut the tree reinforcements out of a piece of green paper from the Patterns and Solids paper pack. You'll need a total of five reinforcements. Ink the edges of the reinforcements using Black Soot Distress Ink and a blending tool with foam.

Next, you'll need the green, gold and red holly paper from the Christmas Time Patterns & Solids Paper Pack. From the Planner Essentials 12 - Arrow Page & Trees, you'll need the plain tree, the dotted tree, the zig zag tree and the three stars. Die cut two plain trees out of the green paper. Die cut the dotted tree out of the red holly paper. Die cut the zig zag tree out of the gold paper. Die cut a total of five stars out of the gold paper. Ink the edges of all the trees and stars using Black Soot Distress Ink and a blending tool with foam.

From the Planner Essentials 16 - Christmas Tree Page, you'll need the two truck pieces, the large tires and the half tree. From the Christmas Time Pattern & Solids Paper Pack, you'll need a piece of red, green and black paper. Die cut the two trucks out of the red paper. Die cut the half tree out of the green paper. Die cut the two tires out of black paper. Ink the edges of the two trucks, half tree and two tires using Black Soot Distress Ink and a blending tool with foam.

Now, you'll need a piece of gold paper from the Christmas Time Patterns & Solids Paper Pack. From the House Stamp Set, you'll need the It's Christmas Time. Apply Emboss It Ink to the stamp and stamp onto the gold paper. Sprinkle Gothic Black Modern Gilding Powders over the stamped words. Tap off the excess powder and emboss with a heat tool. Cut the three words into three strips. Ink the edge of the word strips using Black Soot Distress Ink and a blending tool with foam.

Adhere the reinforcement trees over top of the holes on the planner page.

Foam square the red note piece to the middle of the page. Use adhesive and foam squares to adhere the black note piece 1/2" from the left and 1" from the bottom of the page. Use adhesive to adhere the holly note piece 5/8" from the right and 1/2" from the bottom of the page. Use adhesive and foam squares to adhere the gold/deer note piece all the way to the right edge and 1 1/2" from the top of the page.

Adhere the zig zag tree to a plain tree. Adhere the dotted tree to the other plain tree. Use foam squares to adhere the zig zag tree 1" from the left and 1 1/2" from the top of the page. Use adhesive and foam squares to adhere the dotted tree 5/8" from the right and 1 7/8" from the top of the page.

Adhere your truck together. Adhere the truck 7/8" from the bottom and 3/4" from the left of the page.

Use adhesive to adhere the It's Christmas Time Word Strips to the top portion of the trees as desired. To finish the page, adhere the five stars as desired on the page.

Here are a few closeup photos of the planner page.


Here is the finished It's Christmas Time Planner Page.

Elizabeth Craft Designs Supplies Used:
 Other Supplies Used:
- Tim Holtz for Ranger Ink: Distress Ink - Black Soot and Blending Tool with Foam
- Ranger Ink: Emboss It Dabber
- Emerald Creek Craft Supplies: Gothic Black Modern Gilding Powders
- Graphic 45: Christmas Time Paper Pack and Christmas Time - 12x12 Patterns & Solids
Thanks so much for joining me today and I hope that I have inspired you to recreate your own version of my It's Christmas Time Planner Page.
- Katelyn
Fabulous layers. So festive and timelessly pretty.
ReplyDeleteAutumn Zenith 🧡 Witchcrafted Life
Thanks Autumn!
Delete