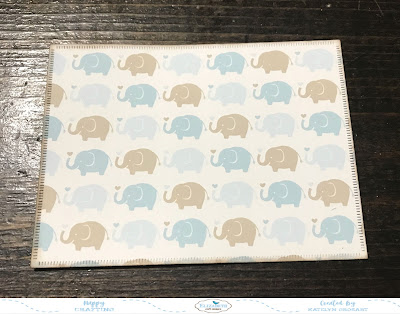
Happy Thursday! I took a break from making Christmas cards this weekend and created this cute Congrats Baby Card. To create my card, I used dies from Els van de Burgt Studio, ModaScrap and Joset Designs as well as patterned paper from ModaScrap. You'll want to read below as I share with you how to recreate my Congrats Baby Card at home.
To start, you'll need the 5/8" Fitted Stars die. Die cut three 5/8" stars out of light blue cardstock. Die cut two 5/8" stars out of brown cardstock. Ink the edges of all five stars using Ground Espresso Distress Ink and a blending tool with foam.
From the Words 1 - Celebration, die cut the Congrats sentiment out of brown cardstock.
Die cut a 4" Dashing Rectangle out of light blue cardstock. Place the piece of cardstock into the Lots of Dots Embossing Folder and run through your die cutting machine. Ink the edges of the rectangle using Ground Espresso Distress Ink and a blending tool with foam.
Choose a piece of patterned paper from the ModaScrap - My Little Boy Paper Pack. Die cut the 3 1/2" Dashing Rectangle die out of the patterned paper piece. Ink the edges of the rectangle using Ground Espresso Distress Ink and a blending tool with foam.
Die cut the 1 1/8" Stitched Fishtail Banner out of White Soft Finish Cardstock. Trim the banner down to 3 1/2". Die cut the 3/4" Stitched Fishtail Banner out of Light Blue Cardstock. Trim the banner down to 3". Ink the edges of the banners using Ground Espresso Distress Ink and a blending tool with foam.
From the Valentines Edges die, die cut the scallop die out of brown cardstock. Trim the edge down to 3 1/2". Cut a bit out of the top right corner if needed. Ink the edges of the scallop border using Ground Espresso Distress Ink and a blending tool with foam.
Adhere the 4" dashing rectangle to the 4 1/2" dashing rectangle.
Adhere the scallop edge to the bottom of the white banner. Foam square the white banner 1" from the bottom of the light blue cardstock and all the way to the left side of the 4" patterned paper. Adhere the light blue banner 3/8" from the top of the white banner.
Adhere the congrats sentiment at the top of the light blue banner. Adhere a brown and light blue star to the bottom left side of the sentiment. Adhere the remaining three stars in the top left corner of the white banner.
Cut a card base out of light blue cardstock that measures 5 1/2" a 8 1/2", score at 4 1/4". Adhere the card front to the card base.
Here are a couple of closeup photos of the finished card.
And here's the finished Congrats Baby Card.
Elizabeth Craft Designs Supplies Used:
- ModaScrap: My Little Boy Paper Pack
Other Supplies Used:
- Tim Holtz for Ranger Ink: Distress Ink- Ground Espresso and Blending tool with Foam
- Misc: Light Blue & Brown Cardstock
Thanks for stopping by and checking out my card. I hope that I've inspired you to recreate my Congrats Baby Card at home.
- Katelyn


No comments:
Post a Comment