Happy Friday! I've been busy creating Christmas projects this week and today I'm sharing with you my Merry Christmas Mini Card, which features dies from Els van de Burgt Studio, ModaScrap, Joset Designs and stamps from Krista Schneider as well as patterned paper from ModaScrap. You'll want to read below as I share with you how to recreate my Merry Christmas Mini Card at home.
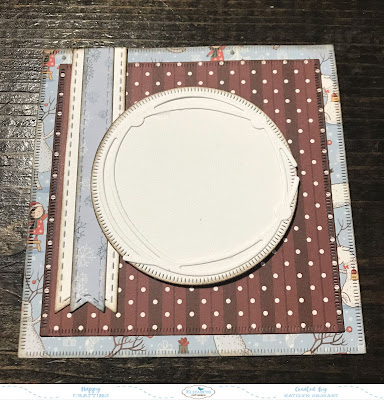
To start, choose two patterned papers from the ModaScrap White Christmas Paper pack. From one of the patterned papers, die cut the 4 1/2" Dashing Square. From the second piece of patterned paper, die cu the 4" Dashing Square. Ink the edges of both squares using Ground Espresso Distress Ink and a blending tool with foam.
Die cut the small Entwined Circle out of White Soft Finish Cardstock.
Next, you'll need to pick out a third patterned paper piece. Die cut the 3/4" Stitched Fishtail Banner out of White Soft Finish Cardstock. Die cut the 3/8" Stitched Fishtail Banner out of the third piece of patterned paper. Ink the edges of both banners using Ground Espresso Distress Ink and a blending tool with foam.
Die cut the 2 3/4" Dashing Circle out of White Soft Finish Cardstock. Ink the edges of the circle using Ground Espresso Distress Ink and a blending tool with foam.
Apply Jet Black Archival Ink to the elf with lights from the Elves Stamp Set and stamp onto a piece of watercolour cardstock. Colour the elf in using Tombow Markers - 847, 990, N25, 026, 969 and 177. Using the coordinating die, die cut the elf out.
From the Words 5 - Winter Wishes, die cut the Merry Christmas sentiment out of White Soft Finish Cardstock. Using a blending tool with foam, blend Ground Espresso Distress Ink over the entire surface of each word.
Adhere the 4" square to the 4 1/2" square.
Adhere the 3/8" stitched fishtail banner to the middle of the 3/4" stitched fishtail banner. Adhere the 3/4" stitched fishtail banner 1/8" from the left hand side of the 4" square.
Adhere the entwined circle to the dashing circle. Foam square the dashing circle to the middle of the 4" square.
Foam square the elf to the right side of the dashing circle.
Adhere the Merry to the left of the elf on the circle. Adhere the Christmas to the bottom portion of the card front. To finish off your card, cut a card base that measures 4 1/2" x 9", score at 4 1/2". Adhere the card front to the card base.
Here are a couple of closeup photos of the finished mini card.
And here's the finished Merry Christmas Mini Card.
Elizabeth Craft Designs Supplies Used:
- ModaScrap: White Christmas Paper Pack
Other Supplies Used:
- Ranger Ink: Jet Black Archival Ink
- Tim Holtz for Ranger Ink: Distress Ink- Ground Espresso and Blending tool with Foam
- Tombow: Markers - 990, 969, 026, N25, 847 and 177
- Misc: Watercolour Cardstock
Thanks for stopping by and checking out my card. I hope that I've inspired you to recreate my Merry Christmas Mini Card at home.
- Katelyn


No comments:
Post a Comment