Wednesday, July 31, 2019

Planner Post #3 - July Week #3 Planner Spread

Happy Wednesday! I'm sharing last week's planner spread from inside my planner with you today.  To create my planner spread, I've used a variety of the dies from the Planner Essentials line. You'll want to read below to learn how to recreate my July Week #3 Planner Spread at home.


To start, choose a couple of patterned papers from the Mintay - 7th Heaven Paper Pack as well as the matching cut aparts. Next, you'll need the page from the Planner Essentials - 10 die, die cut the page out of one of the patterned papers. Ink the edges of the page using Black Soot Distress Ink and a blending tool with foam. 


You'll need the page from the Planner Essentials - 3 die, die cut the page out of the other patterned paper. Apply Victorian Velvet Distress Ink to the July word off of the Months stamp set and stamp onto the tab of the page. Ink the edges of the page using Black Soot Distress Ink and a blending tool with foam. 


Next, you'll need the large rectangle off of the My Life stamp set. Apply Victorian Velvet Distress Ink to the stamp and stamp onto a piece of White Soft Finish Cardstock. Reapply the ink to the stamp and stamp again. Repeat the previous step five more times. Cut each box out. Apply Stormy Sky Distress Ink to each of the days of the week from the Calendar stamp set and stamp one of the days on each of the boxes. Write in the boxes. Ink the edges of the boxes using Black Soot Distress Ink and a blending tool with foam.


Die cut the bow from the Planner Essentials - 9 die out of each of the patterned papers used for the pages.


Apply Victorian Velvet Distress Ink to the checklist stamp off of the Bullet Journaling 3 stamp set and stamp onto a piece of White Soft Finish Cardstock. Reapply ink to the checklist stamp and stamp onto the same piece of White Soft Finish Cardstock. Cut the checklists out. Fill in the checklists as desired. Ink the edges fo the checklists using Black Soot Distress Ink and a blending tool with foam.


Apply Victorian Velvet Distress Ink to the large circle stamp off of the Moments in Life stamp set and stamp onto a piece of White Soft Finish Cardstock. Repeat the previous step. Apply Victorian Velvet Distress Ink to the small circle stamp off the same stamp set and stamp onto the same piece of White Soft Finish. Repeat the previous step three more times. Apply Smoky Slate Distress Ink to the large circle stamp and stamp onto a piece of White Soft Finish Cardstock. Repeat the previous step. Apply Smoky Slate Distress Ink to the small circle stamp and stamp onto the same piece of White Soft Finish. Repeat the previous step three more times. Fussy cut all the circles out. Ink the edges of the circles using Black Soot Distress Ink and a blending tool with foam.


From the 7th Heaven cut apart paper, fussy cut a flower bunch, three flowers, four butterflies, small jar and lanterns. Ink the edges of all the images using Black Soot Distress Ink and a blending tool with foam.


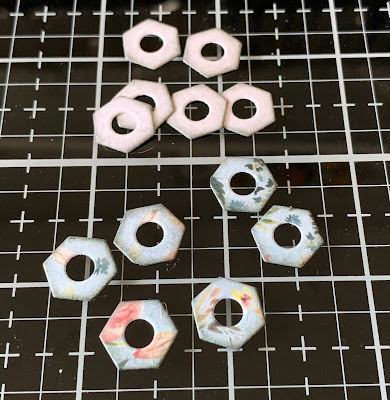
Die cut the reinforcements from the Planner Essentials - 5 die out of each of the patterned papers used for the pages. Ink the edges of the reinforcements using Black Soot Distress Ink and a blending tool with foam.


Adhere the patterned reinforcement circles overtop of the left hand page circles. Adhere the patterned bow to the middle of the left hand page.


On the top half of the left page, use adhesive and foam squares to adhere the flower bunch, small blue circle, large pink circle, Monday and Tuesday boxes as well as a butterfly.


On the bottom half of the left page, use adhesive and foam squares to adhere a flower, large blue circle, small pink circle, small blue circle, Wednesday and Thursday boxes as well as the jar.


Adhere the other reinforcement circles overtop of the right hand page circles. Adhere the other bow to the middle of the right hand page.


On the top half of the left page, use adhesive and foam squares to adhere the lanterns, large blue circle, small pink circle, small blue circle, large flower, Friday box, both checklists and a butterfly.


On the bottom half of the right page, use adhesive and foam squares to adhere a flower, large pink circle, two small pink circle, small blue circle, Saturday and Sunday boxes as well as the last two butterflies.


Here are a few closeup photos of the finished planner spread.


Here is the finished July Week #3 Planner Spread.


Elizabeth Craft Designs Supplies Used:

Months

Other Supplies Used:

- Tim Holtz for Ranger Ink: Distress Ink - Black Soot, Stormy Sky & Victorian Velvet and a Blending tool with foam
- Mintay Paper: 7th Heaven Paper Collection
- Misc: Black Gel Pen

- Katelyn


Monday, July 29, 2019

Believe in Yourself Wall Hanging

I have one more post to share with you today!
I'm excited to be back on Creative Scrapbooker Magazine's Blog as a monthly blogger sharing my Believe in Yourself Wall Hanging. My wall hanging features a variety of products from Carta Bella, ink from Ranger Ink and adhesive from Scrapbook Adhesives by 3L.


You'll want to make sure to stop by the Creative Scrapbooker Blog to learn how I created my Believe in Yourself Wall Hanging.

Thanks for stopping by!
- Katelyn

Elizabeth Craft Designs July Group Post - Christmas In July

Happy Monday!

We are switching things up on the Elizabeth Craft Designs blog this year and instead of having a designer challenge, we are having group posts each month. Each month the group post will have a theme and some or all of the design team members will participate. For July's theme it's all about Christmas in July - Your favourite Christmas Song! I have many favourite Christmas songs, so I settled on Home for the Holidays.

Even though I don't want to think about Christmas right now as it's 30 degrees outside as I write this blog post, it's hard to believe it's only 5 months away. For this month's group post, I created this fun From our home to yours card, perfect to give to use as your Christmas Card this year. To create my card, I've used dies from Joset Designs and patterned paper from ModaScrap. Grab your favourite beverage and read below as I have a tutorial for you so that you can re-create my card at home. You'll also want to make sure to stop by the Elizabeth Craft Designs Blog to check out the rest of the team's projects. 


The next few steps are using the Christmas Door Die.

Choose a piece of patterned paper from the ModaScrap - Wood Effect Paper pack. Once the paper has been chosen, die cut the door out of the patterned paper. Ink the edges of the door using Hickory Smoke Distress Ink and a blending tool with foam.


From a piece of White Soft Finish Cardstock, die cut the rectangle, top and bottom door frames and snow. Ink the edges of the rectangle and top & bottom door frame using Hickory Smoke Distress Ink and a blending tool with foam. Ink the edges of the snow using Tumbles Glass Distress Ink and a blending tool with foam.


Die cut the two wreaths and tree out of White Soft Finish Cardstock. Using a blending tool with foam, blend Forest Moss Distress ink over the entire surface of all of the pieces.


On a piece of White Soft Finish Cardstock, blend Squeezed Lemonade Distress Ink with a blending tool with foam. Die cut the circles and inside of the lamp out of the now coloured White Soft Finish Cardstock.


From a piece of black cardstock, die cut the lamp, door handle and plant pot. 


From a piece of White Soft Finish Cardstock, die cut the tree base out. Using a blending tool with foam, blend Vintage Photo Distress Ink over the entire surface.


On a piece of White Soft Finish Cardstock, blend Candied Apple Distress Ink with a blending tool with foam. Die cut the bow and ribbon out of the now coloured White Soft Finish Cardstock.


From the Fitted Indented Rectangle, die cut the 3 3/4" rectangle out of grey cardstock. Ink the edges of the rectangle using Hickory Smoke Distress Ink and a blending tool with foam.


Foam square the white rectangle piece to the middle of the indented rectangle. Adhere the door to the middle of the white rectangle.


Foam square one of the door frame caps to the top of the door. Foam square the other door frame cap to the bottom of the door. Adhere two of the snow pieces to the top of the door frame. Adhere the other two snow pieces to the bottom of the door frame.


Adhere the yellow light piece inbehind the black lamp. Adhere the lamp to the top left side of the door. Adhere the door handle to the door.


Adhere the tree together. Adhere the tree to the pot. Adhere the potted tree to the right of the door, so that the tree hangs over the white rectangle.


Adhere the wreath together as desired. Foam square the wreath to the middle of the door.


Apply Hickory Smoke Distress Ink to the "From our home" sentiment off the Joyful Wishes stamp set and stamp on the bottom portion of the door cap. To finish the card, cut a cardbase out of White Soft Finish Cardstock that measures 5 1/4" x 8", score at 4". Adhere the cardfront to the cardbase.


Here are a few closeups of the card.


Here's the finished From our Home to Yours Card.


Elizabeth Craft Designs Products Used:

- ModaScrap: Wood Effect Paper Pack

Other Products Used:

- Tim Holtz for Ranger Ink: Distress Ink - Tumbled Glass, Hickory Smoke, Forest Moss, Squeezed Lemonade, Vintage Photo & Candied Apple and Blending Tool with Foam
- Misc: Grey and Black Cardstock

- Katelyn


Friday, July 26, 2019

Feel the Beat Tag

Happy Friday! I have a new project over on Wild Whisper's blog, where I'm sharing my Feel the Beat Tag which features one of the brand new collections Feel the Beat.


For all the details, more photos and a full tutorial on my tag you'll want to stop by the Wild Whisper blog. You'll want to make sure to keep checking out Wild Whisper's blog as the design team will be sharing lots of inspiration using the new collections.

- Katelyn

Wednesday, July 24, 2019

Mr & Mrs Card

Happy Wednesday! I'm up on the Elizabeth Craft Designs blog today sharing my Mr & Mrs Card, which features dies and patterned paper from the ModaScrap.


I would love for you to go and check out the full tutorial on how to create my Mr & Mrs Card over on the Elizabeth Crafts Designs Blog

- Katelyn


Monday, July 22, 2019

Magic Art Journal Page

Happy Monday!
I'm excited to share a new post over on Quietfire Design blog today, where I'm sharing my Magic Art Journal Page. My art journal page features a variety of Quietfire stamps as well as A Way With Words Dies and Stencils.


 For a full tutorial and a few more photos of my project, you'll want to head over to Quietfire Design blog for all the details. 

- Katelyn


Thursday, July 18, 2019

Planner Post #2 - July Week #2 Planner Spread

Happy Thursday! Today, I'm sharing last week's planner spread from inside my planner.  To create my planner spread, I've used a variety of the dies from the Planner Essentials line. You'll want to read below to learn how to recreate my July Week #2 Planner Spread at home.


To start, die cut the planner page from the Planner Essentials - 10 die out of White Soft Finish Cardstock, this will be the right hand page. Die cut the planner page from the Planner Essentials - 1 die out of White Soft Finish Cardstock, this will be the left hand page. 
Put the two pages side by side and sprinkle Magenta Nuance powder in Raspberry, Hot Pink and Aquamarine. Spritz the powder with water. Once the pages have dried, apply Jet Black Archival Ink to the number stamp from the Patterns 1 stamp set and stamp randomly on the pages. Reapply ink as needed to the stamp. On the left hand page, you will stamp six number sets and on the right hand page, you will stamp eight number sets. Apply Jet Black Archival Ink to the July Month and stamp onto the tab on the left hand page. 
Using a blending tool with foam, ink the edges of both pages using Black Soot Distress Ink and a blending tool with foam.


From the Planner Elements die, die cut two of the flower borders out of White Soft Finish Cardstock. Cut each piece down to fit the bottom of each page.


From the same die, die cut the square bunch twice out of black cardstock.


From the Planner Essentials - 1 die, die cut the reinforcement circles twice out of White Soft Finish Cardstock.


From the Planner Labels die, choose two labels. Die cut one label three times out of kraft cardstock. Die cut the other label four times out of kraft cardstock. Stamp the day of the week on each label using Jet Black Archival Ink. Fill in each label using a black gel pen. Ink the edges of each label using Black Soot Distress Ink and a blending tool with foam.


Adhere one of the square bunches on the left hand page and adhere the other square bunch on the right hand page. Adhere one of the flower borders at the bottom of the left page and the right page.


Adhere a reinforcement circle over top of each circle on the planner page.


To finish off the planner spread, foam square Monday to Wednesday on the left hand page and foam square Thursday to Sunday on the right hand page.


Here are a few closeup photos of the finished planner spread.


Here is the finished July Week #2 Planner Spread.


Elizabeth Craft Designs Supplies Used:


Other Supplies Used:

- Tim Holtz for Ranger Ink: Distress Ink - Black Soot and a Blending tool with foam
- Ranger Ink: Jet Black Archival Ink and Mister
- Magenta Nuance: Hot Pink, Raspberry and Aquamarine
- Misc: Kraft Cardstock, Black Cardstock and Black Gel Pen

- Katelyn