Happy Thursday!
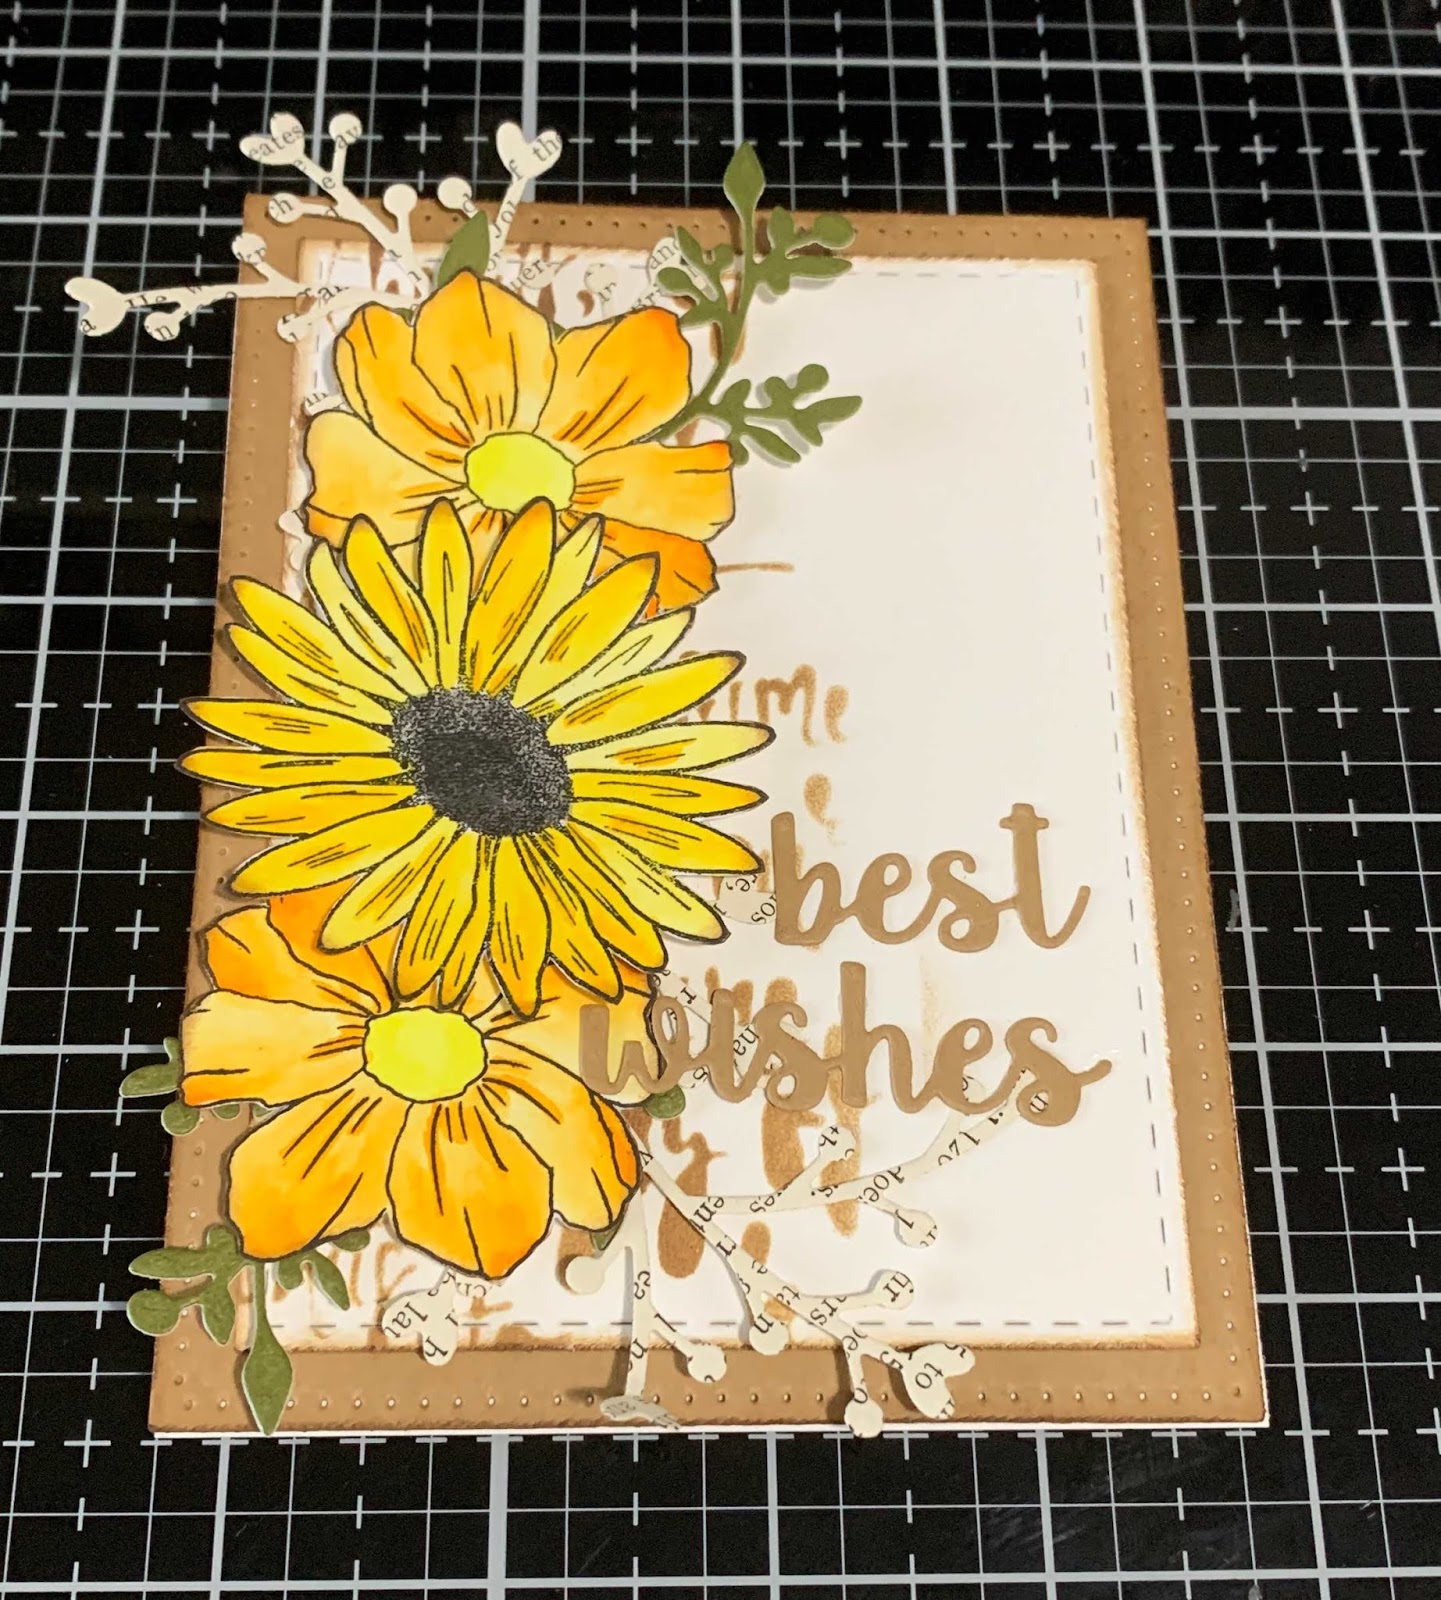
For today's project I'm sharing with you my Best Wishes Card which features some dies and stencils from Charlene & Ilse's Art Journal Specials Collection as well as dies from Joset Designs, Els van de Burgt Studio and stamps from Charlene van der Vorst. You'll want to read below as I have a full tutorial on how to recreate my card at home.

To start, die cut a 4" Stitched Rectangle out of kraft cardstock. Distress the edges of the rectangle. Ink the edges of the rectangle using Walnut Stain Distress Oxide Ink and a blending tool with foam.

Die cut a 3 1/2" Stitched Rectangle out of White Soft Finish Cardstock. Place the Storytelling stencil on the left hand side of the rectangle. Using a blending tool with foam and Walnut Stain Distress Oxide Ink, blend the ink through the stencil. Distress the edges of the rectangle. Ink the edges of the rectangle using Walnut Stain Distress Oxide Ink and a blending tool with foam.

Choose one of the flower stamps from the A Field of Flowers stamp set. Apply Jet Black Archival Ink to the stamp and stamp onto a piece of watercolour paper. Repeat the previous step. Once both flowers have been stamped, colour the flowers in using the Watercolor Palette. After the flowers have dried, fussy cut them out. Ink the edges of the flowers using Walnut Stain Distress Oxide Ink and a blending tool with foam.

Choose one of the flower stamps from the Garden Flowers stamp set. Apply Jet Black Archival Ink to the stamp and stamp onto a piece of watercolour paper. Once the flower is stamped, colour the flower in using the Watercolor Palette. After the flower has dried, fussy cut it out. Ink the edges of the flower using Walnut Stain Distress Oxide Ink and a blending tool with foam.

From the Words 1 - Celebration die, die cut the Best Wishes words out of kraft cardstock.

From the Blooming Branches die, die cut the heart branch twice out of book page. Die cut the leafy branch twice out of Olive Twist Soft Finish Cardstock.

Adhere the 3 1/2" rectangle to the 4" rectangle.

Adhere a heart branch and leafy branch to the top left side of the 3 1/2" rectangle as desired. Adhere the other heart branch and leafy branch to the bottom left side of the 3 1/2" rectangle as desired.

Foam square the large flower to where the branches meet in the middle of the card. Adhere the other two flowers as desired around the large flower. Adhere the best wishes sentiment 1/4" from the right and 3/4" from the bottom of the 3 1/2" rectangle.

To finish the card, cut a cardbase out of White Soft Finish Cardstock that measures 4" x 10 1/2", score at 5 1/4". Adhere the cardfront to the cardbase.
Here are a few closeup photos of the finished card.


Here is the finished Best Wishes Card.

Elizabeth Craft Designs Supplies Used:
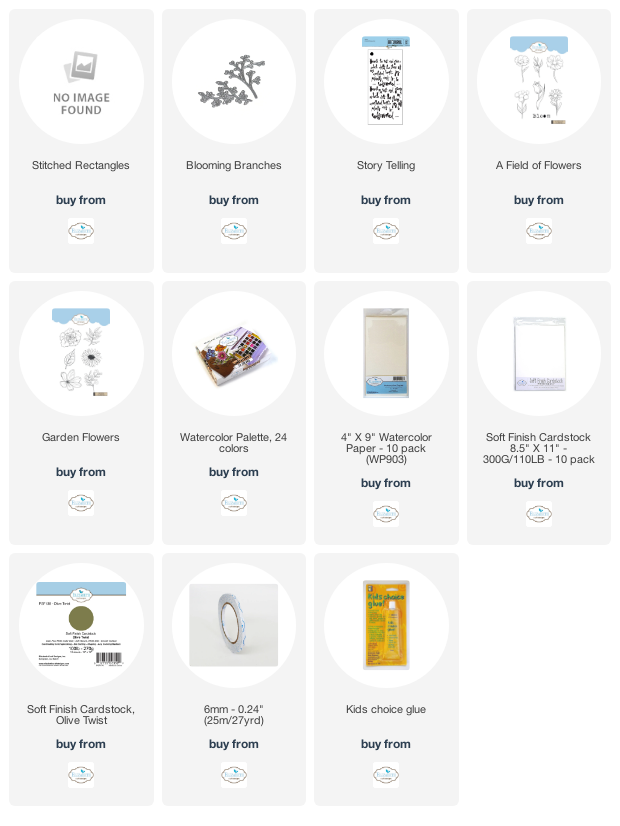
Other Supplies Used:
- Ranger Ink: Jet Black Archival Ink
- Tim Holtz for Ranger Ink: Distress Oxide Ink - Walnut Stain and Blending Tool with Foam
- Misc: Kraft Cardstock
I hope that my card has inspired you to recreate your own version at home.
- Katelyn
No comments:
Post a Comment