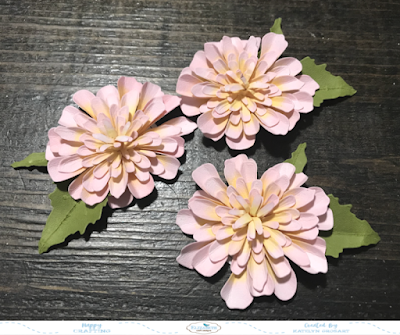
Monday, December 31, 2018

Christmas Memories

Happy Monday! I'm up on Creative Scrapbooker Magazine's Blog as a monthly blogger sharing my Christmas Memories Scrapbook Layout. My scrapbook layout features the Christmas Collection from Carta Bella as well as a variety of other products from Ranger Ink and Scrapbook Adhesives by 3L.


You'll want to make sure to stop by the Creative Scrapbooker Blog to learn all about how I created my Christmas Memories Scrapbook Layout.

Thank for stopping by and Happy New Year!
- Katelyn

Friday, December 28, 2018

Get Well Soon Notecard

Happy Friday!
I have a new post over on Quietfire Design blog today, where I'm sharing my Get Well Soon Notecard which features a variety of Quietfire stamps.


For a full tutorial and a few more photos of my project, you'll want to head over to Quietfire Design blog for all the details. 

- Katelyn

Monday, December 24, 2018

Merry Christmas!

Happy Christmas Eve! Before I share with you my new project, I want to wish you a very Merry Christmas and hope that you have a wonderful Christmas spending time with friends and family. I'm sharing one last Merry Christmas Card with you today which features dies from Els van de Burgt Studio and Joset Designs as well as patterned paper from ModaScrap. Grab a Christmas beverage or goodie and enjoy my tutorial below.


To start, you'll need to die cut all of the elements from the Moose die out of White Soft Finish Cardstock. 

From the now die cut moose, you'll need the head, nose, ear, body, leg and fill in circles for the nose. Using a blending tool with foam, blend Gathered Twigs Distress Ink over the entire surface of all the elements listed above. Ink the edges of the pieces using Ground Espresso Distress Ink and a blending tool with foam.


Next from the moose die cuts, you'll need the antlers, scruff and four hooves. Using a blending tool with foam, blend Ground EspressoDistress Ink over the entire surface of all the elements listed above. 


Next you'll need the eyes. Using a blending tool with foam, blend Black Soot Distress Ink over the entire surface of each eye.


The last element from the moose die cuts are the four ornaments. Using a blending tool with foam, blend Festive Berries Distress Ink over the entire surface of two of the ornaments. Using a blending tool with foam, blend Pine Needles Distress Ink over the entire surface of the other two ornaments. 


From the Words 5 - Winter Wishes die, die cut the Merry Christmas out of White Soft Finish Cardstock. Using a blending tool with foam, blend Pine Needles Distress Ink over the entire surface of the Merry. Using a blending tool with foam, blend Festive Berries Distress Ink over the entire surface of the Christmas.


Choose one of the wood patterned papers from the ModaScrap Wood Effects Paper Pack. Die cut the 4 1/2" Stitched Rectangle out of the wood paper. Die cut the 4" Stitched Rectangle out of White Soft Finish Cardstock. Ink the edges of each rectangle using Ground Espresso Distress Ink and a blending tool with foam.


Adhere all of the elements together to make the moose.


Adhere the 4" stitched rectangle to the 4 1/2" stitched rectangle.


Foam square the moose to the top portion of the 4" stitched rectangle.


Adhere the Merry Christmas sentiment underneath the moose.


Adhere a red and green ornament underneath the right antler. Adhere the other red and green ornaments underneath the left antler. Draw a line using a black gel pen to each ornament to attach them to the antlers. Cut a piece of White Soft Finish Cardstock that measures 5 3/4" x 9", score at 4 1/2". Adhere the cardfront to the cardbase.


Here are a few closeups of the finished card.


Here's the finished Merry Christmas Card.


Elizabeth Craft Designs Supplies Used:


Other Supplies Used:

- Tim Holtz for Ranger Ink: Distress Ink - Ground Espresso, Gathered Twigs, Pine Needles, Festive Berries & Black Soot Distress Ink and Blending Tool with Foam
- Misc: Black Gel Pen

- Katelyn


Thursday, December 20, 2018

December Planner Post #1

Happy Thursday! I'm excited to be sharing a couple of planner spreads with you. I've been playing with the different stamps and dies in the planner collection from Elizabeth Craft Designs to my December Tittle page and the December Monthly Calendar. You'll want to grab a cup of your favourite holiday beverage and read below as I have a tutorial for you on how to recreate both planner spreads. 


To start, we'll create the December Tittle page. 
Choose one of the patterned papers from the Unconventional Christmas Paper Pack. From the Planner Essentials #1 die, die cut the planner page out of the patterned paper. Apply Jet Black Archival Ink to the zigzag stamp from the Schedule Stamp Set and stamp in between the set of holes as well as in the bottom right hand corner of the page. Apply Jet Black Archival Ink to the scallop stamp from the Schedule Stamp Set and stamp twice at the top left corner of the page. Apply Jet Black Archival Ink to the arrow stamp from the Months Stamp Set and stamp where the tab is. Colour the scallops and arrows in using black and white gel pens. Ink the edges of the planner page using Black Soot Distress Oxide Ink and a blending tool with foam.


From the Unconventional Christmas Paper Pack, you'll need the hello circle from the cut apart paper. die cut the hello circle using the stitched circle die from Planner Essentials #1. Die cut a 1 3/4" Stitched Circle out of a piece of the patterned paper from the Unconventional Christmas Paper Pack. Ink the edges of both circles using Black Soot Distress Oxide Ink and a blending tool with foam.


From the Planner Pocket #2 die, die cut the dotted circle wreath twice out of White Soft Finish Cardstock.


Choose another piece of patterned paper from the Unconventional Christmas Paper Pack. Die cut the December out of the patterned paper piece using the Blackboard Alphabet Dies. Ink the edges of the letters using Black Soot Distress Oxide Ink and a blending tool with foam.


Adhere the first dotted circle wreath to the middle of the planner page. Adhere the second dotted circle wreath overtop of the first dotted circle wreath, making sure the circles are slightly off set from one another.


Adhere the hello circle to the 1 3/4" stitched circle. Foam square the 1 3/4" stitched circle to the middle of the dotted circle wreaths.


Adhere the December word around the top half of the dotted circle wreaths.


Outline the circles on the dotted circle wreath. Die cut seven snowflakes from the Winter Sweater die out of White Soft Finish Cardstock. Add a transp. glitter/gold dot to the center of each snowflake. Adhere two snowflakes to the top half of the planner spread and adhere the other five snowflakes to the bottom half of the planner spread.


Here are a few closeups of the page.


Here's the finished December Tittle Page.


Now let's work on the back side of the December Tittle Page. 

Randomly sprinkle Red Magenta Nuance powder to the top half of the planner page. Spritz the powder with water. Dry the top half of the page with a heat tool. Place the Sunday to Saturday stamps onto a block and apply Jet Black Archival Ink to them. Stamp the days of the week 3 3/4" from the top of the planner page. Write each number underneath the corresponding day.  Ink the edges of the planner page using Black Soot Distress Oxide Ink and a blending tool with foam.


Choose one of the patterned papers from the Unconventional Christmas Paper Pack. Die cut Dec. from the Blackboard Alphabets out of the patterned paper piece.


Adhere the Dec. word at the top of the days of the week. Apply Jet Black Archival Ink to the stitching stamp from the Schedule Stamp Set and stamp in the top right hand corner of the page. Reapply Jet Black Archival Ink to the stitching stamp and stamp it twice in the bottom left hand corner of the planner page. Apply Jet Black Archival Ink to the Important stamp from the Schedule Stamp Set and stamp underneath the calendar. Circle the important days using a red marker. Underneath the Important, I wrote the numbers that are circled in red and then beside them, I wrote in black gel pen why the days are important.


Here are a few closeups of the page.


And here's the finished December Calendar Page.


Elizabeth Craft Designs Supplies Used:

Months

Other Supplies Used:

- Ranger Ink: Jet Black Archival Ink and Mister
- Tim Holtz for Ranger Ink: Black Soot Distress Oxide Ink and Blending Tool with Foam
- Magenta: Nuance - Red
- Tombow Markers: 847
- Misc: Black Gel Pen and White Gel Pen

Stay tuned as I share some more planner pages with you over the next few weeks.

- Katelyn


Tuesday, December 18, 2018

Garden Notes - Frame It/Stitched Inspiration - December Designer Challenge

It's time for a brand new Designer Challenge on the Elizabeth Craft Designs Blog today.  For December's challenge it's all about using Susan Garden Notes - Frame It/Stitched Dies. The inspiration for my project came from Susan's Frame It/Stitched Oval Die. With that die in my hand, I also added a few other dies from Els van de Burgt Studio and Joset Designs to create my Birthday Wishes Card. Grab your favourite holiday beverage and read below as I have a tutorial for you so that you can re-create my card at home. You'll want to make sure to read all the way down to the bottom of this post as there's some details on how to get in on an awesome giveaway from Elizabeth Craft Designs.


To start, die cut three of the large leaves and three of the small leaves from the Dahlia 2 die out of White Soft Finish Cardstock. Using a blending tool with foam, blend Peeled Paint Distress Ink over the entire surface of each leaf. Use the leaf molding pad and tool to shape your leaves.


From the same die, you'll need to cut out six extra large petals, six large petals, six medium petals, three small petals, three extra small petals and three centers. Using a blending tool with foam, blend Spun Sugar Distress Ink over each petal and center. Using a detailer brush, brush in Squeezed Lemonade Distress Ink in the middle of the petals.


Shape your petals and centers using the flower shaping tools and molding pad.


Adhere the flowers together. Each flower will need two extra large petals, two large petals, two medium petals, one small petal, one extra small petal and one center. For the center, you'll need to apply glue to the bottom portion of it and roll it up. Once the flower is assembled, adhere a large and small petal to each flower.


Die cut a 4 1/2" Stitched Rectangle out of White Soft Finish Cardstock. Place the 3 1/4" Frame It/Stitched Oval in the center of the stitched rectangle, run the piece through your die cutting machine.


Die cut the 4" Stitched Rectangle out of White Soft Finish Cardstock.


Die cut the Birthday Wishes Sentiment from the Words 1 - Celebration die out of White Soft Finish Cardstock. Using a blending tool with foam, blend Spun Sugar Distress Ink over the entire surface of the words.


Adhere the 4" Stitched Rectangle to the backside of the 4 1/2" Stitched Rectangle.


Adhere two of the Dahlia's in the top left corner of the oval and adhere the other Dahlia in the bottom right hand corner of the oval.


Adhere the birthday wishes sentiment in the middle of the oval, making sure that the flowers aren't covering it up.


To finish your card, cut a piece of White Soft Finish Cardstock that measures 5 3/4" x 9", score at 4 1/2". Adhere the cardfront to the cardbase.


Here are a few closeup shots of the card.


And here's the finished Birthday Wishes Card.


*******************

For today's challenge Elizabeth Craft Designs are giving away a $20 Gift Card to use on our website to 3 winners

To enter simply leave a comment on the Elizabeth Craft Designs Facebook Giveaway Blog Post or the Elizabeth Craft Designs Challenge post and tell us Which of the Garden Notes - Frame It/Stitched die sets would you use on a project and how would you use it

We will select 3 lucky winners in a random drawing 

The winners will be announced on Friday, December.21st on the Elizabeth Craft Designs Blog and our Facebook page.


*****************

Elizabeth Craft Designs Products Used:


Other Products Used:

- Tim Holtz for Ranger Ink: Distress Ink - Spun Sugar, Squeezed Lemonade & Peeled Paint and Blending Tool with Foam
- Dynasty Brushes: Small Flat Blend Brush

- Katelyn