Happy Saturday!
I'm excited to be sharing another flower project with you today. Today's project is a Joy Wall Hanging perfect for any area of your home. To create my wall hanging, I've used a variety of dies from the Paper Flower Collection, Joset Designs and stamps from Sue Smith. You'll want to read below as I have a full tutorial on how to recreate my wall hanging at home.
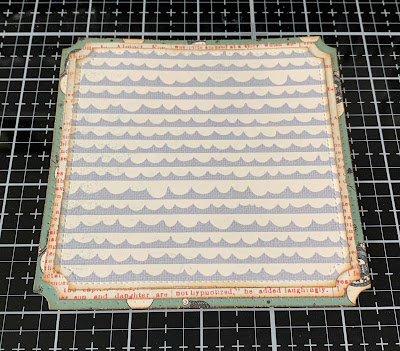
To start, you'll need to choose three coordinating Christmas themed patterned papers. From the first patterned paper, die cut a 4 3/4" Stitched Indented Square. From the second patterned paper, die cut a 4 1/2" Fitted Indented Square. From the third patterned paper, die cut a 4 1/4" Stitched Indented Square. Distress the edges of all three squares. Ink the edges of all three squares using Walnut Stain Distress Ink and a blending tool with foam.
Apply Emboss It Ink to the Joy word from the Peace stamp set. Stamp onto a piece of White Soft Finish Cardstock. Sprinkle Kells Gold Modern Gilding Powder over the stamped word. Tap off the excess powder and emboss with a heat tool. Fussy cut around the word. Ink the edges of the word using Walnut Stain Distress Ink and a blending tool with foam.
Die cut the Elegant Ornament out of a piece of Silver Foil. Cut the ornament down to 4 3/4".
The next three steps use the Florals 4 die.
Die cut the double leaf four times out of White Soft Finish Cardstock. Die cut the double leaf three times out of a piece of book page.
Die cut the centres once out of a piece of Dark Golden Rod Soft Finish Cardstock.
Die cut the large flower twice out of White Soft Finish Cardstock. Die cut the medium flower three times out of White Soft Finish Cardstock. Die cut the small flower three times out of White Soft Finish Cardstock. Using a blending tool with foam, blend Candied Apple Distress Oxide Ink over all of the flowers. Spritz the flowers with water. Once dry, ink the edges of the flowers using Walnut Stain Distress Ink and a blending tool with foam. Shape the flowers as desired.
Adhere the 4 1/2" square to the 4 3/4" square. Adhere the 4 1/4" square to the 4 1/2" square.
Adhere the elegant ornament as desired on the right hand side of the 4 1/4" square.
Adhere the small and medium flower together as well as adhere a flower centre to the middle. Adhere a small, medium and flower flower together as well as adhere a flower centre to the middle. Adhere a small, medium and flower flower together as well as adhere a flower centre to the middle.
Adhere your double blooms as desired around the ornament.
Use foam squares to adhere the three flowers overtop of where the stems of the double blooms meet.
Use foam squares to adhere the joy word to the bottom left hand side of the flowers. To finish the wall hanging, punch two holes at the top of the squares and tie white twine through the holes to create the hanging part of the wall hanging.
Here are a few closeup photos of the finished wall hanging.
Here is the finished Joy Wall Hanging.
Elizabeth Craft Designs Supplies Used:
- Tim Holtz for Ranger Ink: Distress Ink - Walnut Stain, Distress Oxide Ink - Candied Apple and Blending Tool with Foam
- Ranger Ink: Emboss It Dabber
- Emerald Creek Craft Supplies: Kells Gold Modern Gilding Powder
- Authentique: Snowfall Patterned Paper
- Misc: Book Page, White Twine and Silver Foil
I hope that my card has inspired you to recreate your own version of my Joy Wall Hanging.
- Katelyn


Thoroughly gorgeous!!!
ReplyDeleteAutumn Zenith 🧡 Witchcrafted Life
Thank Autumn!
ReplyDelete